Webhook integration examples
Example of OpsGenie Notification webhook setup
This configuration enables the integration of OpsGenie with the Cast AI console, ensuring that alerts are received in OpsGenie.
OpsGenie pre-requisite
Add an API integration
- Go to "Settings" → "Integrations".
- Run a search and select “API”.
- On the next screen, enter a name for the integration.
- Optional: Select a team in the "Assignee team" field if you want a specific team to receive alerts from the integration. Learn about the alert notifications flow in Opsgenie.
- Select "Continue". The integration is saved at this point.
- Expand the "Steps to configure the integration" section and copy the API key for use in your API requests.
- Select "Turn on integration." The rules you create for the integration will only work if you turn it on.

API key integration example
Define rules for creating and processing alerts
The configuration of an API integration involves defining many different alert scenarios. These scenarios specify how and when alerts can be created, closed, acknowledged, etc. The integration comes with a default set of alert creation and processing rules; you can customize them and add as many rules of your own as you like. For example, you can add three rules to create the alert, which means the incoming data is evaluated against these three scenarios in order, and if one of them matches, an alert is created.
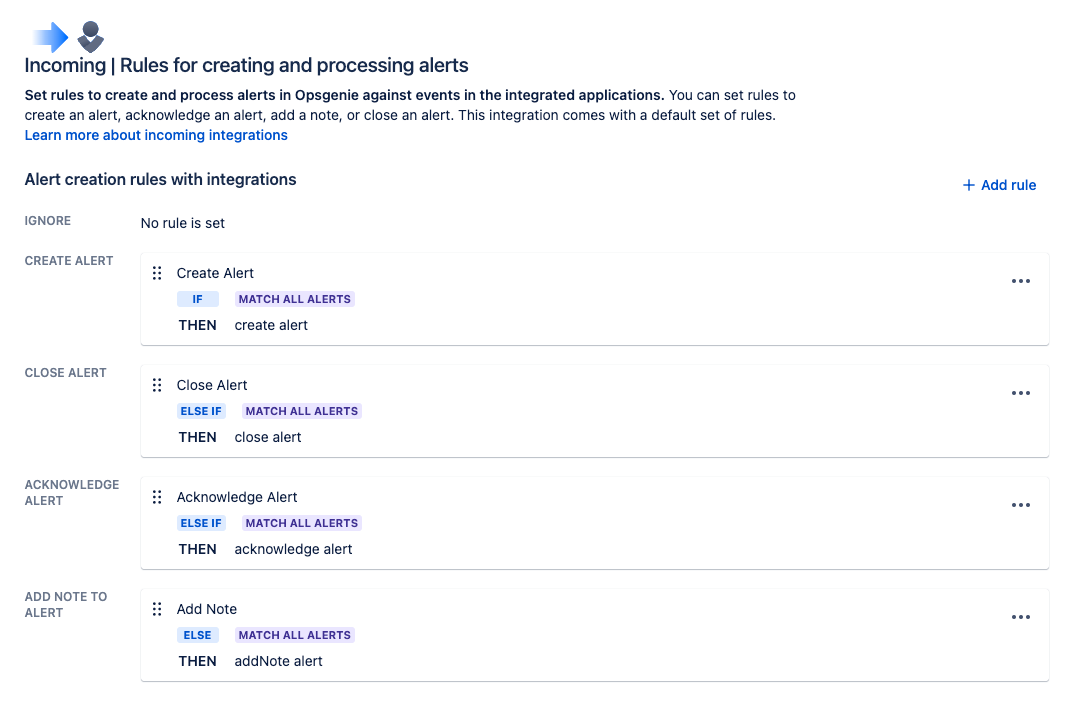
Alert rules example
OpsGenie Integration
Add a Webhook integration
- Go to "Settings" > "Integrations".
- Select "Add integration".
- Run a search and select “Webhook”.
- On the next screen, enter a name for the integration.
- Optional: Select a team in the "Assignee team" if you want a specific team to receive alerts from the integration.
- Select "Continue". The integration is saved at this point.
- Select "Turn on integration." The rules you create for the integration will only work if you turn it on.
Sending alert descriptions and details is only available for "Create" and "Custom" actions.

Webhook integration example
Webhook configuration
Utilize the provided API integration key to configure your webhook integration, ensuring it is used for authentication.
- Webhook URL should be
https://api.opsgenie.com/v2/alerts - Customer Header should include:
- _Authorization: GenieKey
<API Key> - _Content-Type:
application/json
- _Authorization: GenieKey
Webhook integration validation
Before entering the essential details into the Cast AI webhook configuration, we recommend executing the following curl command. This action will verify whether the configured integration receives alerts and notifications as anticipated:
curl -X POST https://api.opsgenie.com/v2/alerts \
    -H "Content-Type: application/json" \
    -H "Authorization: GenieKey <API Key>" \
    -d '{"message": "An example alert message"}'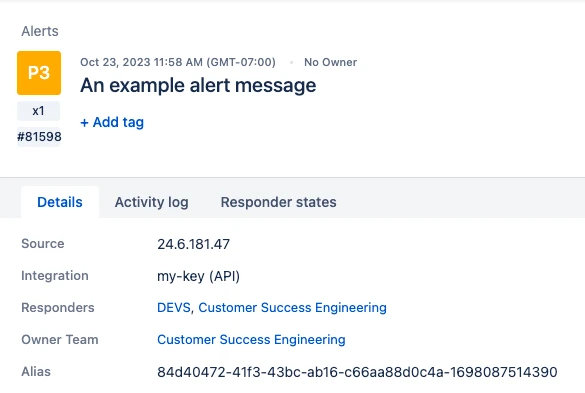
OpsGenie Alert
Cast AI Integration
Add webhook via Cast AI console
- Navigate to "Notifications" > "Add Webhook".

-
Set up the fields below using the information collected from the Webhook and API integration
- Name of Webhook
- Callback URL
- Category
- Severity
- Request template
- Authorization keys (Headers)
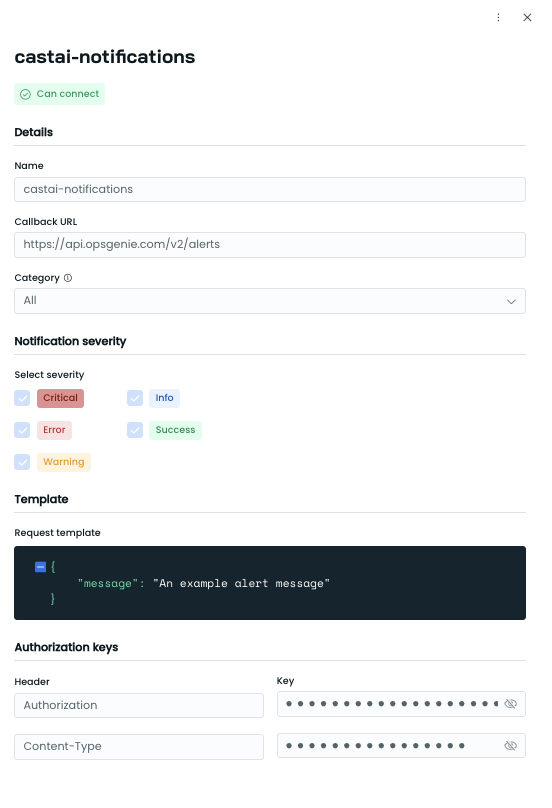

Webhook “Can connect” example
Example of MS Teams Notification webhook setup
This configuration enables the integration of MS Teams with the CAST AI console, ensuring that alerts are received in MS Teams.
Method 1: MS Teams Incoming Webhook Integration
Create an Incoming Webhook
-
In the New Teams client, select Teams and navigate to the channel where you want to add an Incoming Webhook.
-
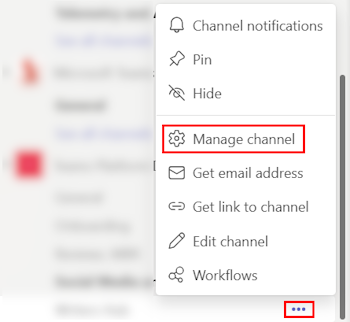
Select "More options" (•••) on the right side of the channel name.
-
Select "Manage channel".
-
Select "Edit".
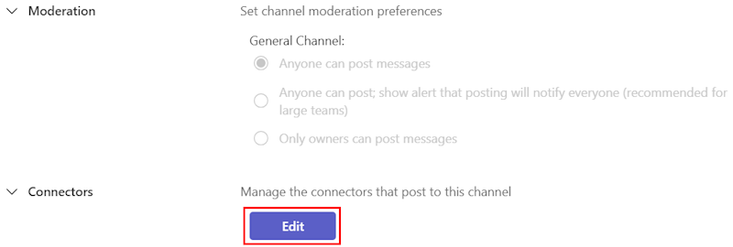
-
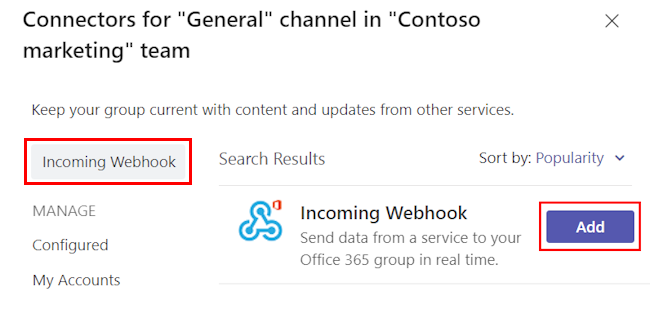
Search for "Incoming Webhook" and select "Add."
-
Select "Add".

NoteIf you’ve already added an Incoming Webhook before, the Configure option appears instead of Add. Select Configure to create another Incoming Webhook.
-
Provide a name for the webhook and upload an image if necessary.
-
Select "Create".
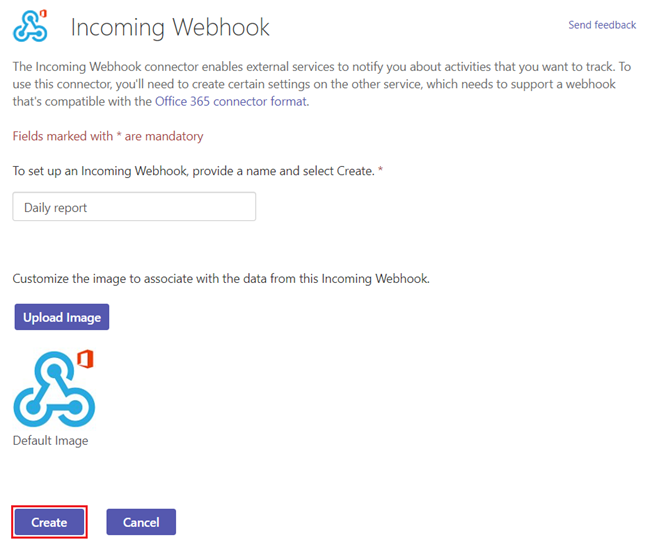
-
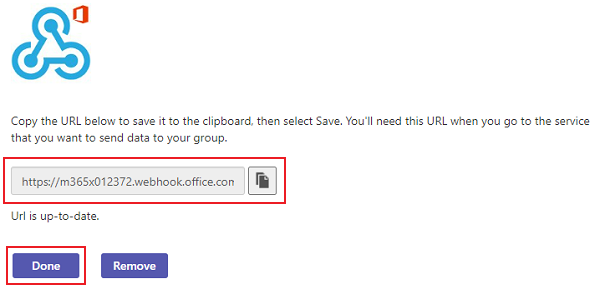
Copy and save the unique webhook URL present in the dialog. The URL maps to the channel, and you can use it to send information to Teams.
-
Select "Done". The webhook is now available in the Teams channel.
Cast AI Integration
Add webhook via Cast AI console
- Navigate to "Notifications" > "Add Webhook".

- Set up the fields below using the information collected from the Webhook and API integration
- Name of Webhook
- Callback URL
- Category
- Severity
- Request template
- Authorization keys (Headers)
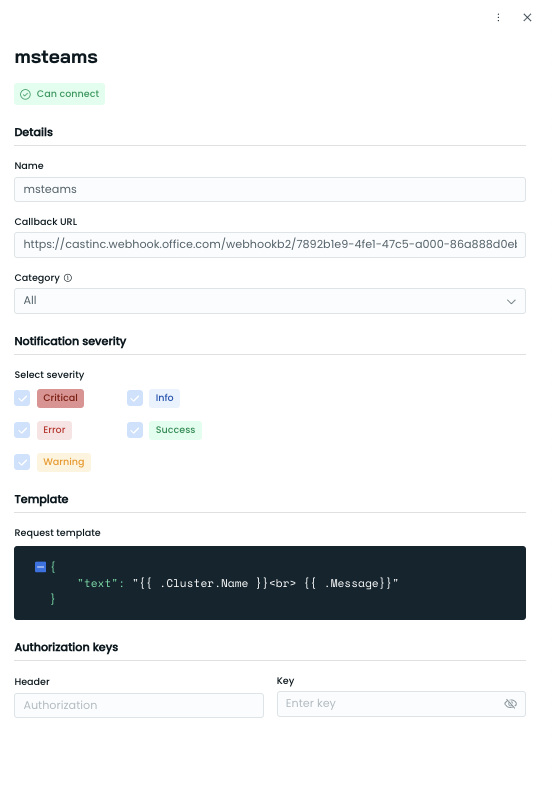
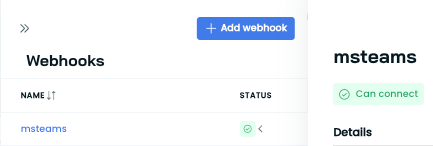
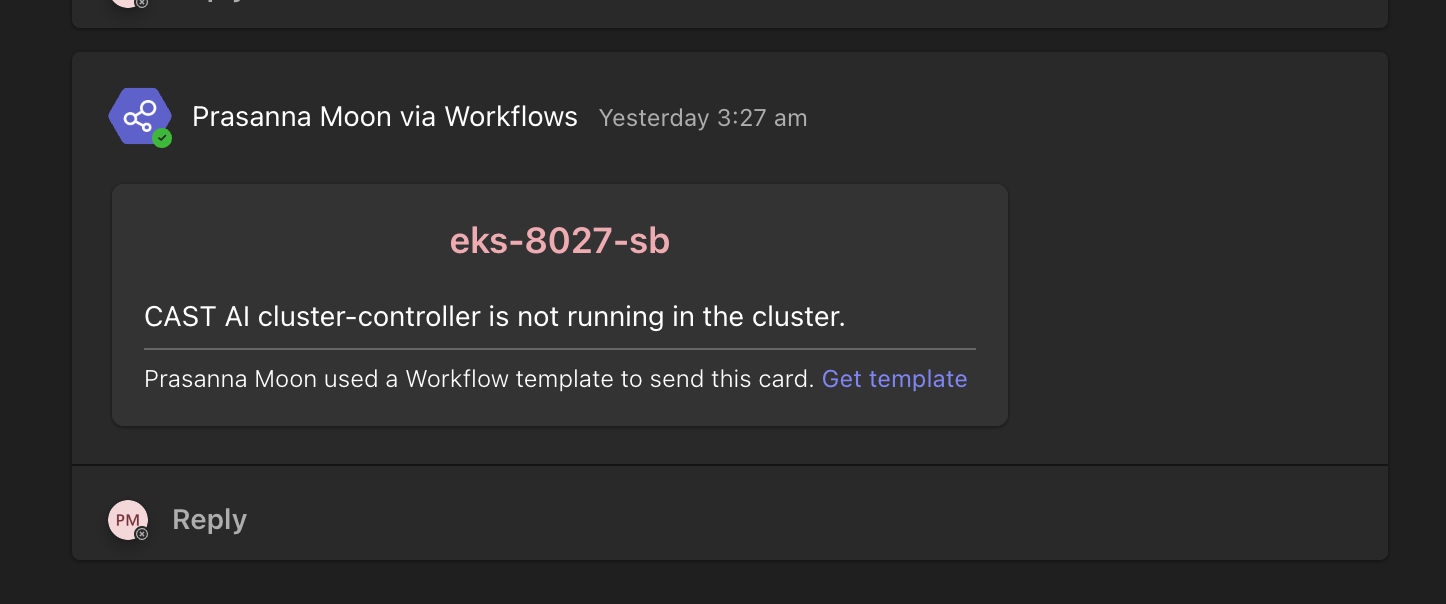
After setting up the webhook, you should see notifications in your designated Teams channel when CAST AI triggers it. The notifications will appear as cards in the channel, displaying relevant information from CAST AI.
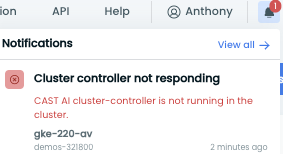
Test Notification

Method 2: MS Teams Workflows Integration
This method uses the Workflows feature in MS Teams to set up notifications from Cast AI.
Set up the Teams workflow
- In Microsoft Teams, select the channel to set up the notification workflow.
- Click the "More options" (•••) button next to the channel name.
- Select "Workflows" from the dropdown menu.
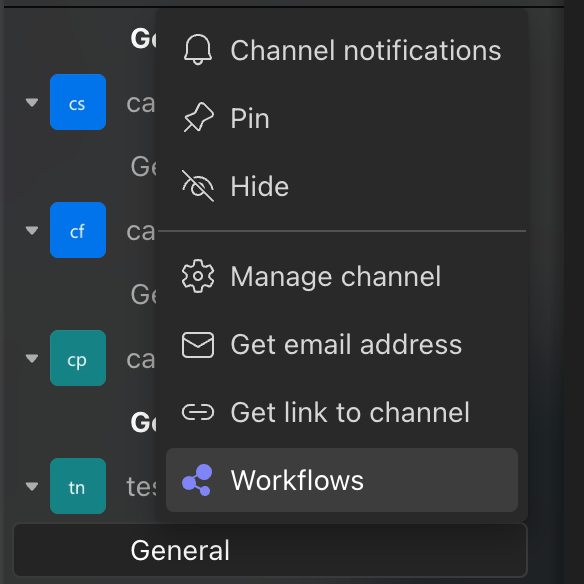
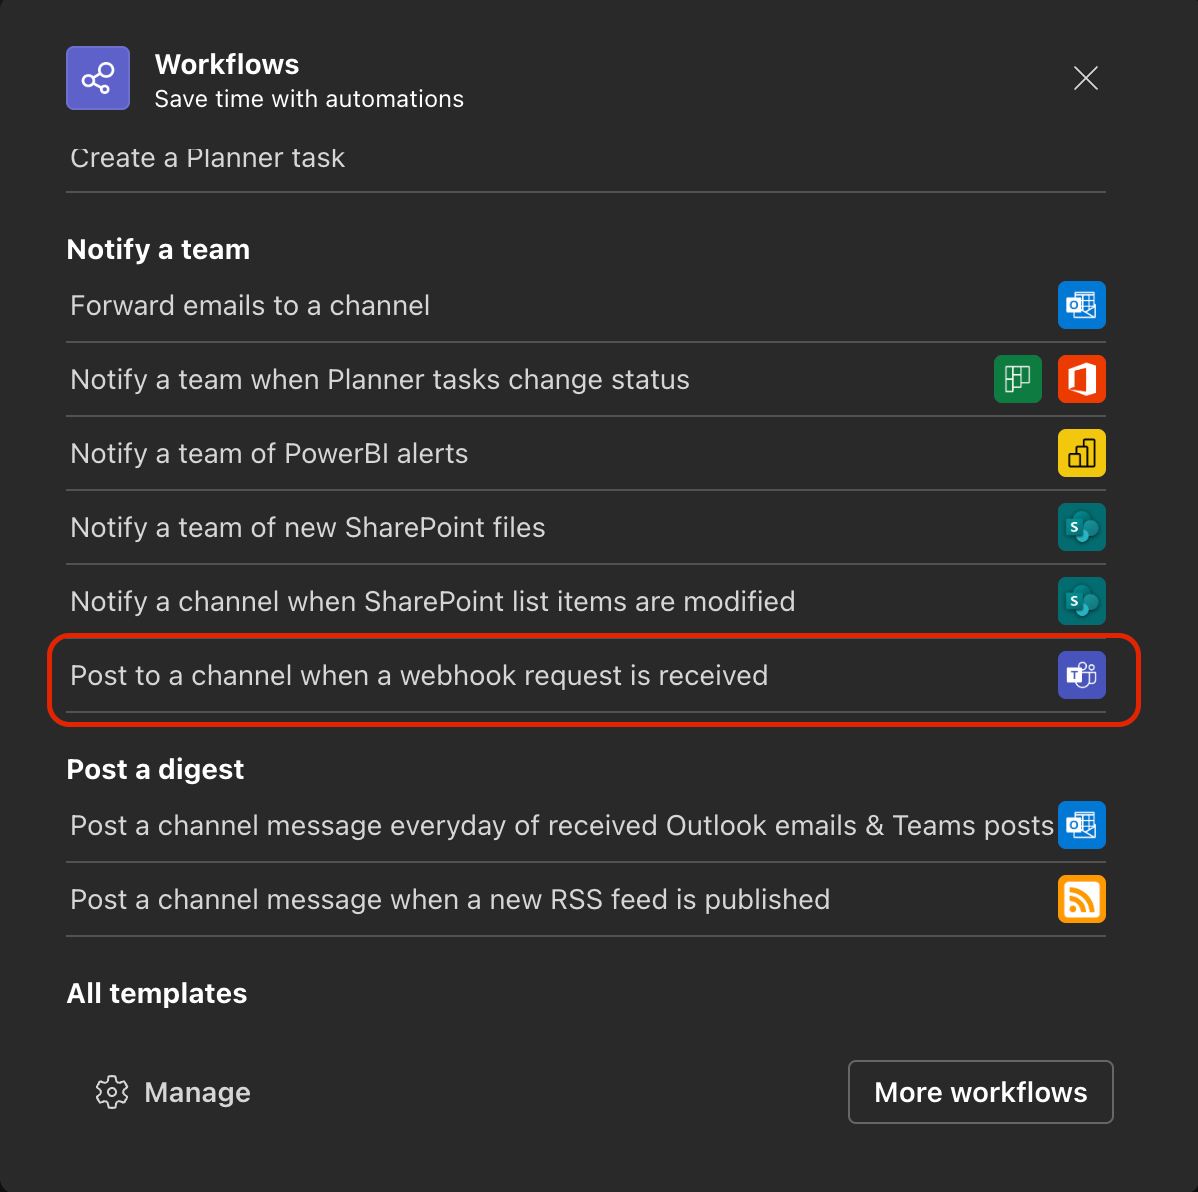
- In the "Workflows" panel, scroll down and select "Post to a channel when a webhook request is received".
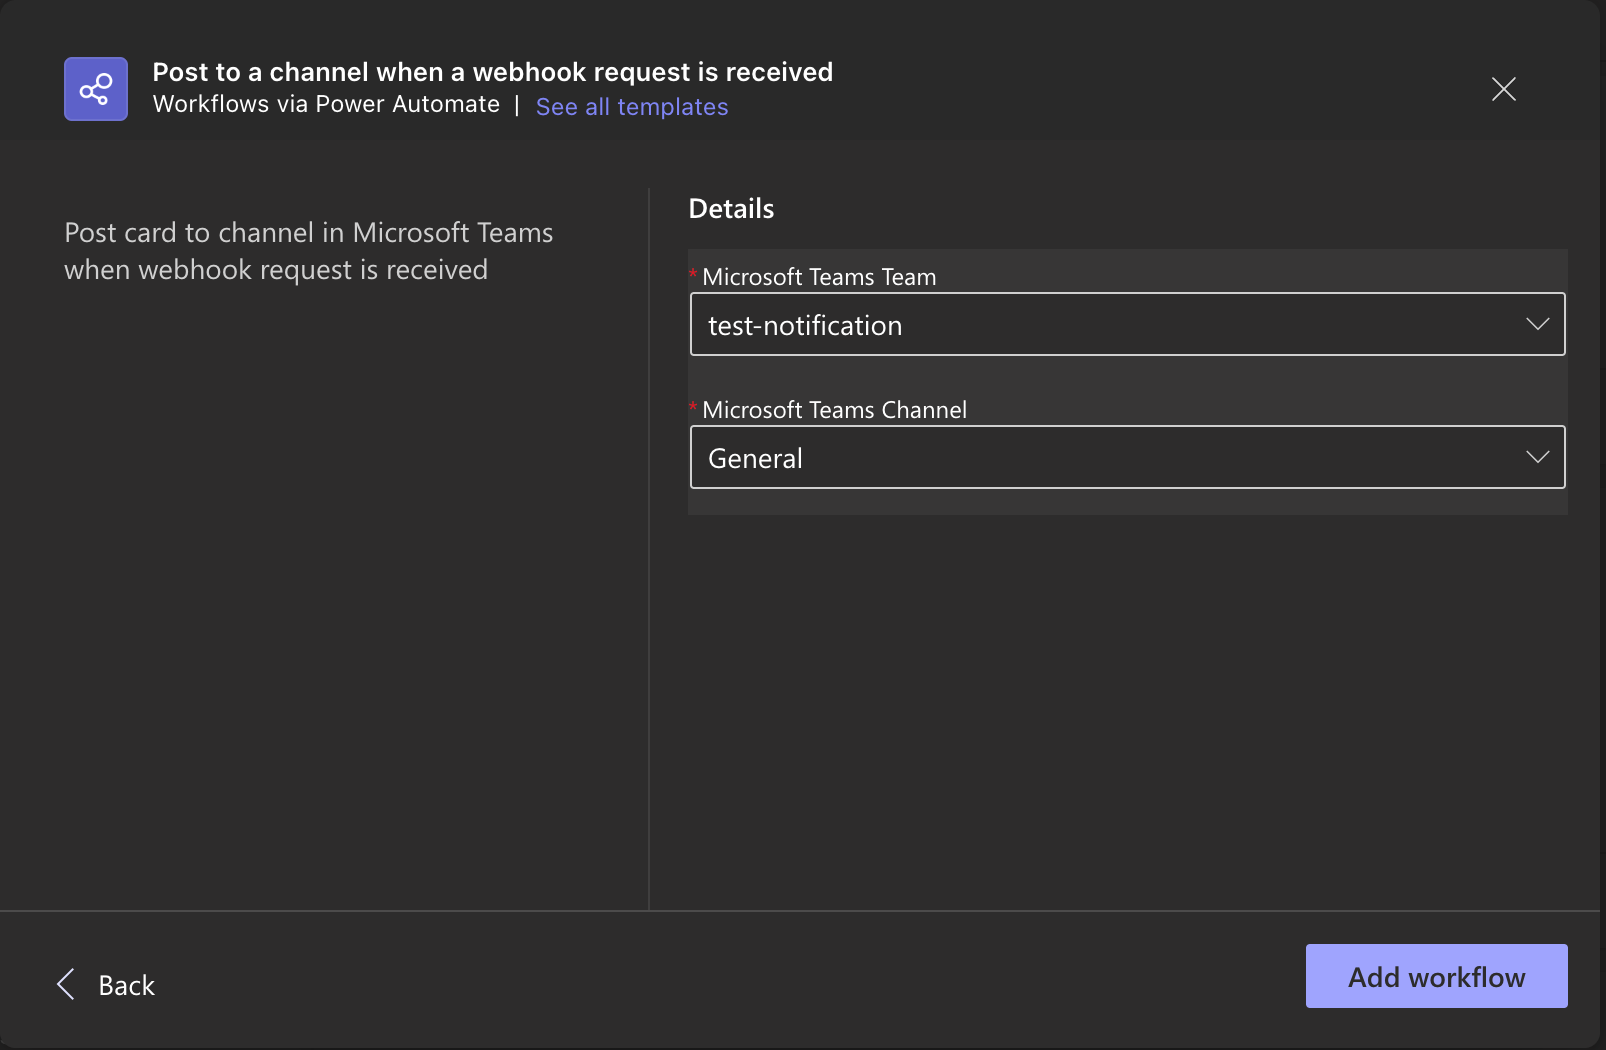
- Select the team and channel you want to use, then click "Add workflow."
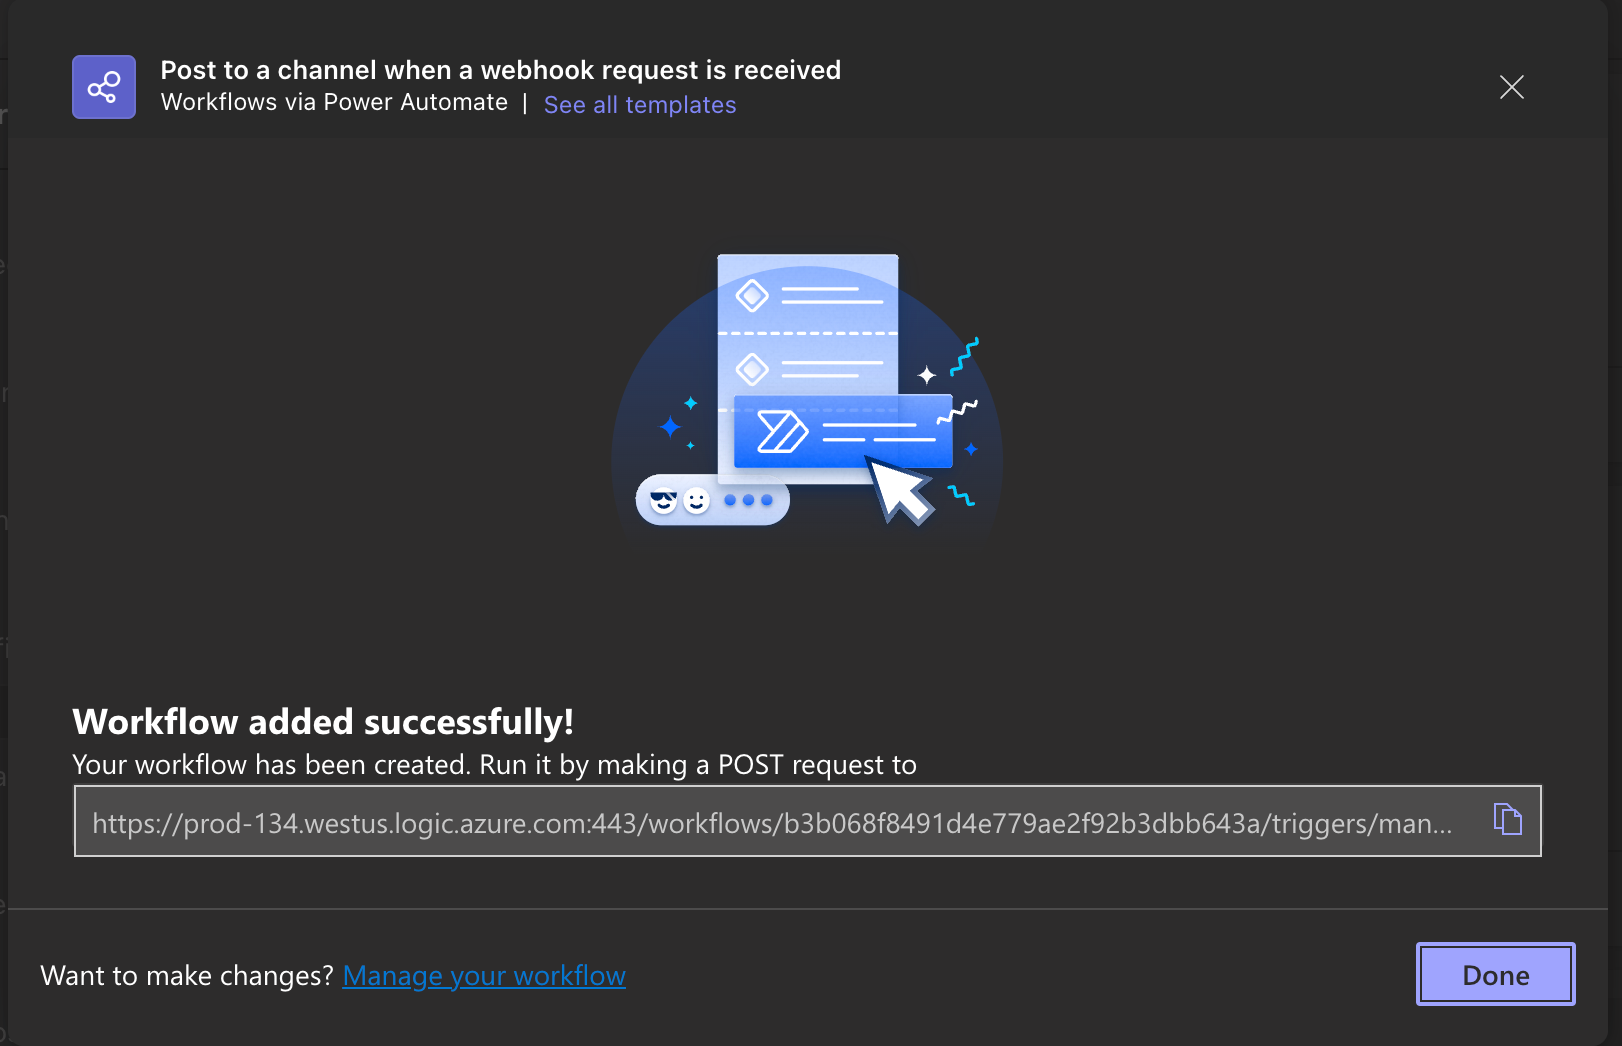
- Once added, you'll receive a Webhook URL. Copy this URL, as you'll need it for the Cast AI configuration described below.
Configure Cast AI to use the Teams workflow
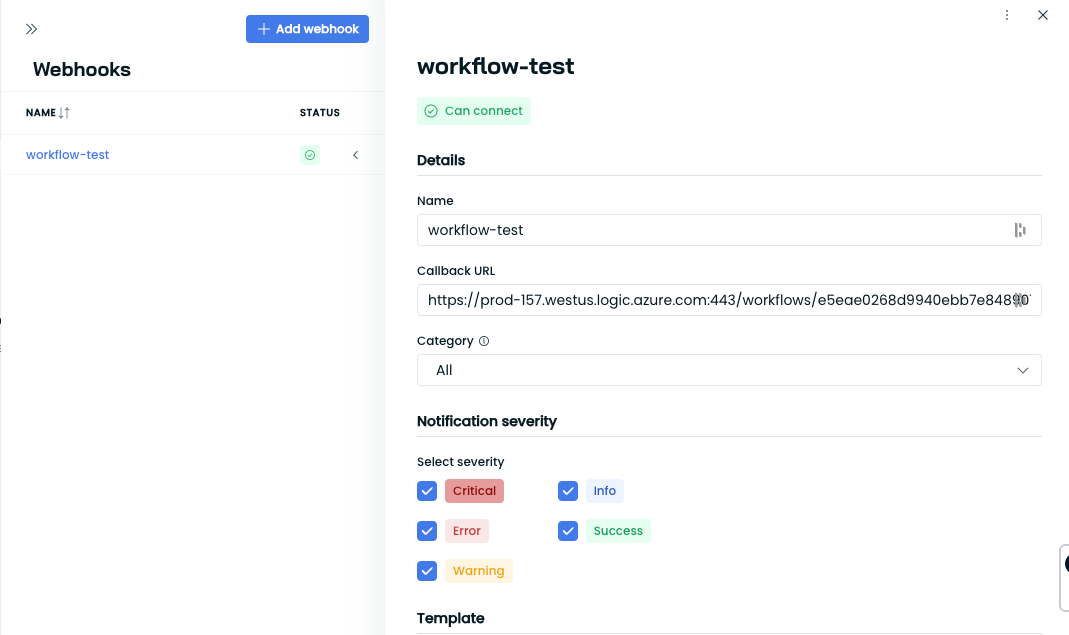
- In the Cast AI console, navigate to "Notifications" > "Add Webhook."
-
Fill in the following details:
- Name of Webhook
- Callback URL (use the webhook URL copied from Teams)
- Category
- Severity
- Request template (you can use the sample payload template provided below)
{ "type": "message", "attachments": [ { "contentType": "application/vnd.microsoft.card.adaptive", "content": { "$schema": "http://adaptivecards.io/schemas/adaptive-card.json", "type": "AdaptiveCard", "version": "1.0", "body": [ { "type": "TextBlock", "text": "{{ .Cluster.Name }}", "size": "Large", "weight": "Bolder", "color": "Attention", "horizontalAlignment": "Center" }, { "type": "TextBlock", "text": "{{ .Message }}", "wrap": true, "spacing": "Medium" } ] } } ] }- Authorization keys (Headers): Set to
application/json

- Click "Add" to create the webhook in Cast AI.
After setting up the webhook, you should see notifications in your designated Teams channel when Cast AI triggers it. The notifications will appear as cards in the channel, displaying relevant information from Cast AI.
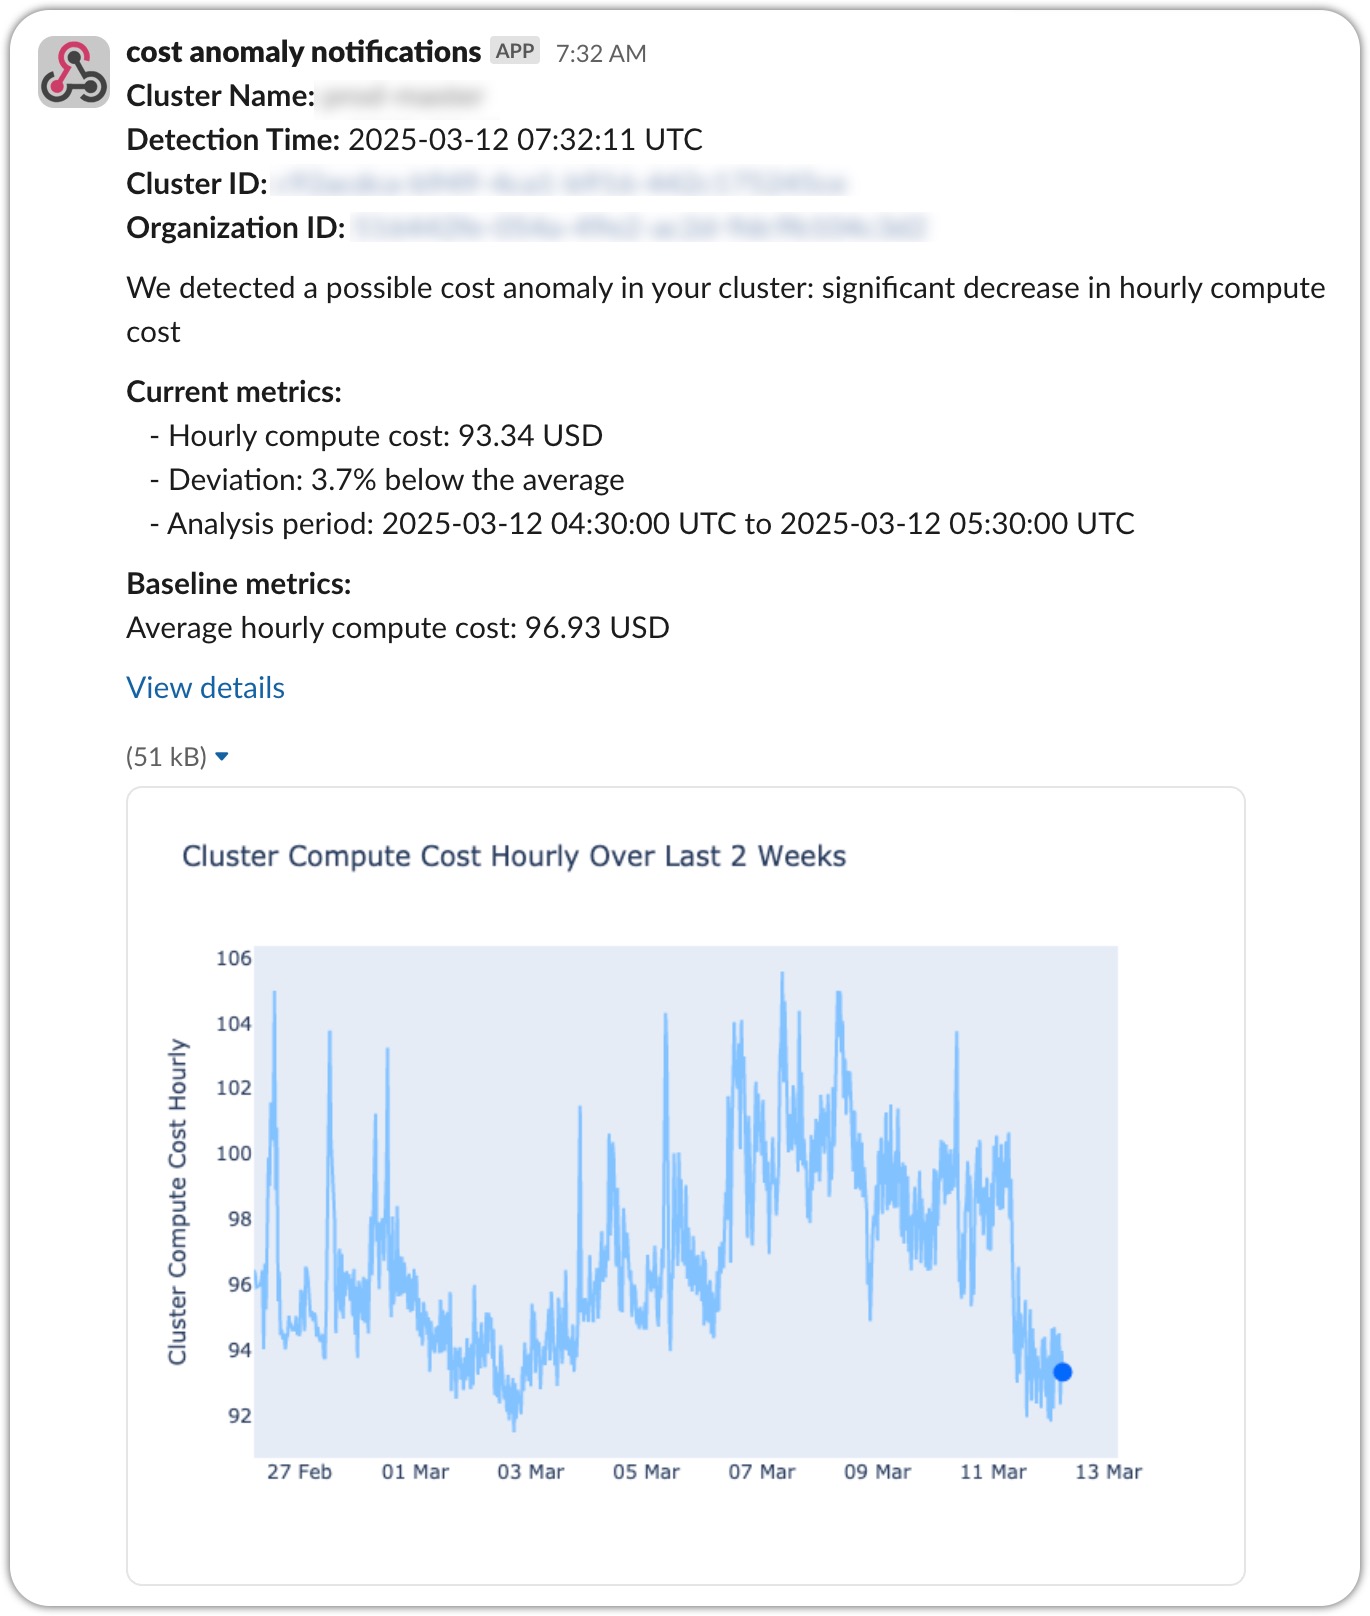
Example of Cost Anomaly Notifications in Slack
NoteFor most use cases, we recommend using the native Slack integration, which requires no webhook configuration. The webhook-based example below is available for customization of cost anomaly notification templates.
Cast AI supports sending cost-anomaly detection notifications via Slack, providing enhanced visualization and faster alerts. This integration lets your team receive real-time notifications with graphical data when cost anomalies are detected in your clusters.
Cost anomaly notifications in Slack include detailed information and visualizations:
Setting up Slack notifications
To configure Slack notifications for cost anomalies:
-
Create a Slack Webhook:
- In Slack, go to your workspace settings and create an incoming webhook
- Follow Slack's guide at api.slack.com/messaging/webhooks for detailed instructions.
-
Configure the Webhook in Cast AI:
-
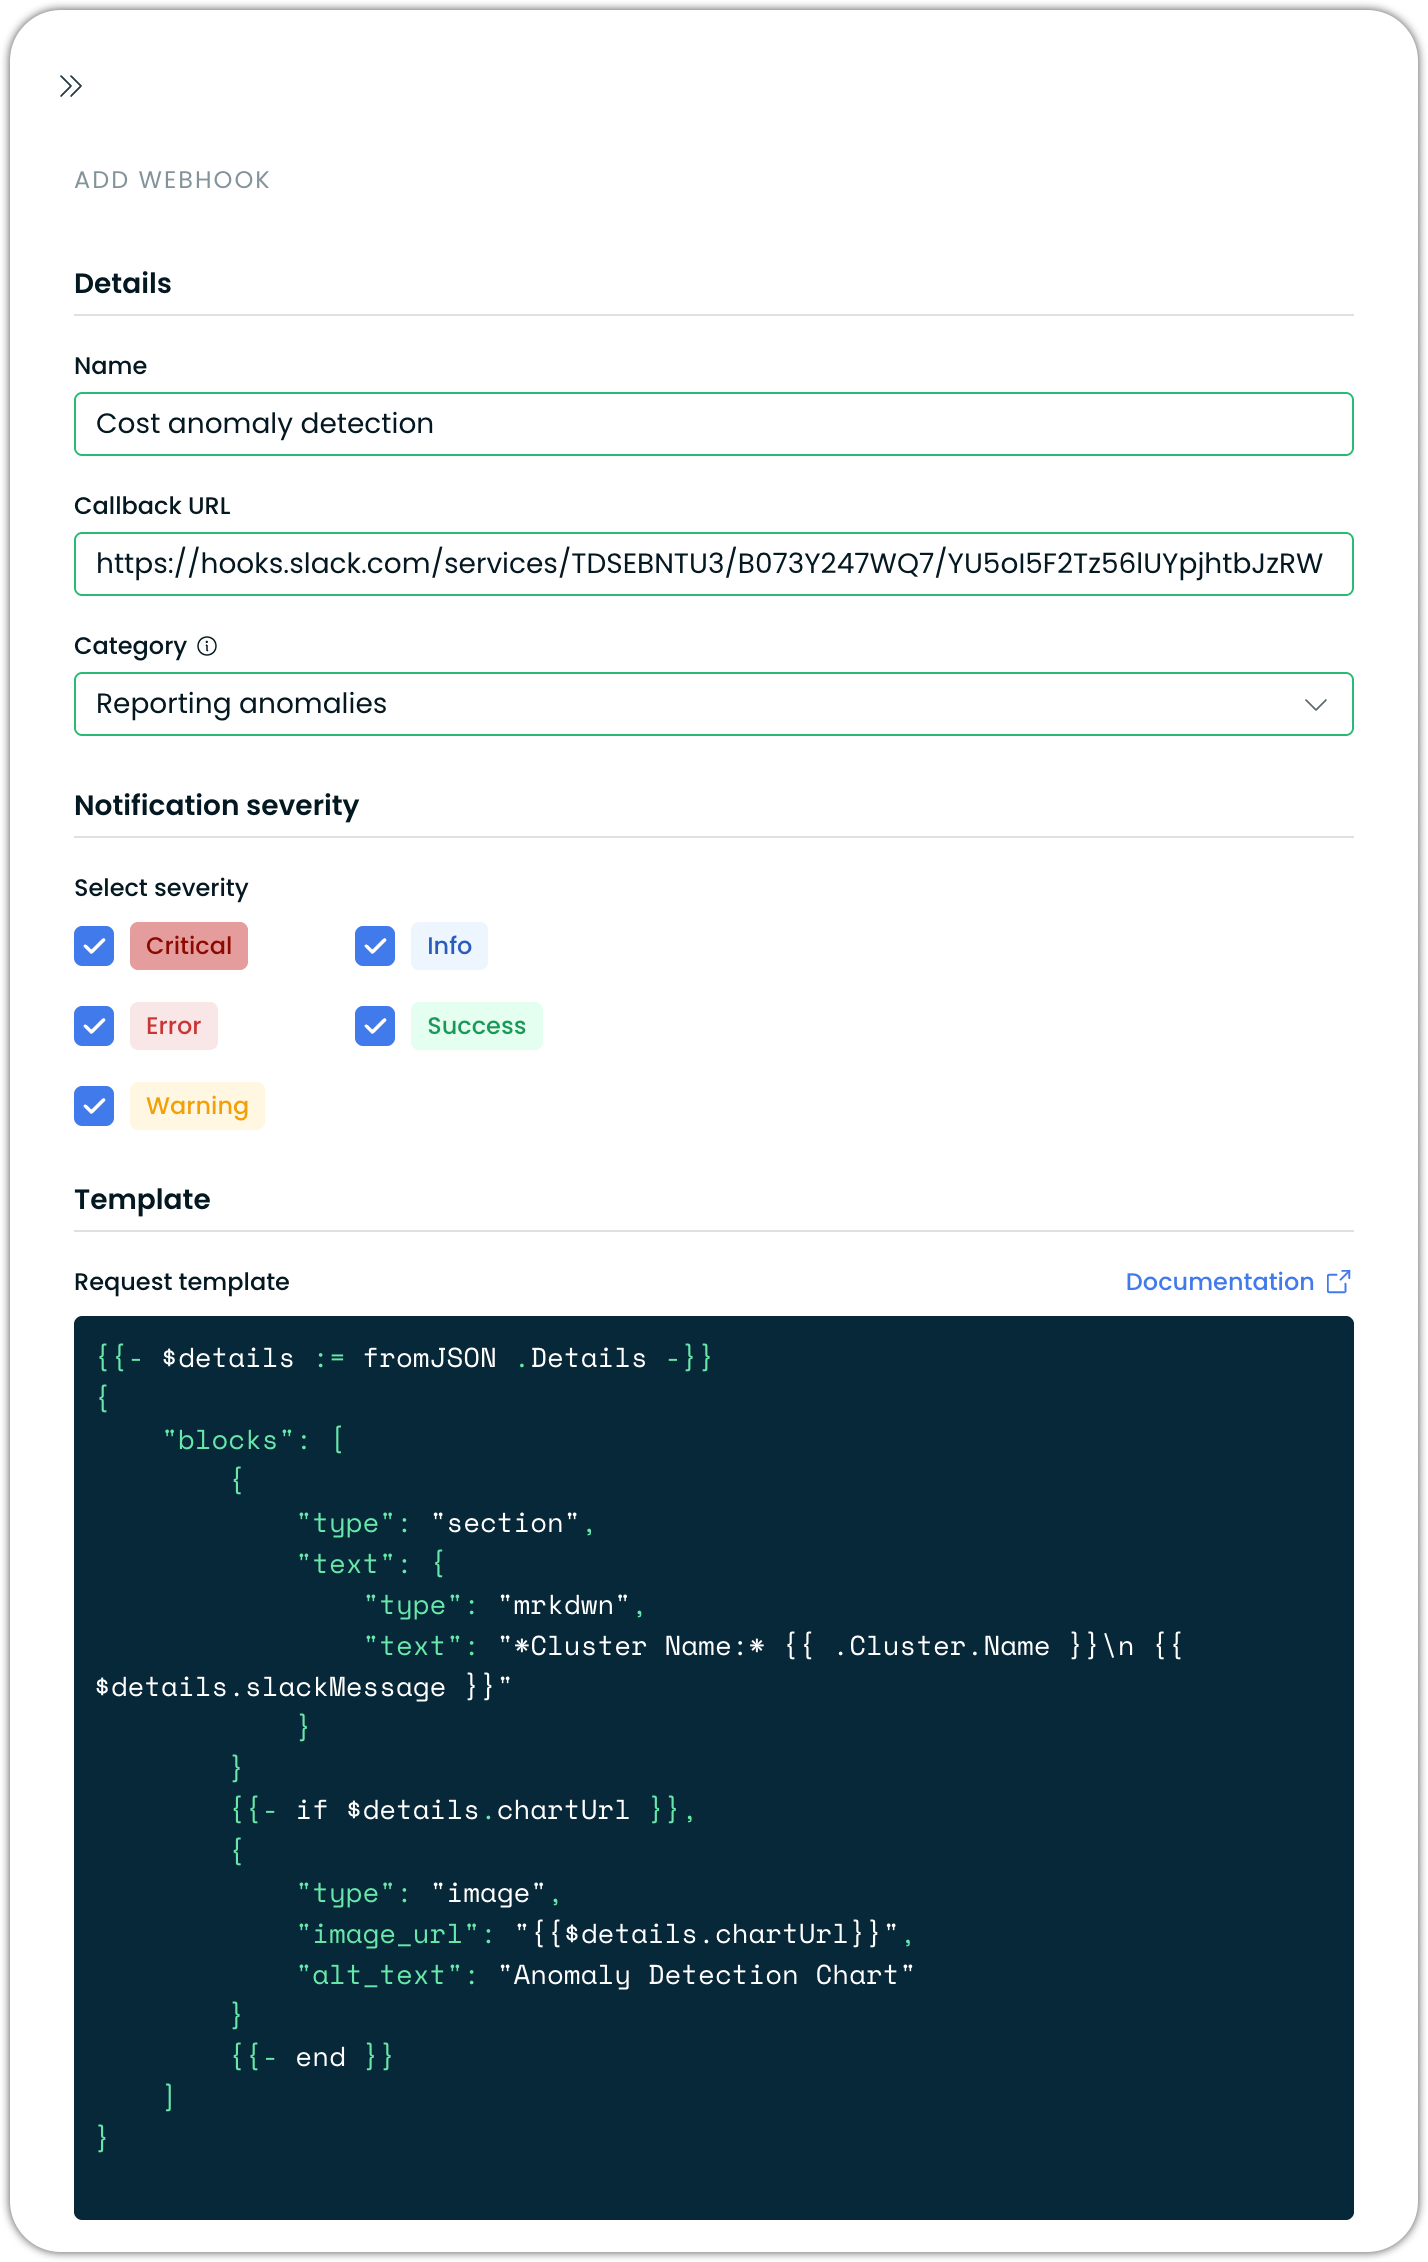
Navigate to Notifications > Add Webhook in the Cast AI console
-
Set the following fields:
- Name: Provide a descriptive name (e.g., "Slack Cost Anomalies")
- Callback URL: Paste your Slack webhook URL
- Category: Select "Reporting anomalies" for cost anomaly notifications
- Severity: Choose which severity levels trigger notifications
- Request template: When you select "Reporting anomalies," Cast AI automatically provides a pre-filled Slack-optimized template for instant setup
-
Template customization (optional)
While the pre-filled template works out of the box, you can still customize it if needed. The default Slack template structure looks like this:
{{- $details := fromJSON .Details -}}
{
    "blocks": [
        {
            "type": "section",
            "text": {
                "type": "mrkdwn",
                "text": "*Cluster Name:* {{ .Cluster.Name }}\n {{ $details.slackMessage }}"
            }
        }
        {{- if $details.chartUrl }},
        {
            "type": "image",
            "image_url": "{{$details.chartUrl}}",
            "alt_text": "Anomaly Detection Chart"
        }
        {{- end }}
    ]
}
You can modify this template to include additional information or formatting based on your requirements. The template uses the Go templating syntax and can access all the data available in the notification payload.
Available variables include:
.Cluster.Name: The name of the cluster.Cluster.ID: The unique identifier of the cluster.Details: Contains all the anomaly-specific data$details.slackMessage: A formatted message about the anomaly$details.chartUrl: URL to a chart visualization (if available)
For more advanced webhook configurations and examples, see our Notification Webhook Setup guide.
NoteConsider creating a dedicated Slack channel for cost anomaly notifications.
Updated 30 days ago
