
Single Sign-On (SSO)
Single Sign-On (SSO) allows users easy access to Cast AI through their existing SSO provider.
Getting started
To start using SSO, you can use Self-Serve Single Sign-On and configure the integration.
This guide describes establishing trust between Cast AI and your identity provider.
Regional endpointsCast AI operates in multiple regions with different endpoints. Ensure you use the endpoints that match your Cast AI environment. Using incorrect regional URLs will prevent successful authentication and cause connection errors.
See API access for the full list of regional endpoints.
OpenID providers
Cast AI now supports any SSO provider that implements the OpenID Connect standard. This gives you the flexibility to use your preferred identity provider.
Prerequisites
- An SSO provider that supports OpenID Connect
- Admin access to configure your SSO provider
Instructions
-
In your SSO provider, create a new OpenID Connect application
-
Configure the application with the following settings based on your Cast AI region:
Use the endpoints matching your Cast AI region (see API access):
- Sign-in redirect URI:
https://login.<region>.cast.ai/login/callback(for US:https://login.cast.ai/login/callback) - Sign-out redirect URI:
$CASTAI_API_URL/v1/auth/logout
- Sign-in redirect URI:
-
Note the following details you'll need to provide to Cast AI:
- Client ID
- Client secret
- Issuer URL (the base URL for your SSO provider)
-
In the Cast AI console, go to Organizational profile -> SSO
-
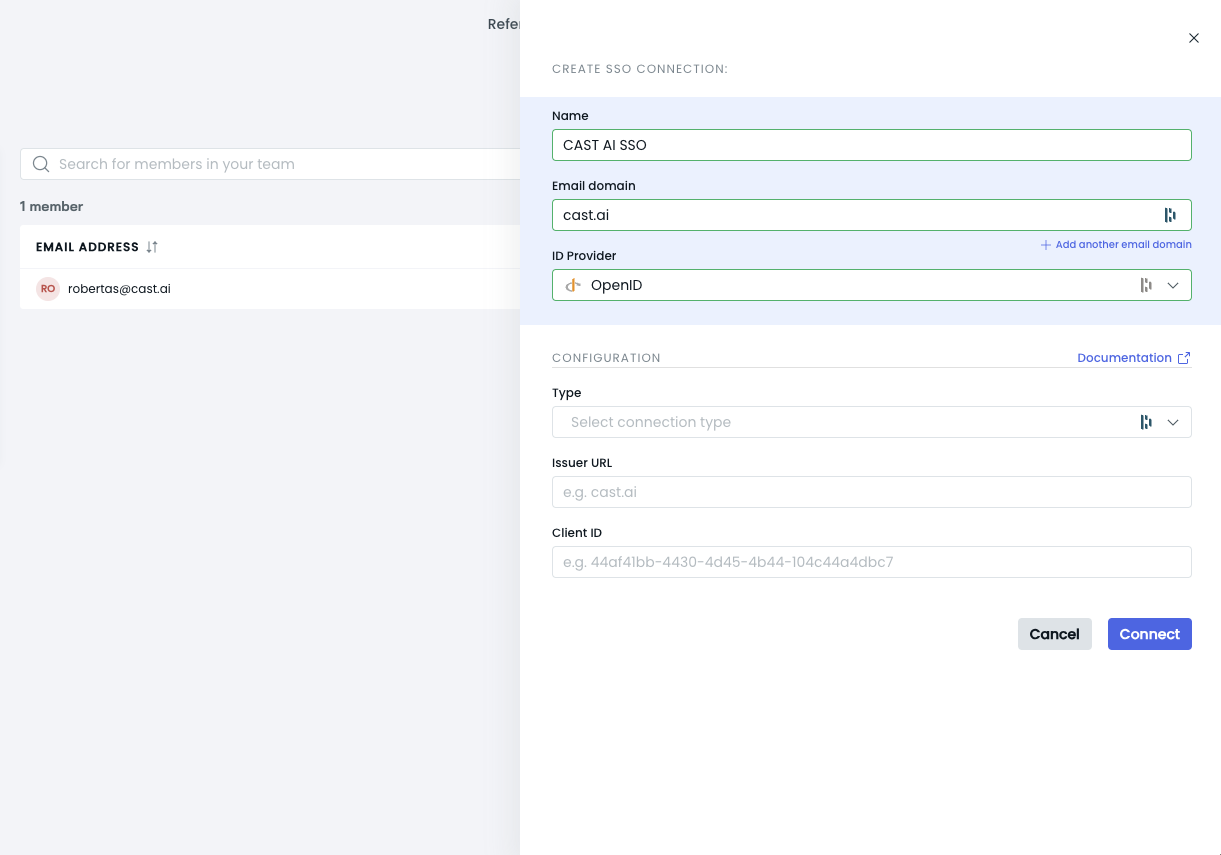
Click Create SSO Connection and select OpenID as the ID Provider
-
Fill in the required fields:
- Name: Give your SSO connection a name
- Email domain: Your organization's email domain
- Type: Choose the appropriate type based on your setup:
- Back channel: Select this if you're using the back channel type of OIDC connection
- Front channel: Select this if you're using the front channel type of OIDC connection
- Issuer URL: The base URL for your SSO provider
- Client ID: From step 3
- Client secret: From step 3. Required for Back channel OIDC connection type only.
-
Click Connect to establish the SSO connection
Your OpenID SSO connection should now be configured and ready to use.
NoteThe correct Issuer URL for Google OIDC authentication is:
https://accounts.google.com/.well-known/openid-configurationAll OIDC Issuer URLs should end with:
/.well-known/openid-configuration
NoteThe type you choose (back channel or front channel) should match the configuration in your OpenID provider. If you're unsure which type to use, consult your SSO provider's documentation or your IT administrator.
Azure AD
This section describes setting up an Azure AD application and defining parameters for calling the Create organization SSO connection to establish SSO trust between Cast AI and the customer-created Azure AD application.
Prerequisites
Admin access to your Azure AD subscription.
Instructions
Create an Azure AD application
In your Azure portal, navigate to Microsoft Entra ID → App Registrations → New Registration:
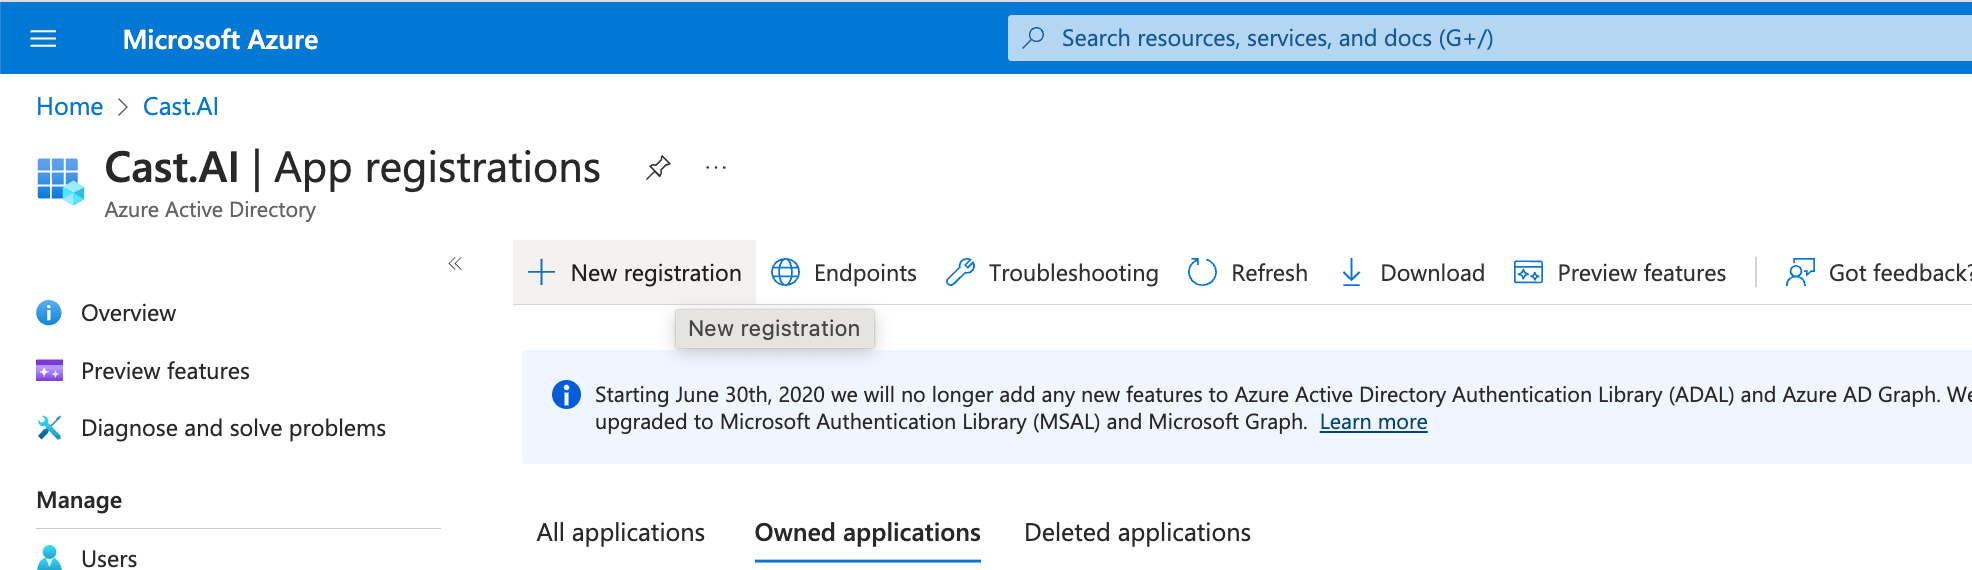
Register a new AD Application
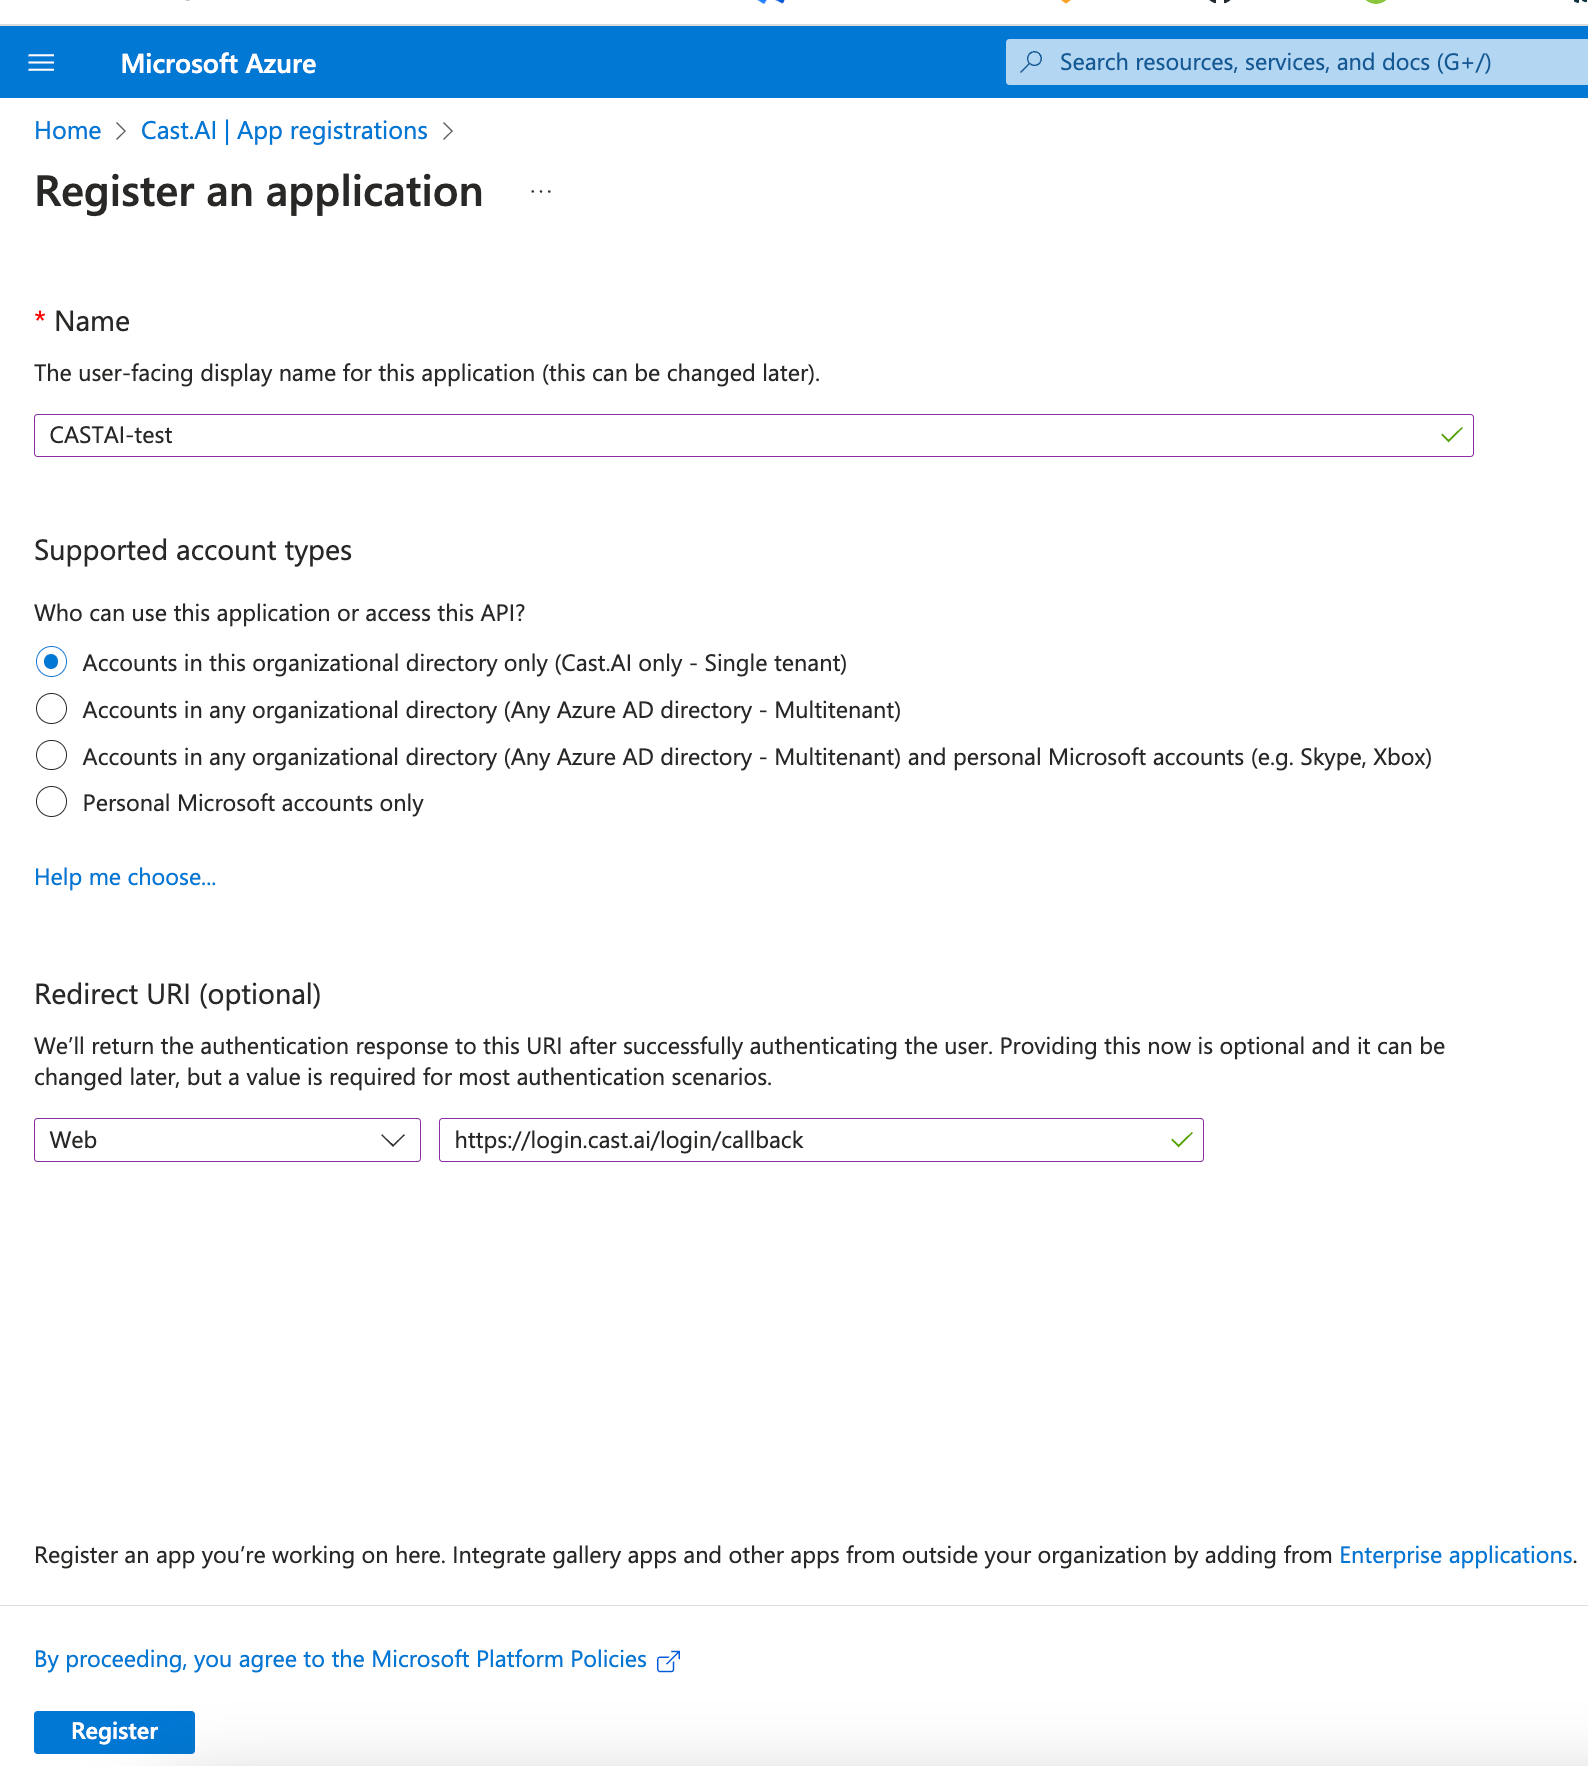
- Give your preferred name to an app registration
- Set Supported account type to Accounts in this organizational directory only (Single tenant)
- Set Redirect URI type to Web, and as a callback value, use:
- US region:
https://login.cast.ai/login/callback - EU region:
https://login.eu.cast.ai/login/callback - India region:
https://login.india.cast.ai/login/callback
- US region:
- Click Register
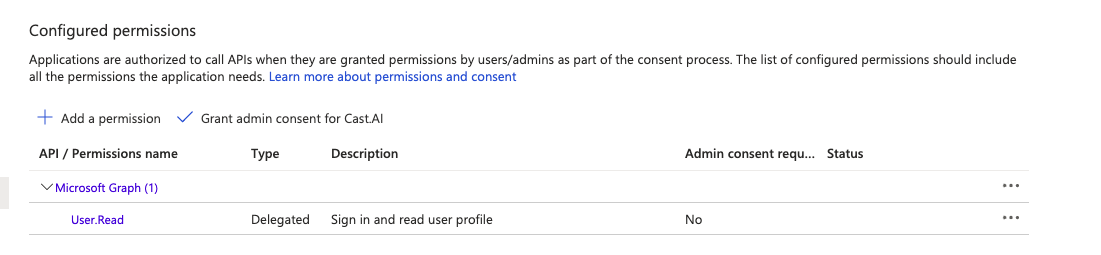
Configure the new AD Application
- Under API permissions, make sure that your application has these permissions:
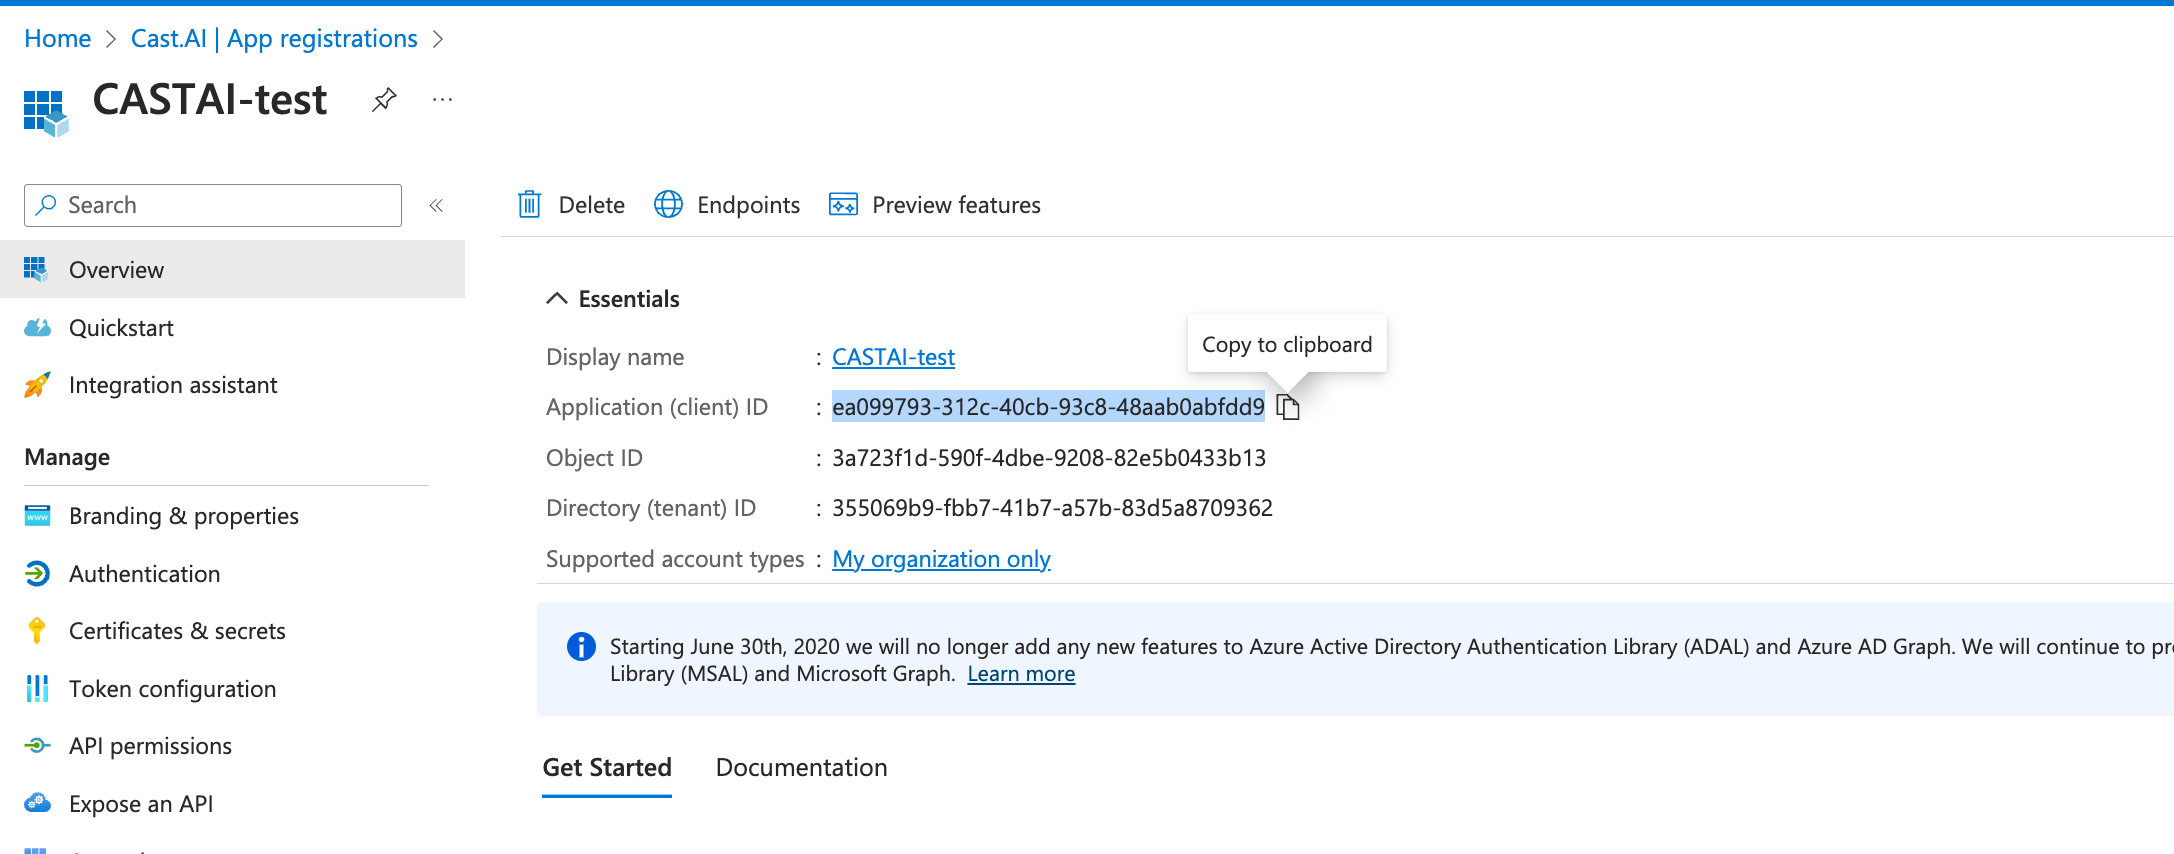
- Make a note of the created app registration Application (client) ID:
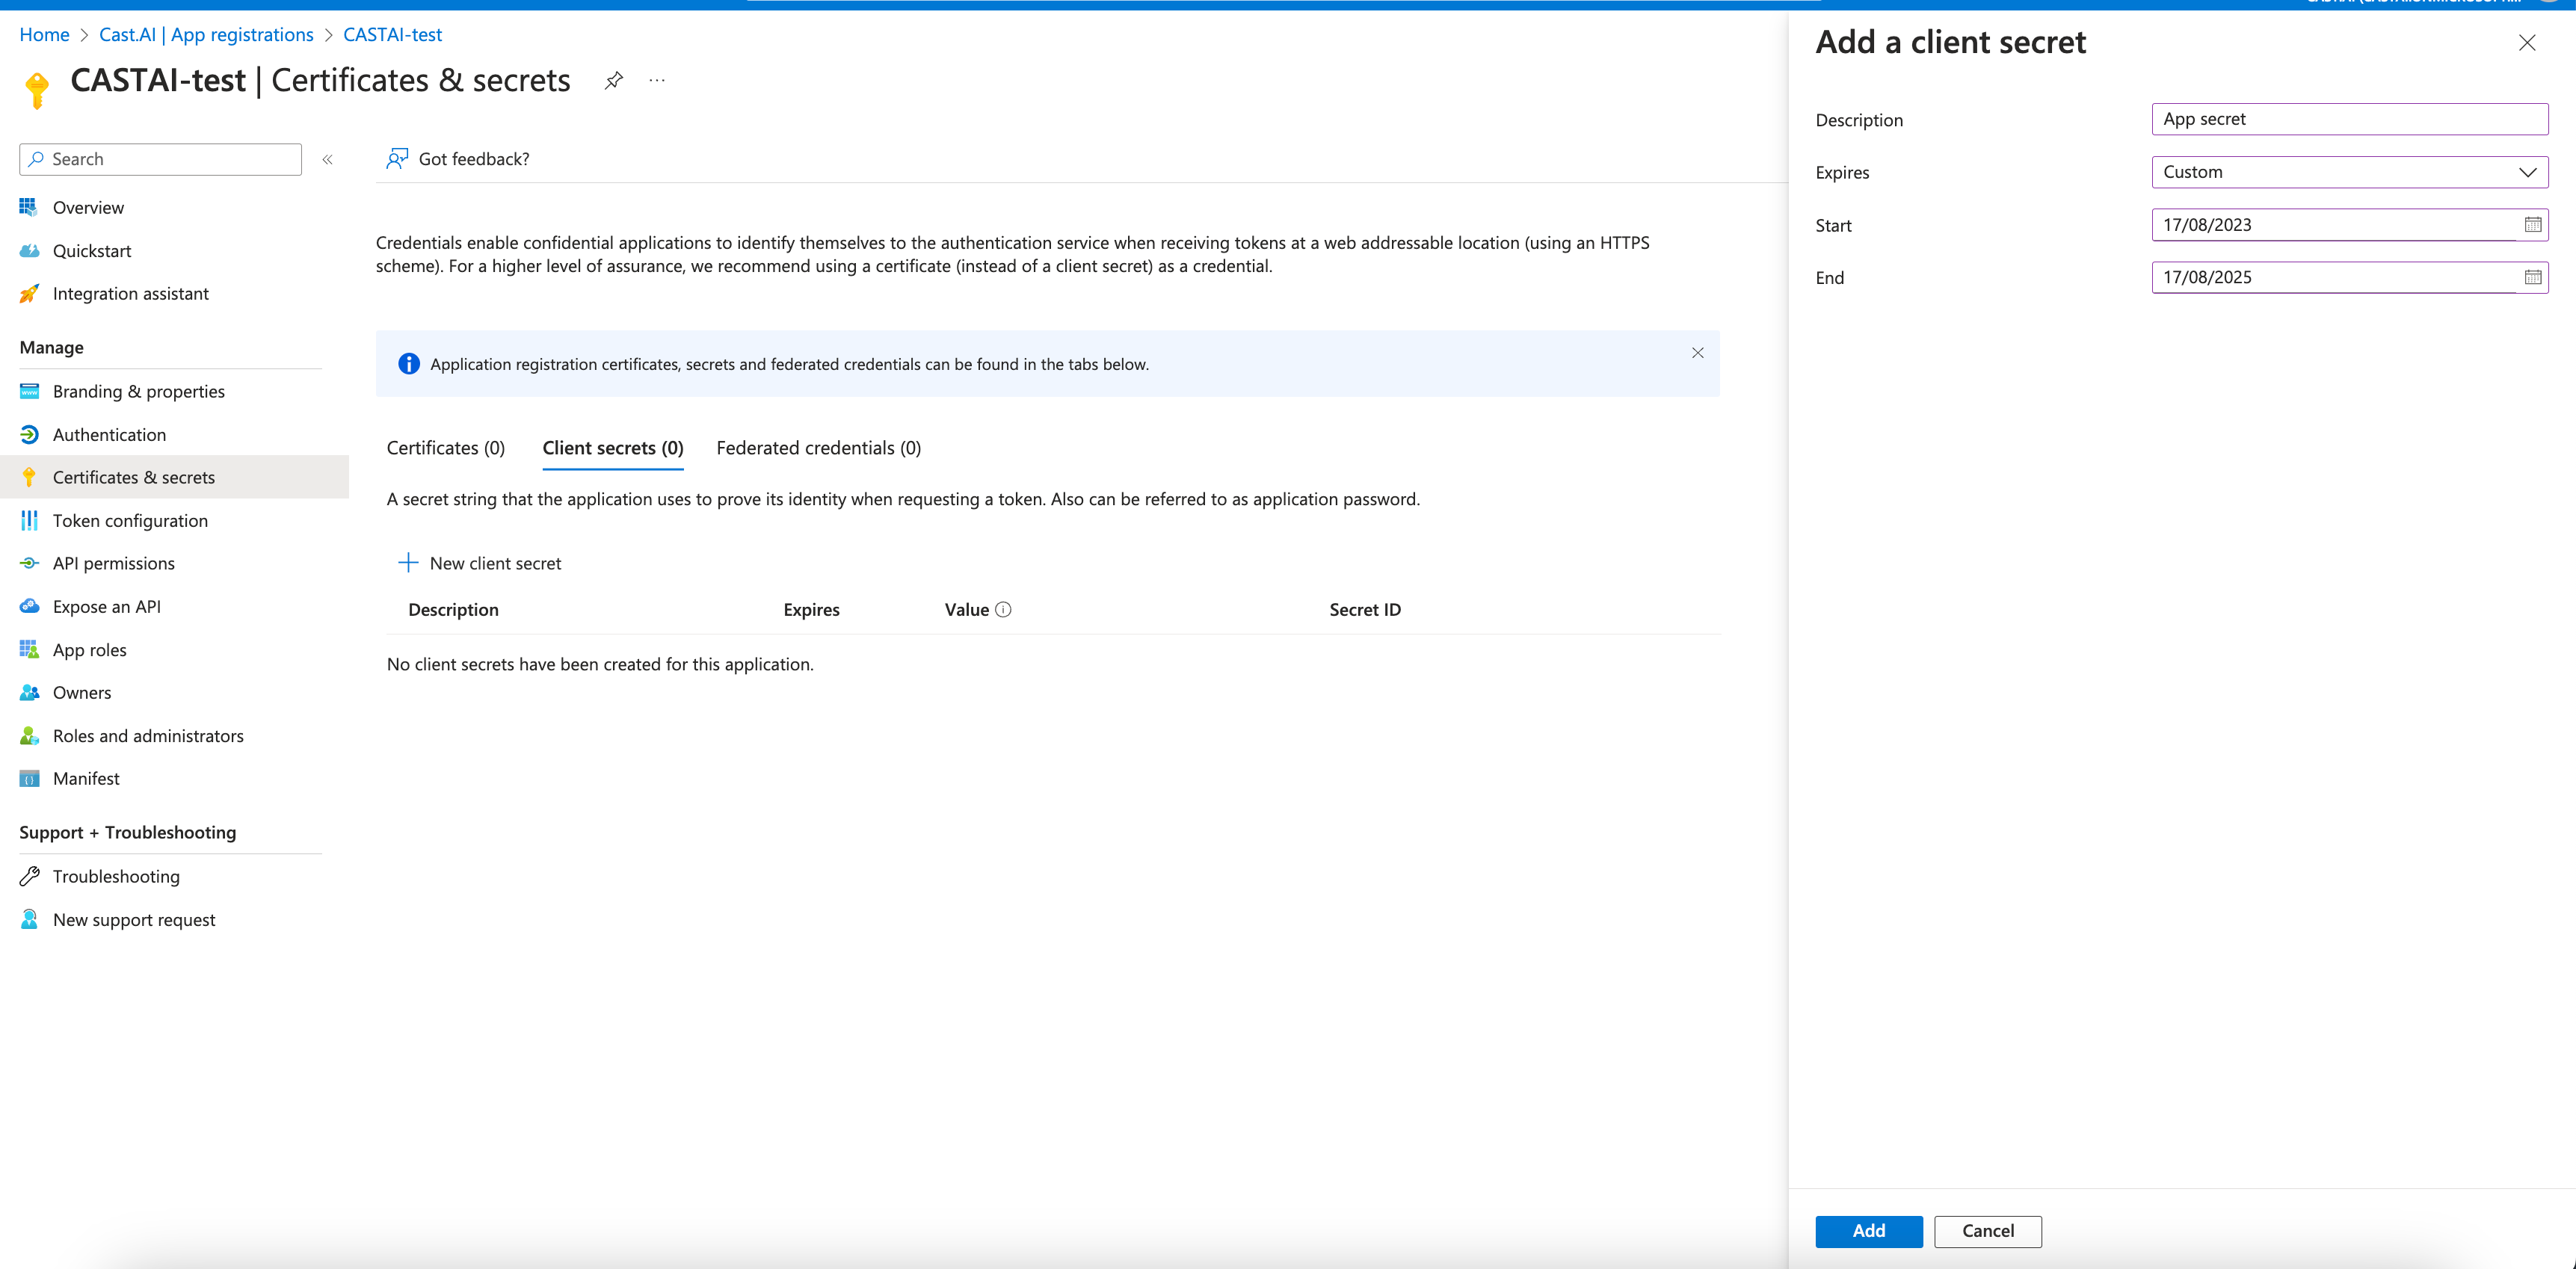
Add a Client secret for the created app registration
- Under the Certificates & secrets section in the previously created app registration window, select New client secret
- Set the description for the secret and set the expiration date for two years.
- Note and securely store the Secret Value as it is shown only during creation.
Now, you can set up a connection using Cast AI console. Go to Organizational profile - > SSO in the Cast AI console.
Office 365 AppIf your organization is using the Office 365 App, configure your app Initiate login URI within the App Registration Home Page URL based on your Cast AI region:
- US region:
https://console.cast.ai/api/sso?auth0returnTo=https%3A%2F%2Fconsole.cast.ai%2Fapi%2Fsso&domain=org-email-domain- EU region:
https://console.eu.cast.ai/api/sso?auth0returnTo=https%3A%2F%2Fconsole.eu.cast.ai%2Fapi%2Fsso&domain=org-email-domain- India region:
https://console.india.cast.ai/api/sso?auth0returnTo=https%3A%2F%2Fconsole.india.cast.ai%2Fapi%2Fsso&domain=org-email-domainIf a URL contains another URL as a query parameter, the parameter must be encoded using percent encoding.
Terraform
If you manage your infrastructure with Terraform, you can check this example of creating an SSO connection with the Cast AI Terraform provider.
Okta Workforce Enterprise Connection
This section describes setting up an Okta OIDC app integration and defining parameters for calling Create organization SSO connection to establish SSO trust between Cast AI and the customer-created Okta OIDC app integration.
Prerequisites
Access to the OKTA admin console.
Instructions
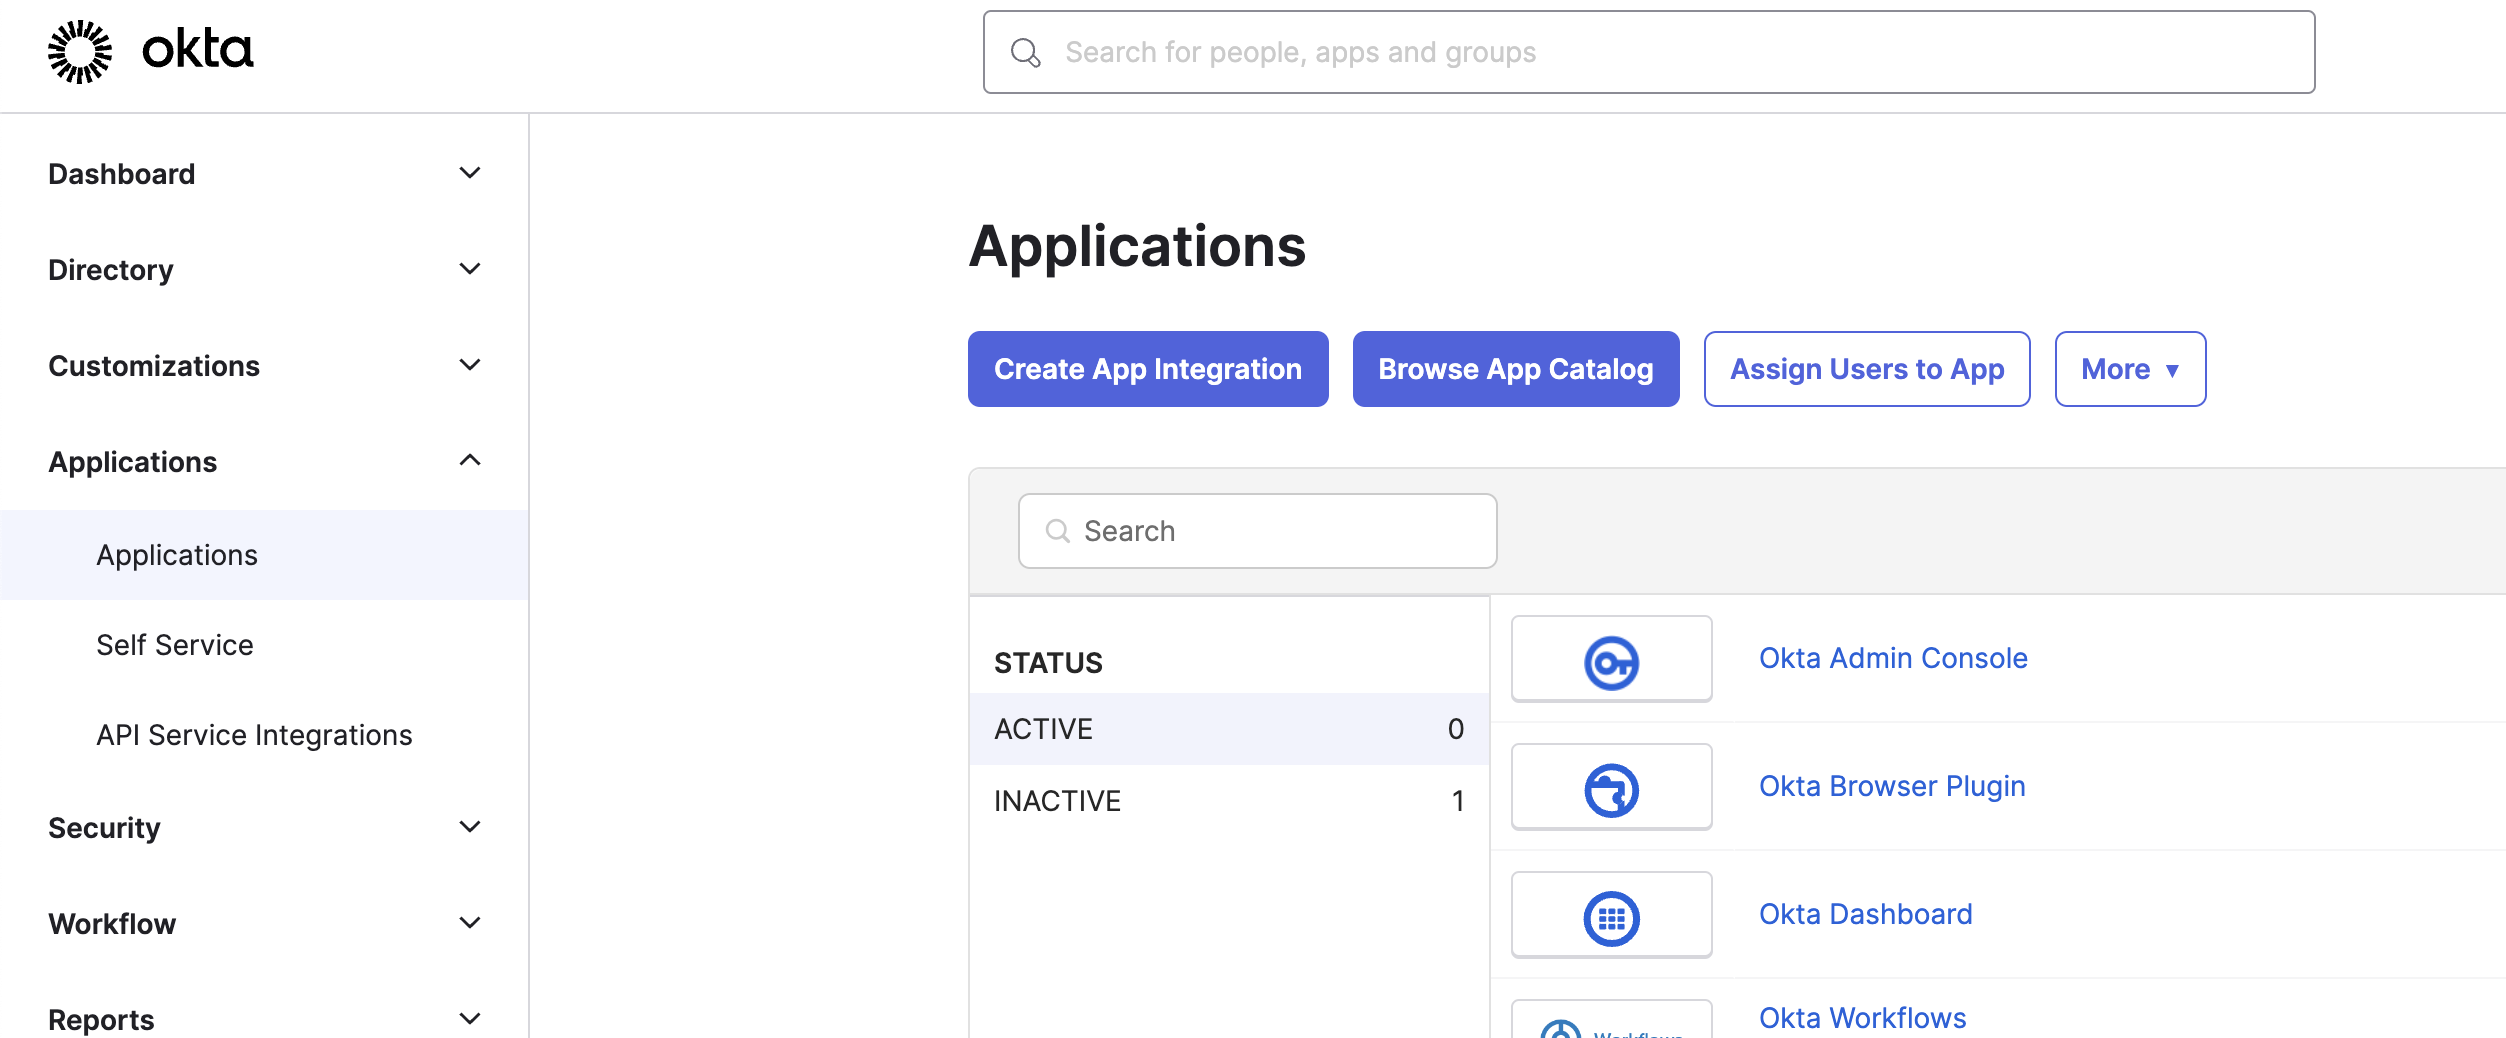
Create a new Okta OIDC app integration
- In your admin console, navigate to Applications → Applications and click on Create App Integration:
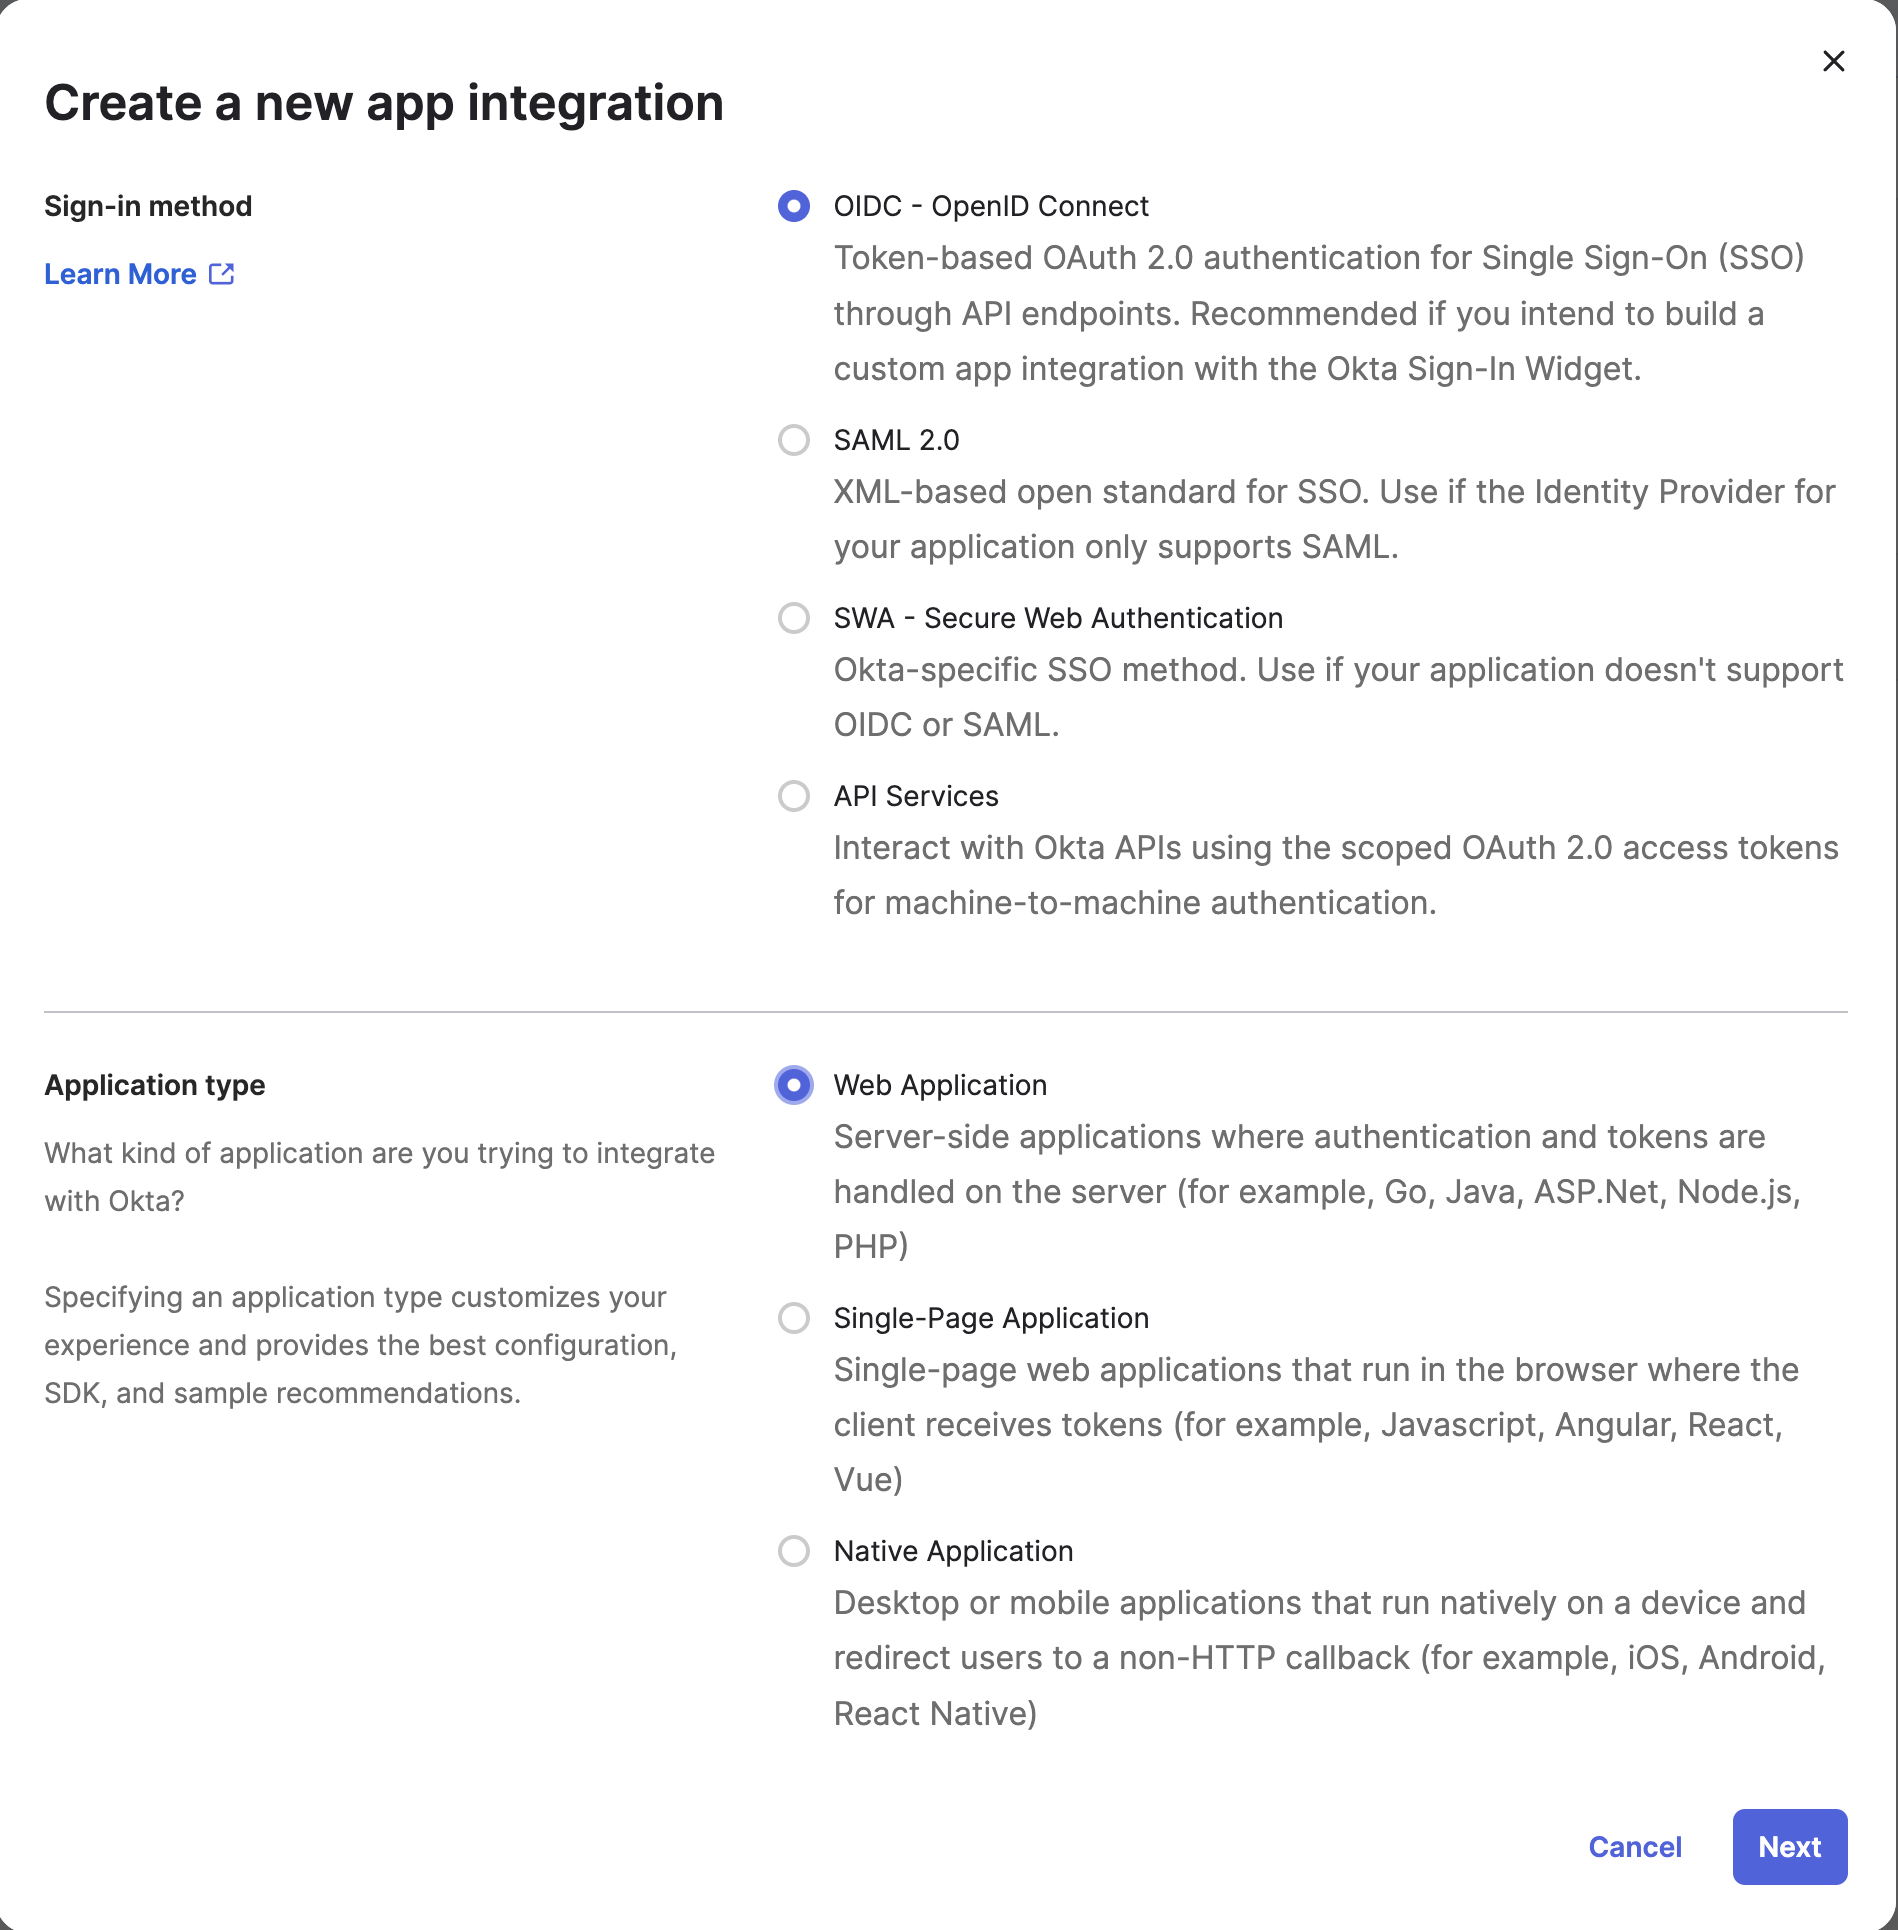
- Set Sign-in method and Application type:
| Option | Type |
|---|---|
| Sign-in method | OIDC - OpenID Connect |
| Application type | Web Application |
- Click Next
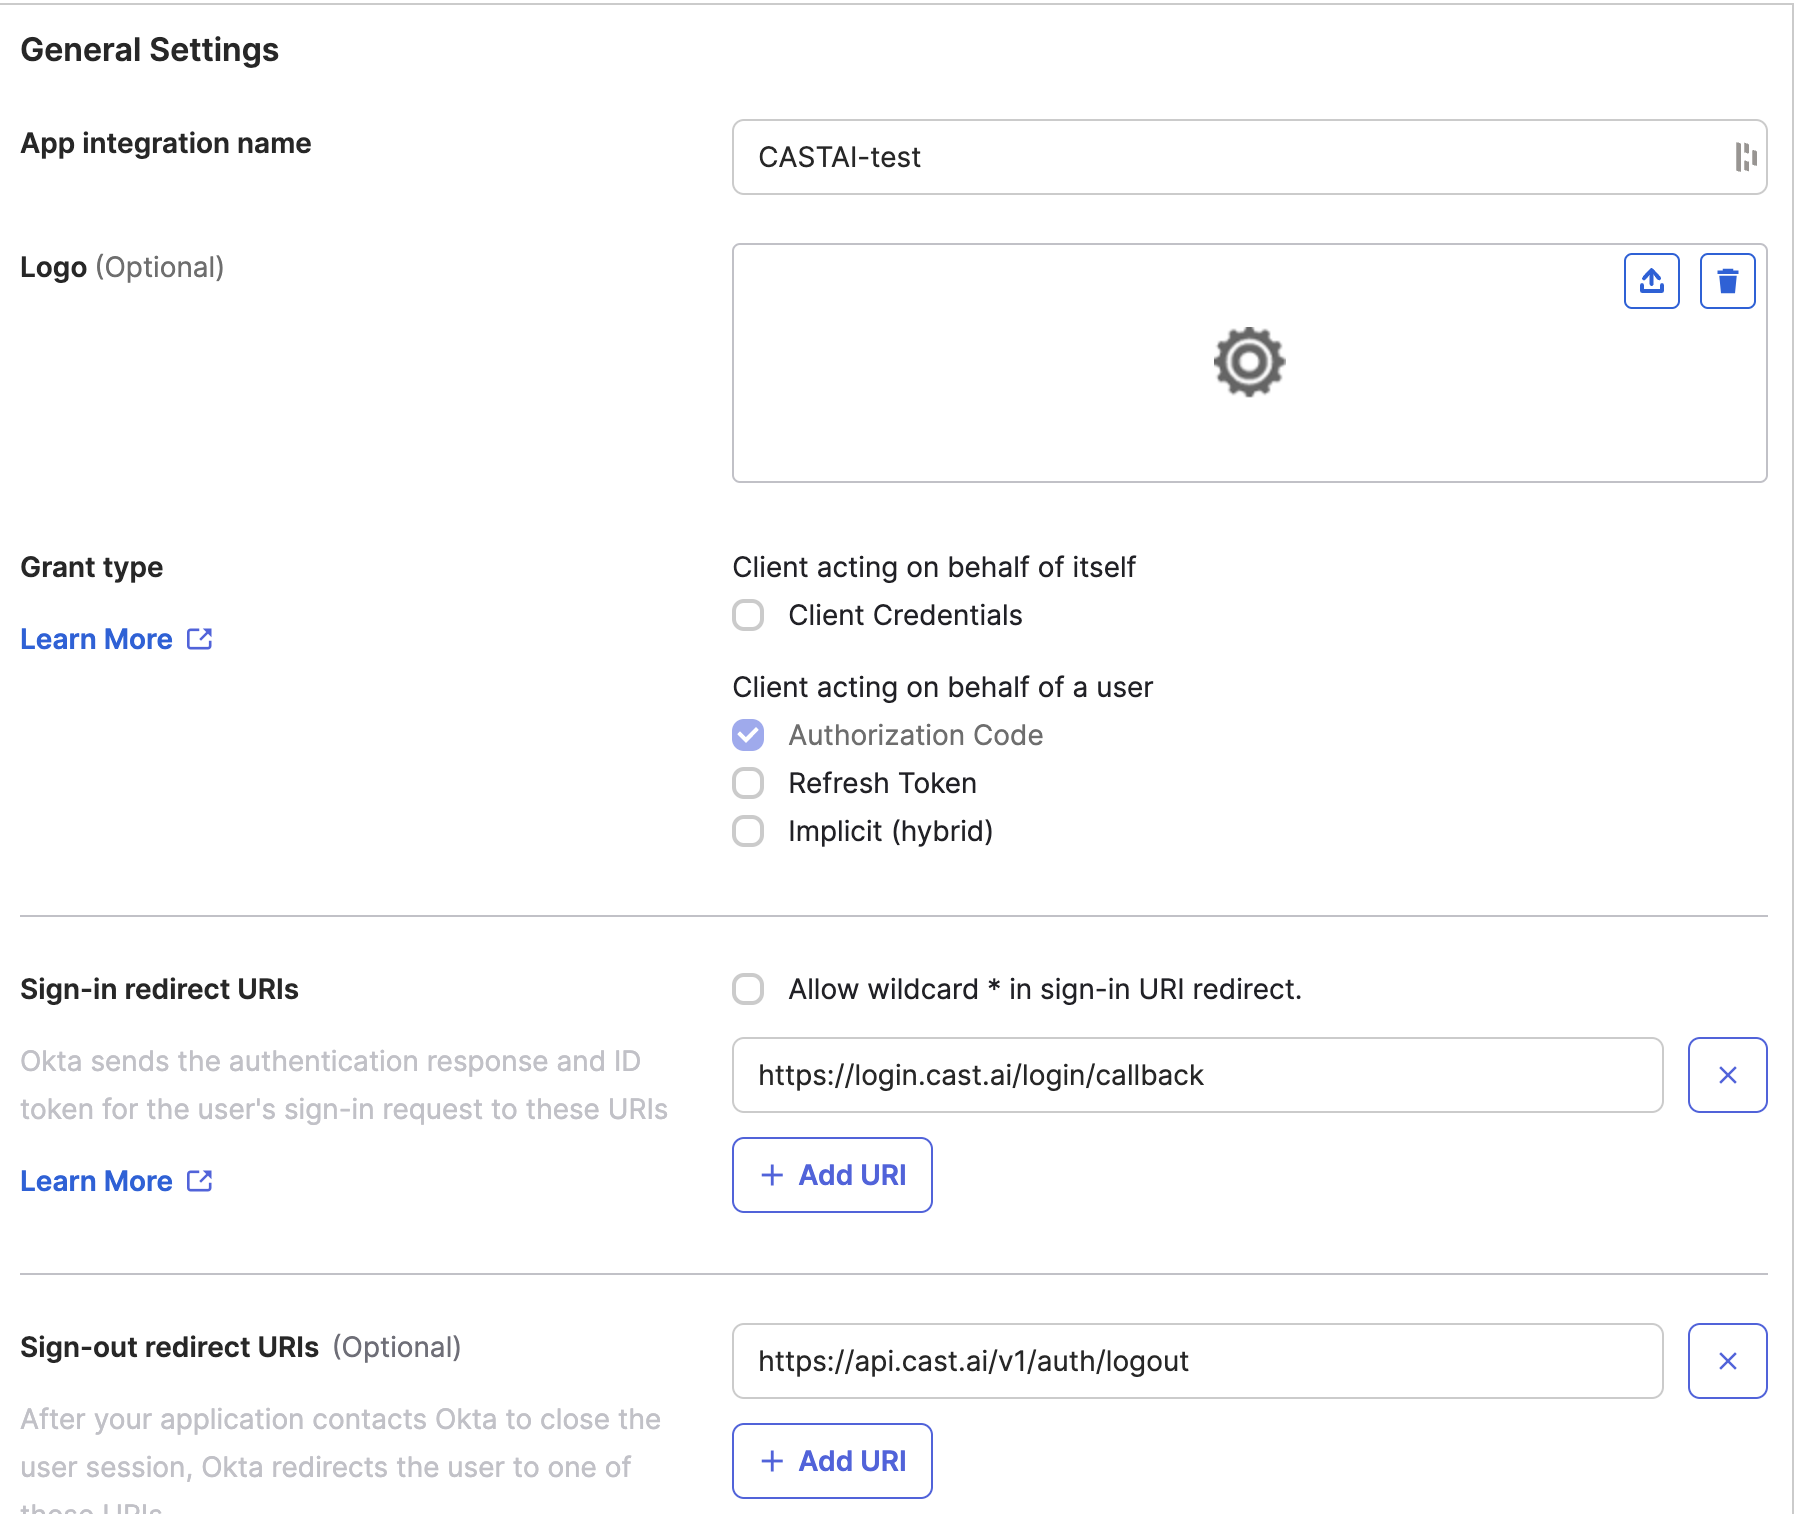
Configure the OKTA app integration
- Give your preferred name to the app integration
- Set Sign-in redirect URIs based on your Cast AI region (see API access):
https://login.<region>.cast.ai/login/callback(for US:https://login.cast.ai/login/callback)
- Set Sign-out redirect URIs:
$CASTAI_API_URL/v1/auth/logout
- Set proper Assignments
- Click Save
Now, you can set up a connection using the Cast AI console.
Okta App TileIf your organization is using the Okta App Tile, configure your app Initiate login URI based on your Cast AI region:
- US region:
https://console.cast.ai/api/sso?auth0returnTo=https://console.cast.ai/api/sso&domain=email-domain- EU region:
https://console.eu.cast.ai/api/sso?auth0returnTo=https://console.eu.cast.ai/api/sso&domain=email-domain- India region:
https://console.india.cast.ai/api/sso?auth0returnTo=https://console.india.cast.ai/api/sso&domain=email-domain
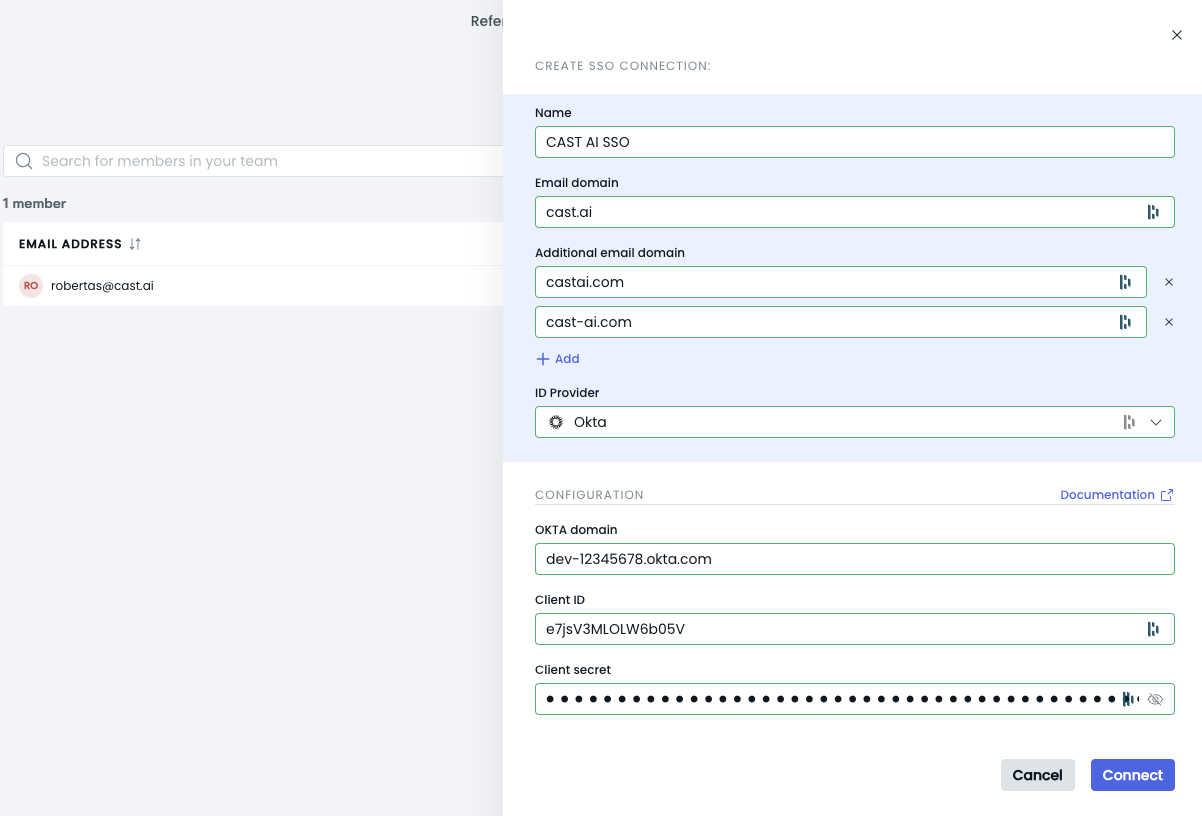
Cast AI Console Okta SSO Configuration:
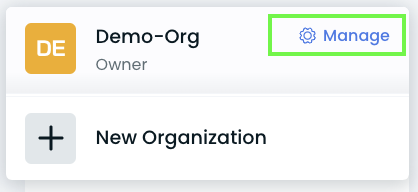
Navigate to Org Icon - > Manage - > Organizational profile - > SSO.
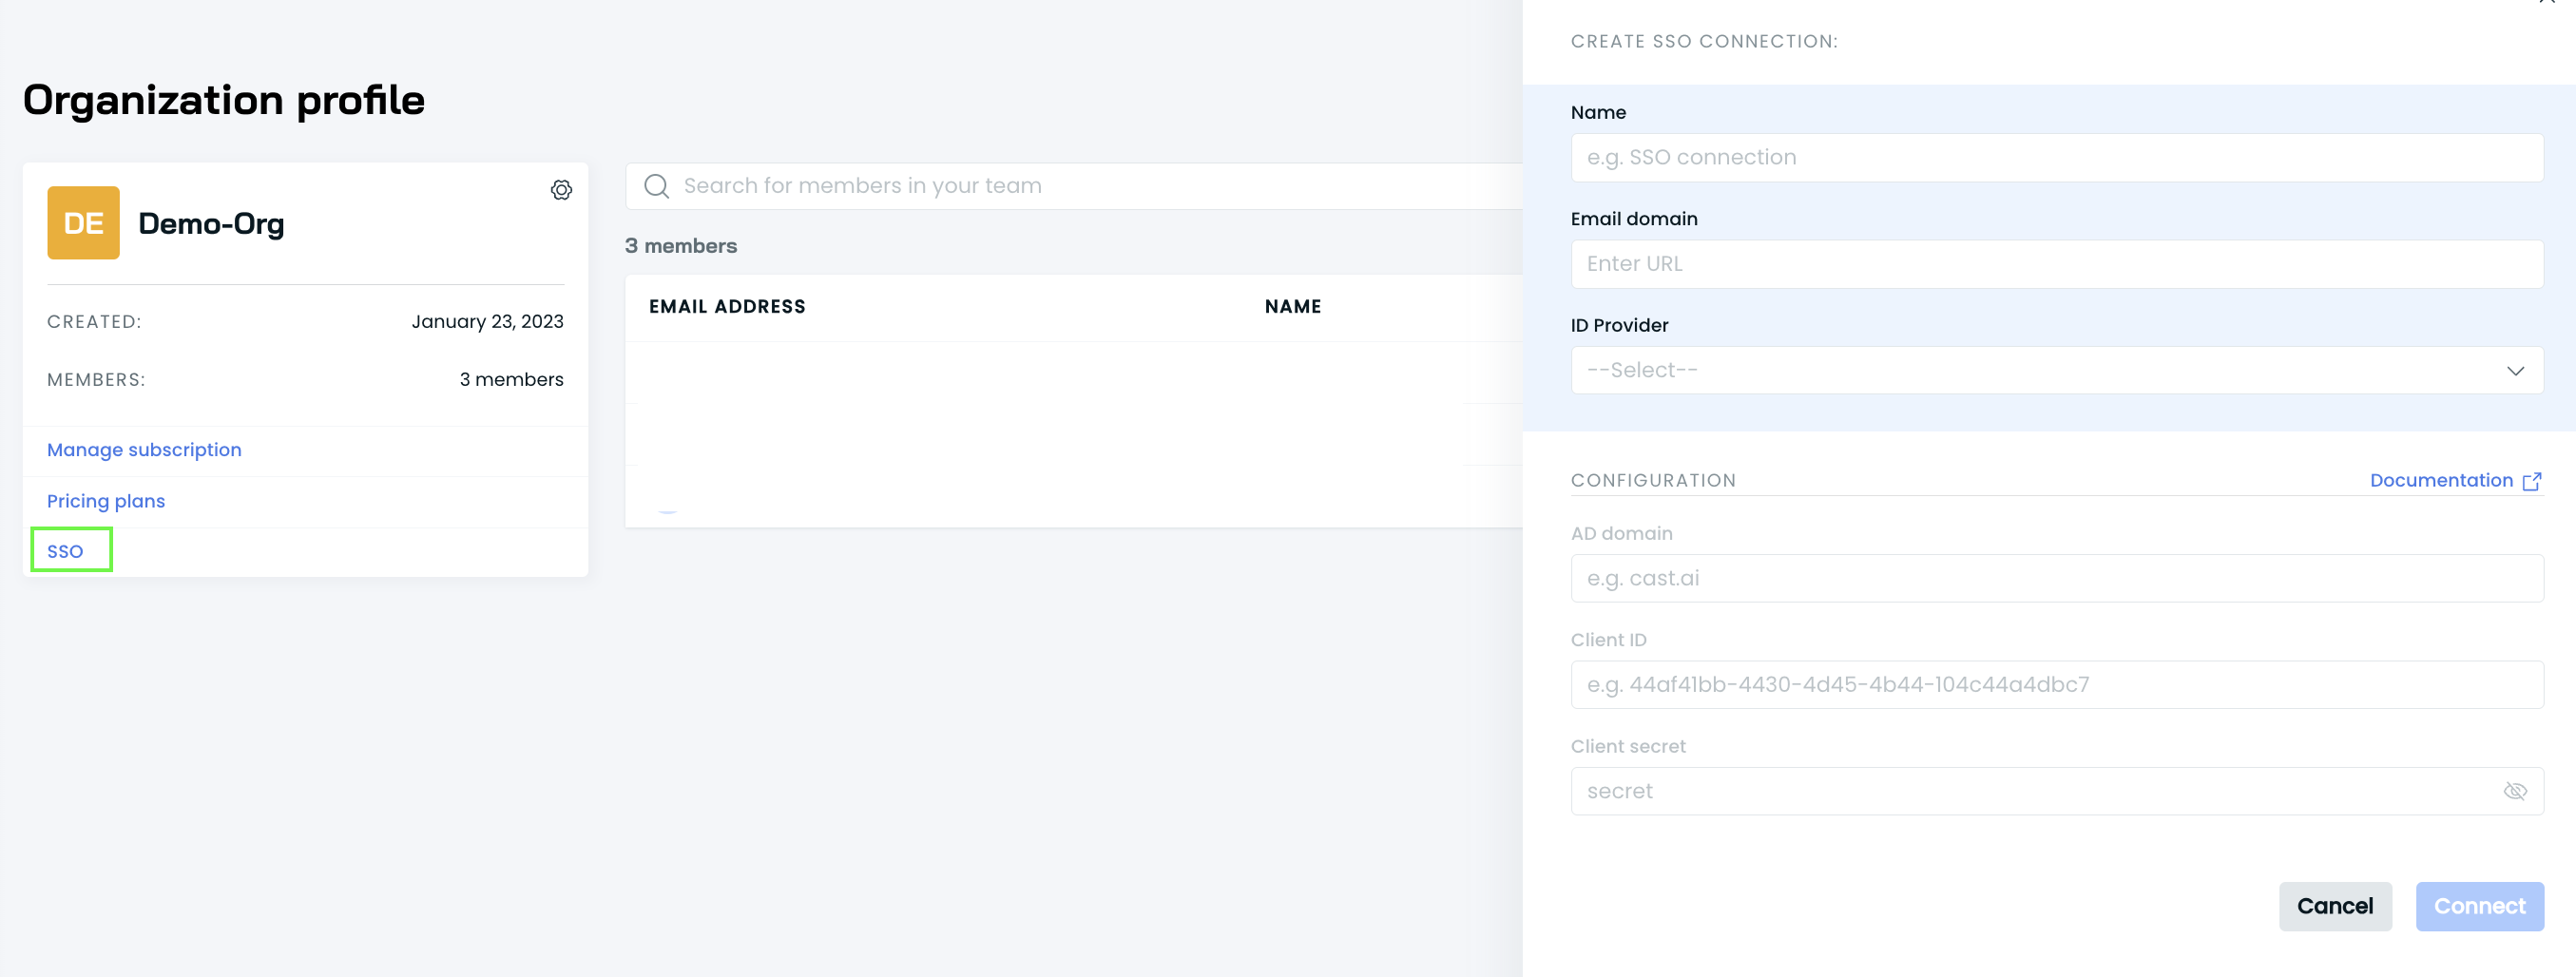
To create an SSO Connection using Okta in the Cast AI console, follow these steps:
-
Gather the following information:
- Connection Name
- Email Domain (e.g.,
your-organization.com) - (Optional) Additional Email Domains (e.g.,
your-organization.co.uk, your-organization-service.eu) - Identity Provider (Okta)
-
Prepare the Okta Configuration details:
- Okta Domain (e.g.,
dev-12345678.okta.com) - Client ID (generated during Okta app creation)
- Client Secret (generated during Okta app creation)
- Okta Domain (e.g.,
-
Enter the information in the SSO Connection form:
 Note
NoteEnsure you use your organization's email domain(-s) and the correct Okta domain.
-
After filling in all required fields, click the Connect button.
-
If all information is correct, your Okta SSO Connection should be successfully established.
Remember to double-check all entered information before submitting to avoid connection issues. If you encounter any problems, verify your Okta configuration and try again.
Multiple Email Domains Support
Cast AI supports configuring multiple email domains for your SSO connection. This feature is available through three methods.
Cast AI Console
You can add multiple email domains in the configuration form when setting up your SSO connection in the Cast AI console:
- Enter your primary email domain.
- Click "Add another email domain" to add additional domains, which are optional.
- Repeat step 2 for each additional domain.

API
To configure multiple email domains using the Cast AI API, use the Create organization SSO connection endpoint. Include all additional email domains in the additionalEmailDomains array of the request body:
{
  "name": "My SSO Connection",
  "emailDomain": "company.com",
  "additionalEmailDomains": [
    "company.co.uk",
    "company.eu"
  ]
}
Terraform
If you manage your infrastructure with Terraform, you can configure multiple email domains using the Cast AI Terraform provider. Update your Terraform configuration to include all desired email domains.
Expired credentials
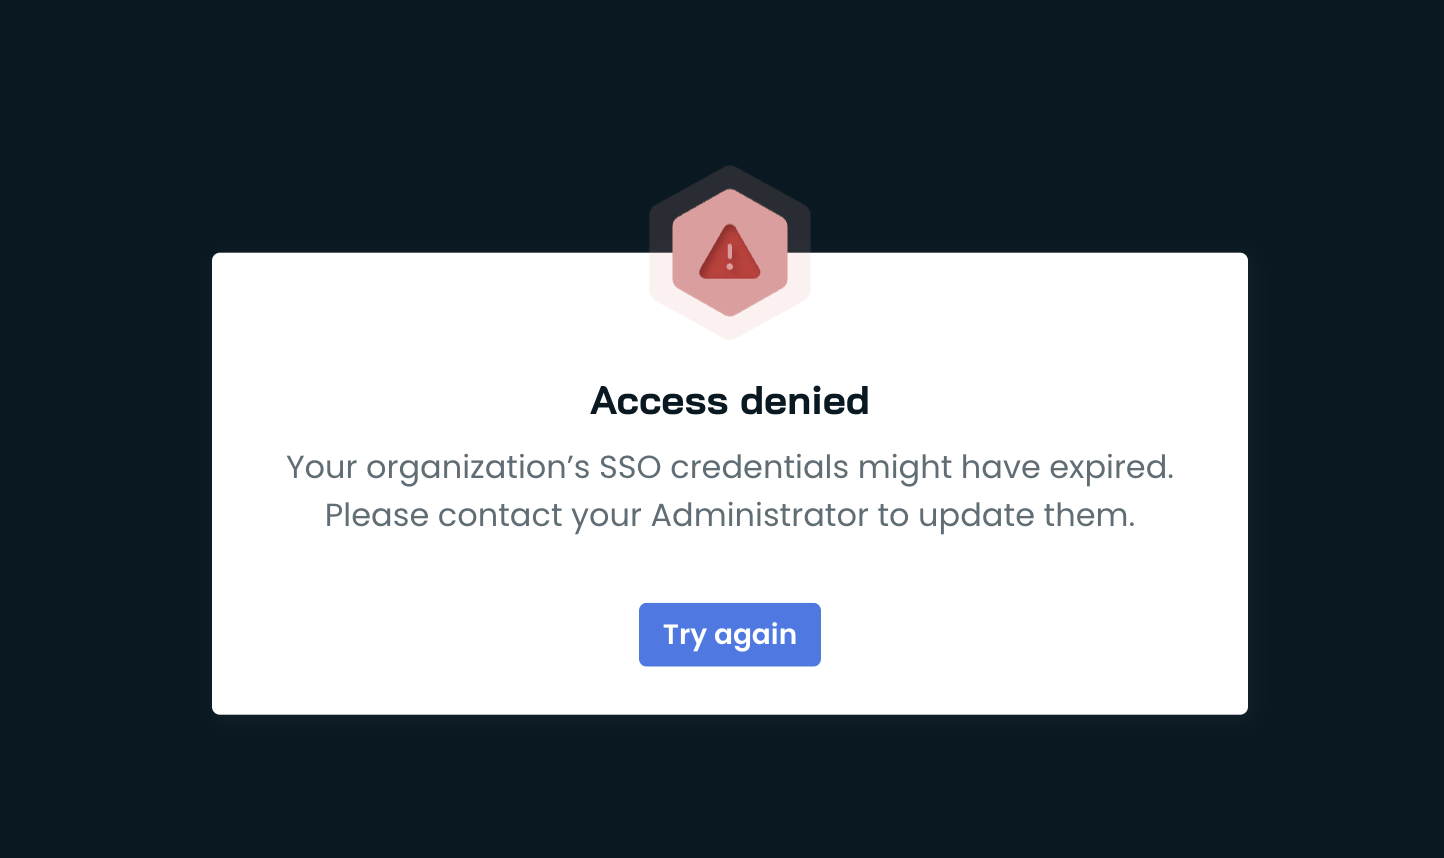
While Cast AI doesn't actively monitor SSO credential expiration dates, the platform uses a mechanism to detect when credentials have expired based on provider responses during login attempts. When this happens:
- Users will see an error message during login indicating expired credentials:
- Organization administrators will receive a detailed notification about the SSO connection issue through the notifications hub. See Notifications for more information.
To resolve this, administrators should:
- Review the notification details in the Cast AI console
- Update the expired credentials in your SSO provider
- Verify the SSO connection is working by testing the login
NoteWe recommend tracking SSO credential expiration dates in your identity provider to prevent disruption to user access.
Managing SSO connections
Restricting user access to SSO only
When SSO is enabled, you can prevent manual user invitations via email to enforce that all users authenticate through your identity provider:
-
In Cast AI console, navigate to Access control > SSO
-
Select User connection only via SSO
-
The invitation button will be disabled in Access control > Users
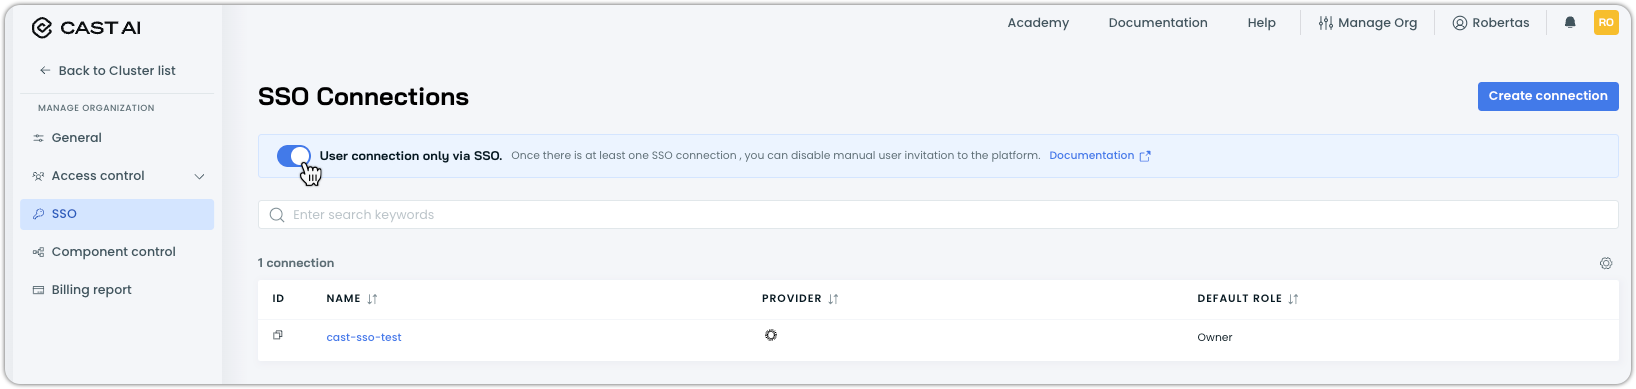
NoteThis setting only works when an active SSO connection exists.
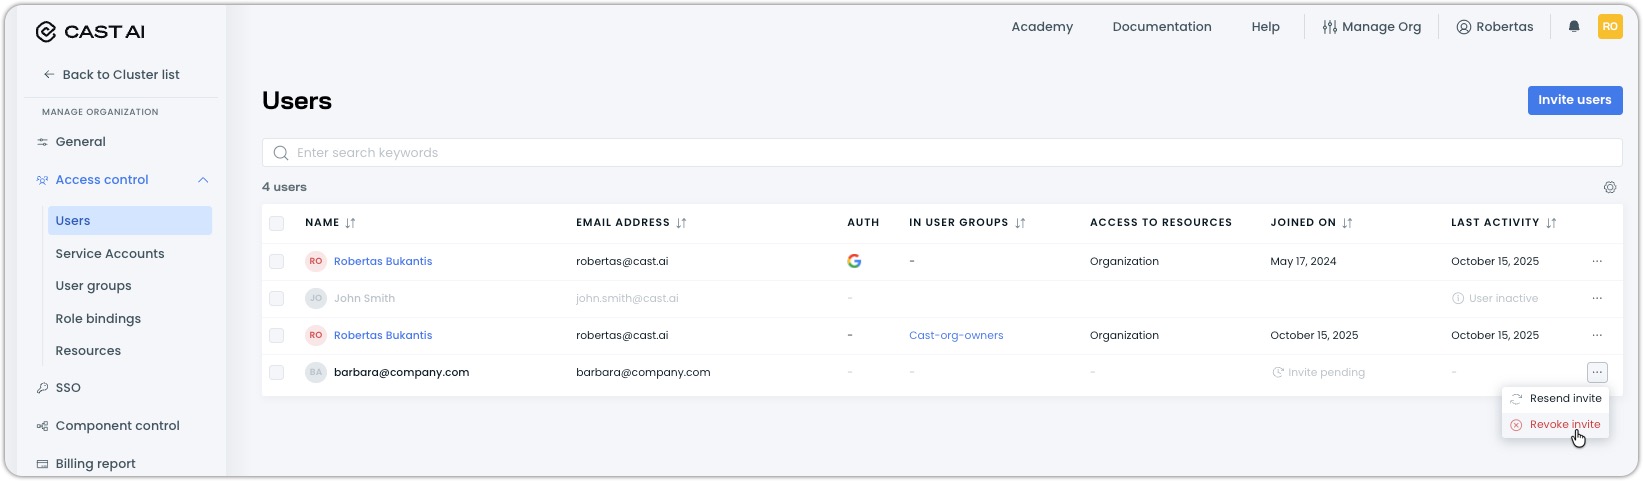
Revoking pending invitations
If invitations were sent before restricting to SSO-only access, they remain valid until manually revoked:
-
In Cast AI console, navigate to Access control > Users
-
Find users with Invite pending status
-
Click the ellipsis (⋯) and select Revoke invite
Deleting an SSO connection
WarningDeleting your SSO connection will permanently remove all users who were provisioned through SSO from Cast AI. If you have SSO Group Sync enabled, all synced groups will also be removed.
To remove an SSO connection:
-
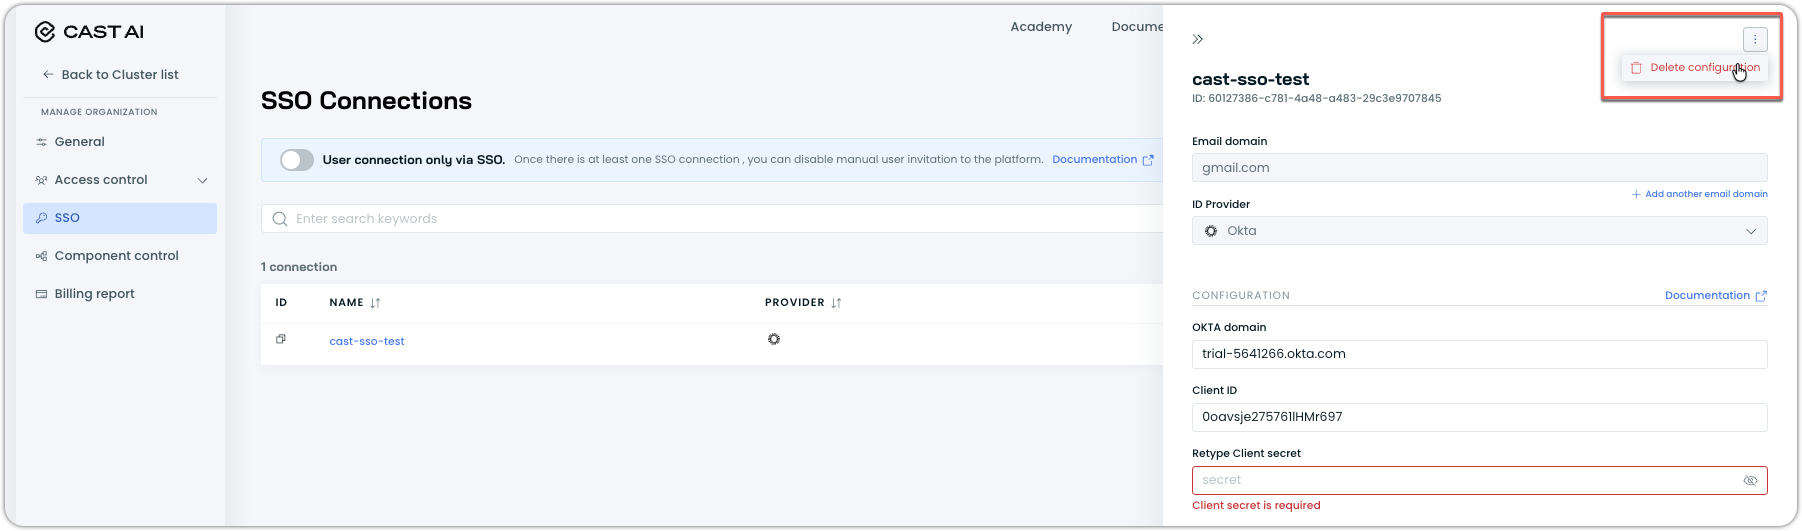
In Cast AI console, navigate to Access control > SSO
-
Find your SSO connection and click on it
-
In the configuration drawer, click the ellipsis in the top right and select Delete configuration
-
Confirm the deletion
Impact:
- All users provisioned through SSO will be deleted from Cast AI
- If Group Sync is enabled, synced groups will be removed
- Any SCIM connections will be severed