
Upgrading Kubernetes version
Upgrading Kubernetes version
This guide outlines the recommended steps for upgrading your Kubernetes cluster managed by Cast AI. Following these steps ensures a smooth upgrade process and minimizes potential disruptions to your workloads.
Before you begin
Before deciding to upgrade the Kubernetes version in your clusters, review the Kubernetes release notes for any new features or deprecations that may affect your workloads.
Important: Amazon Linux 2 (AL2) deprecation in EKSAWS is ending support for Amazon Linux 2 (AL2) with Kubernetes v1.32. Starting with v1.33, only AL2023 and Bottlerocket AMIs will be supported. When planning your Kubernetes upgrade:
- If upgrading to v1.32: Consider using this opportunity to migrate from AL2 to AL2023 or Bottlerocket
- If upgrading to v1.33 or later: You must use AL2023 or Bottlerocket for node images
For node configuration updates related to this change, refer to our Node Configuration documentation.
Before starting the upgrade process, ensure that:
- You have access to your cloud provider's console (AWS, Azure, or GCP).
- You have the necessary permissions to modify your Kubernetes cluster.
- You have access to the Cast AI console.
- For EKS clusters on v1.32 or planning to upgrade to v1.33+, you've reviewed your node image requirements.
Upgrade process
Step 1: Upgrade the control plane
- Log in to your cloud provider's console.
- Navigate to your Kubernetes cluster management section.
- Initiate the control plane upgrade process.
NoteMake sure to upgrade the control plane separately from the node pools. Cast AI will automatically handle node pool upgrades after the control plane upgrade. This approach helps avoid scaling delays and ensures seamless updates.
- Wait for the control plane upgrade to complete successfully.
NoteFor exact steps on how to perform a control plane upgrade using your cloud provider's console, refer to your cloud provider's documentation:
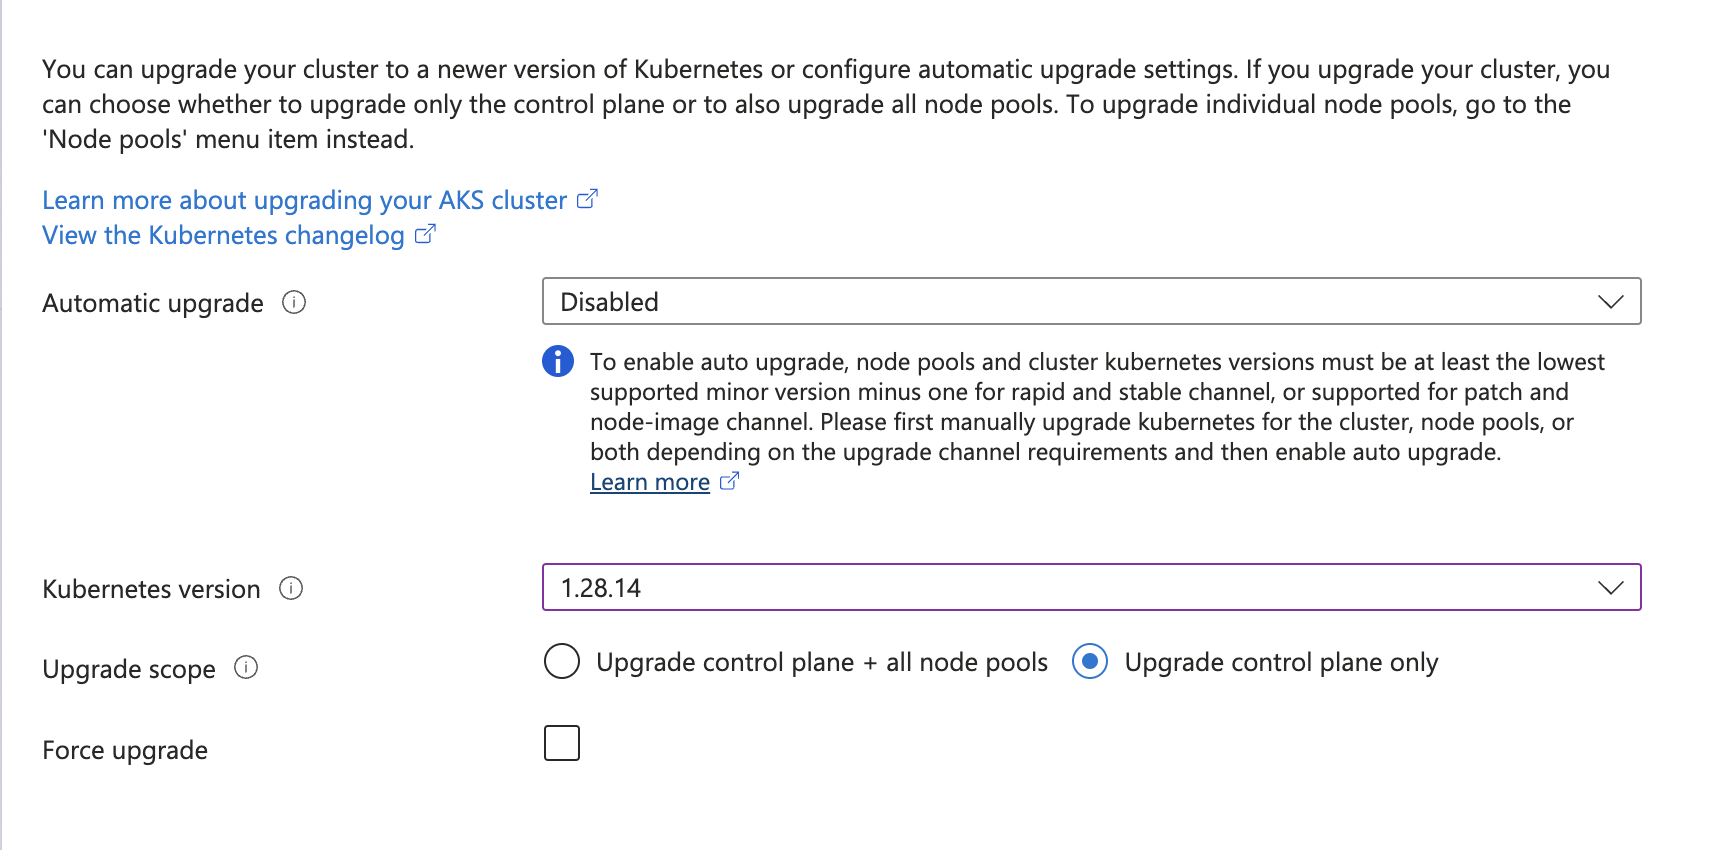
Example of upgrading the Kubernetes version for AKS
Step 2: Reconcile in Cast AI
After the control plane upgrade is finished:
- Navigate to the Cast AI console.
- Locate your cluster and click the "Trigger reconcile" button.
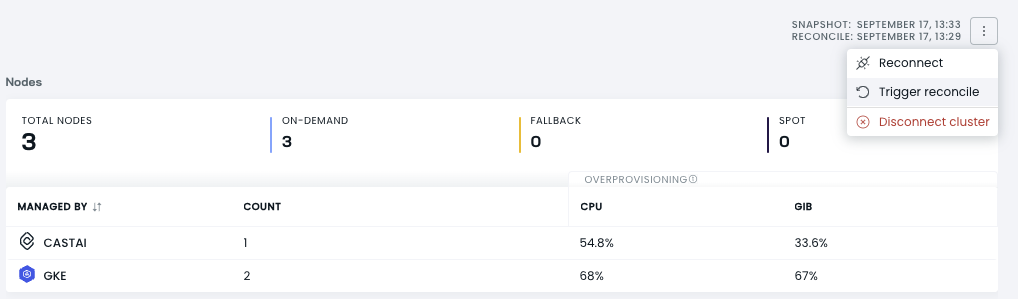
Triggering reconciliation from the cluster dashboard
NoteAlternatively, you can wait for the auto-reconcile, which occurs every 30 minutes.
The reconciliation process will:
- Initiate the creation of new images for node pools (this can take 20-30 minutes).
- Ensure that all new nodes added by Cast AI use the upgraded control plane version.
TipFor AKS clusters, you can confirm the image update by checking the Azure Compute Gallery for new images with the current date.
For EKS clusters, if you're upgrading to v1.32 or later, this is a good time to update your node configuration to use AL2023 or Bottlerocket image families, as AL2 will be deprecated. See Node Configuration for details.
Step 3: (Optional) Full node replacement
To replace all existing nodes with new ones using the upgraded version:
-
Set up a scheduled rebalance with the following parameters:
- Minimum node age: 0

- Savings threshold: Disabled

This ensures all old nodes are replaced regardless of any potential cost changes.
- Generate and run a rebalancing plan.
For detailed instructions on scheduled rebalancing, see our Scheduled rebalancing guide.
Troubleshooting
If you encounter issues during the upgrade process, follow these steps:
Nodes failing to be added after rebalance
If you initiated a rebalance without reconciling first, and nodes are timing out or failing to be added:
-
For AKS clusters:
- Delete the
castpoolfrom the Azure cloud console.
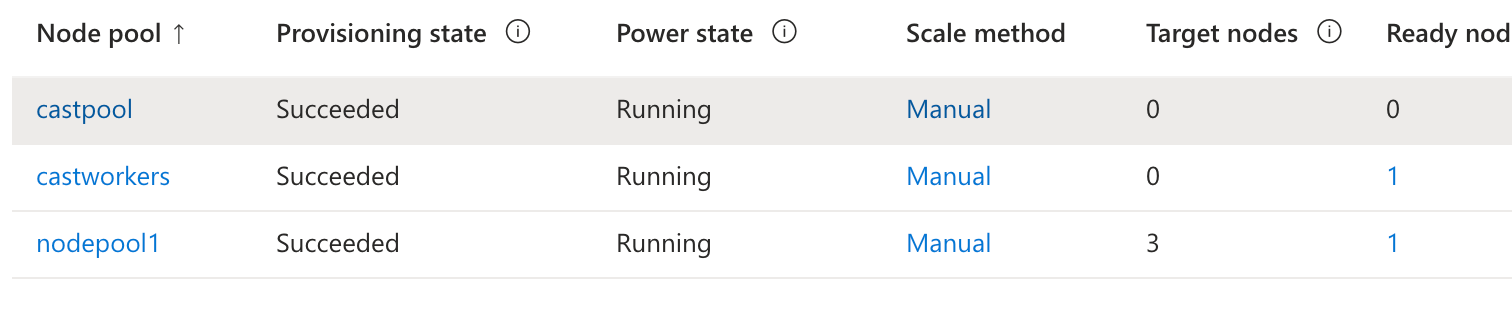
- Delete the
-
Trigger a reconciliation from the Cast AI console.
-
After the reconciliation is complete, re-run the rebalance to add nodes successfully.
AL2 deprecation issues (EKS)
If upgrading to v1.32 or v1.33 and experiencing issues with AL2 deprecation:
- Check that your node configuration has been updated to use either
FAMILY_AL2023orFAMILY_BOTTLEROCKET - Ensure a full reconciliation has been completed after updating the node configuration
- If nodes still fail to provision with the new OS family, contact Cast AI support for assistance
Next steps
After successfully upgrading your Kubernetes cluster:
- Verify that all your workloads are running correctly.
- Update any client applications or tools that interact with your cluster to ensure compatibility with the new Kubernetes version.