
Node updates
WarningThe Cast AI Kubernetes Security feature set is undergoing significant changes. Some features shown in this documentation are being deprecated and others are moving to the cluster view in the console. Screenshots and navigation paths may not reflect the current product. Updated documentation is in progress.
Keeping your Kubernetes cluster nodes up-to-date with the latest security patches is crucial for maintaining a secure and compliant environment. The Node updates feature in Cast AI provides a comprehensive overview of your nodes' update status. It enables you to automate the update process, ensuring that worker nodes always run the latest available image.
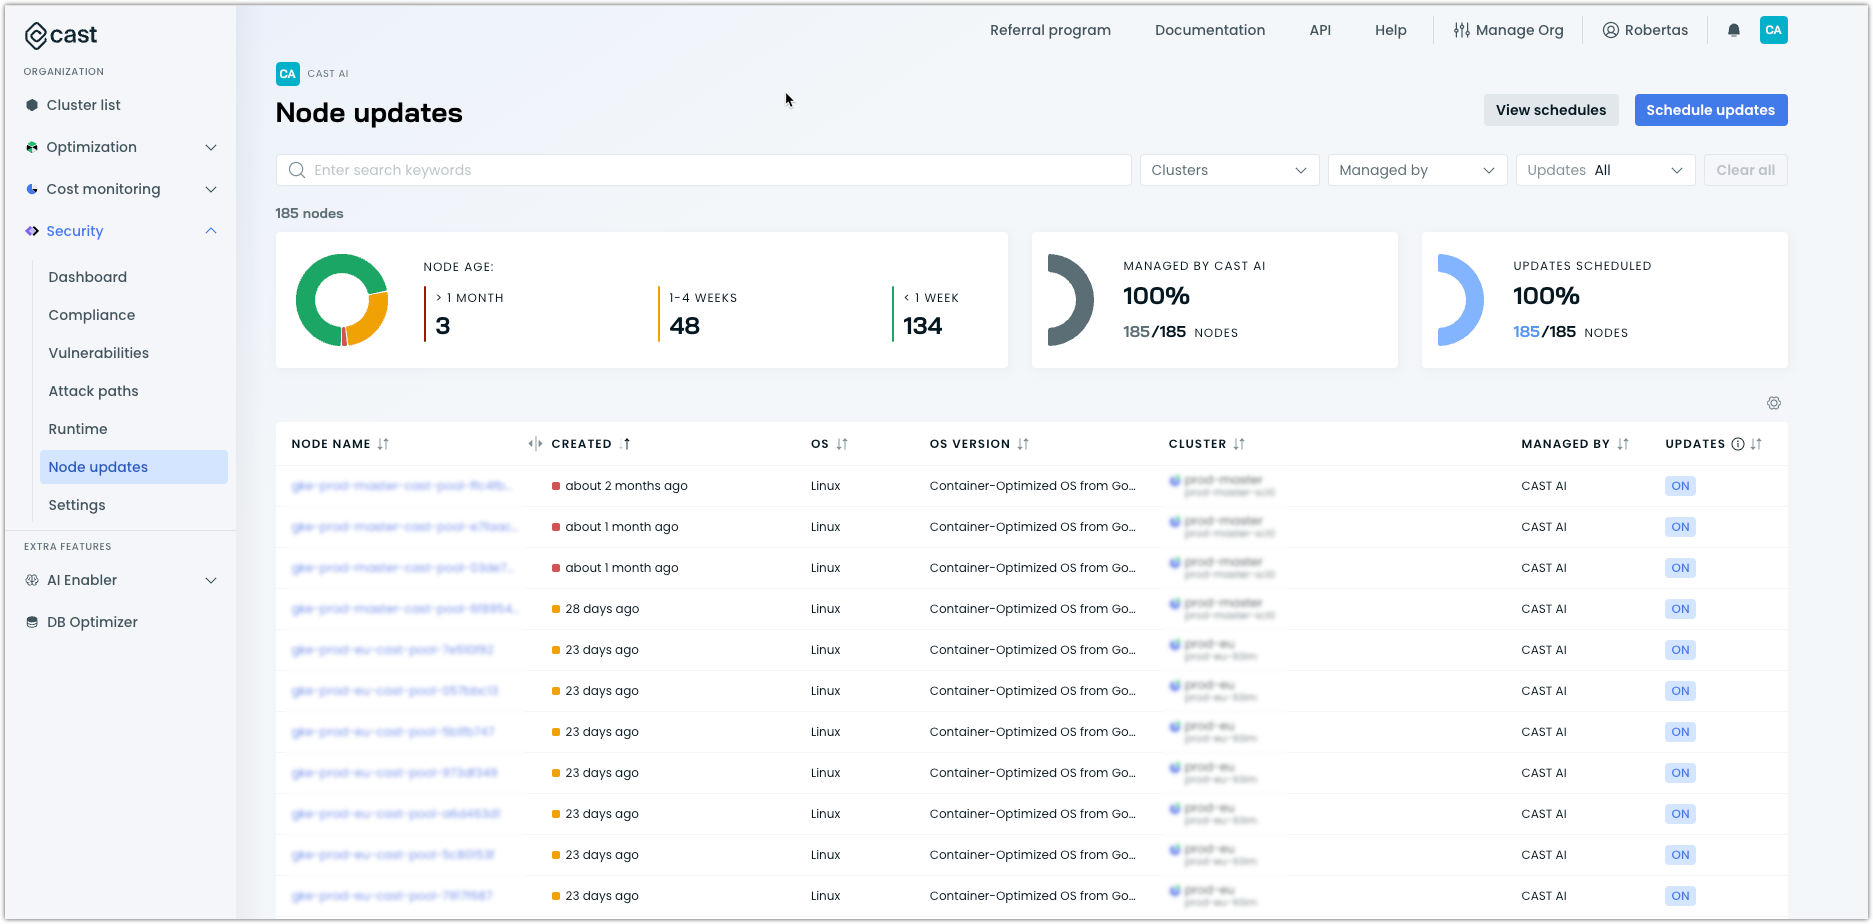
You can find the Node updates feature in the main menu of the Cast AI console, under the Security tab in the sidebar:
How Cast AI streamlines your node updates
OS vendors regularly release security patches to fix known vulnerabilities. Keeping your node image up-to-date reduces the risk of breaches and data compromises in Kubernetes clusters.
Moreover, regulatory and compliance requirements like SOC2 often require updating K8s environments with the latest security patches to ensure data protection and system integrity.
The Cast AI security feature addressed these challenges in two ways:
-
The node update page offers a comprehensive node update status overview: It provides information on your nodes’ age, the OS image installed, the service provider responsible for node provisioning, and whether any scheduled node updates are enabled. This report helps you demonstrate compliance with regulatory or internal security policy requirements.
Moreover, it immediately proves that your organization complies with regulatory or internal security policy requirements.
-
Automation of node updates: Cast AI enables you to schedule automated node updates, ensuring that worker nodes always run the latest available image. This automation aids in patching vulnerabilities and maintaining node security.
How to use the node update report
The Node Update report is the first view you see when you select the Node Update tab in the Security sidebar.
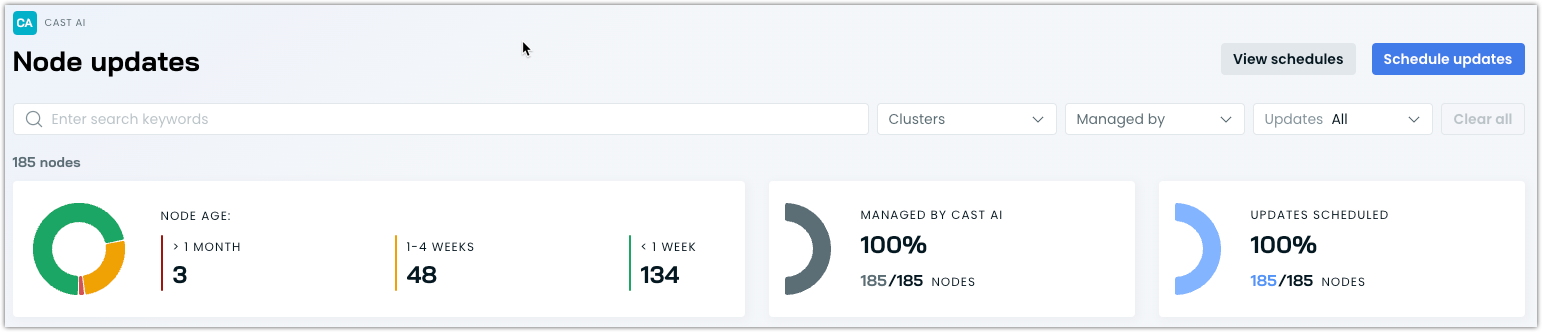
The report identifies your organization's nodes and provides an overview of their age, the percentage of nodes managed by Cast AI, and the number of nodes with scheduled image or rebalancing updates.

Below the overview, you'll find a detailed list of nodes, including information such as node name, creation date, OS name and version, and the node provisioning provider.
Useful tip:Each column in the node list allows you to order nodes based on the cluster they belong to, the vendor managing them, and their scheduled update status (enabled or disabled).
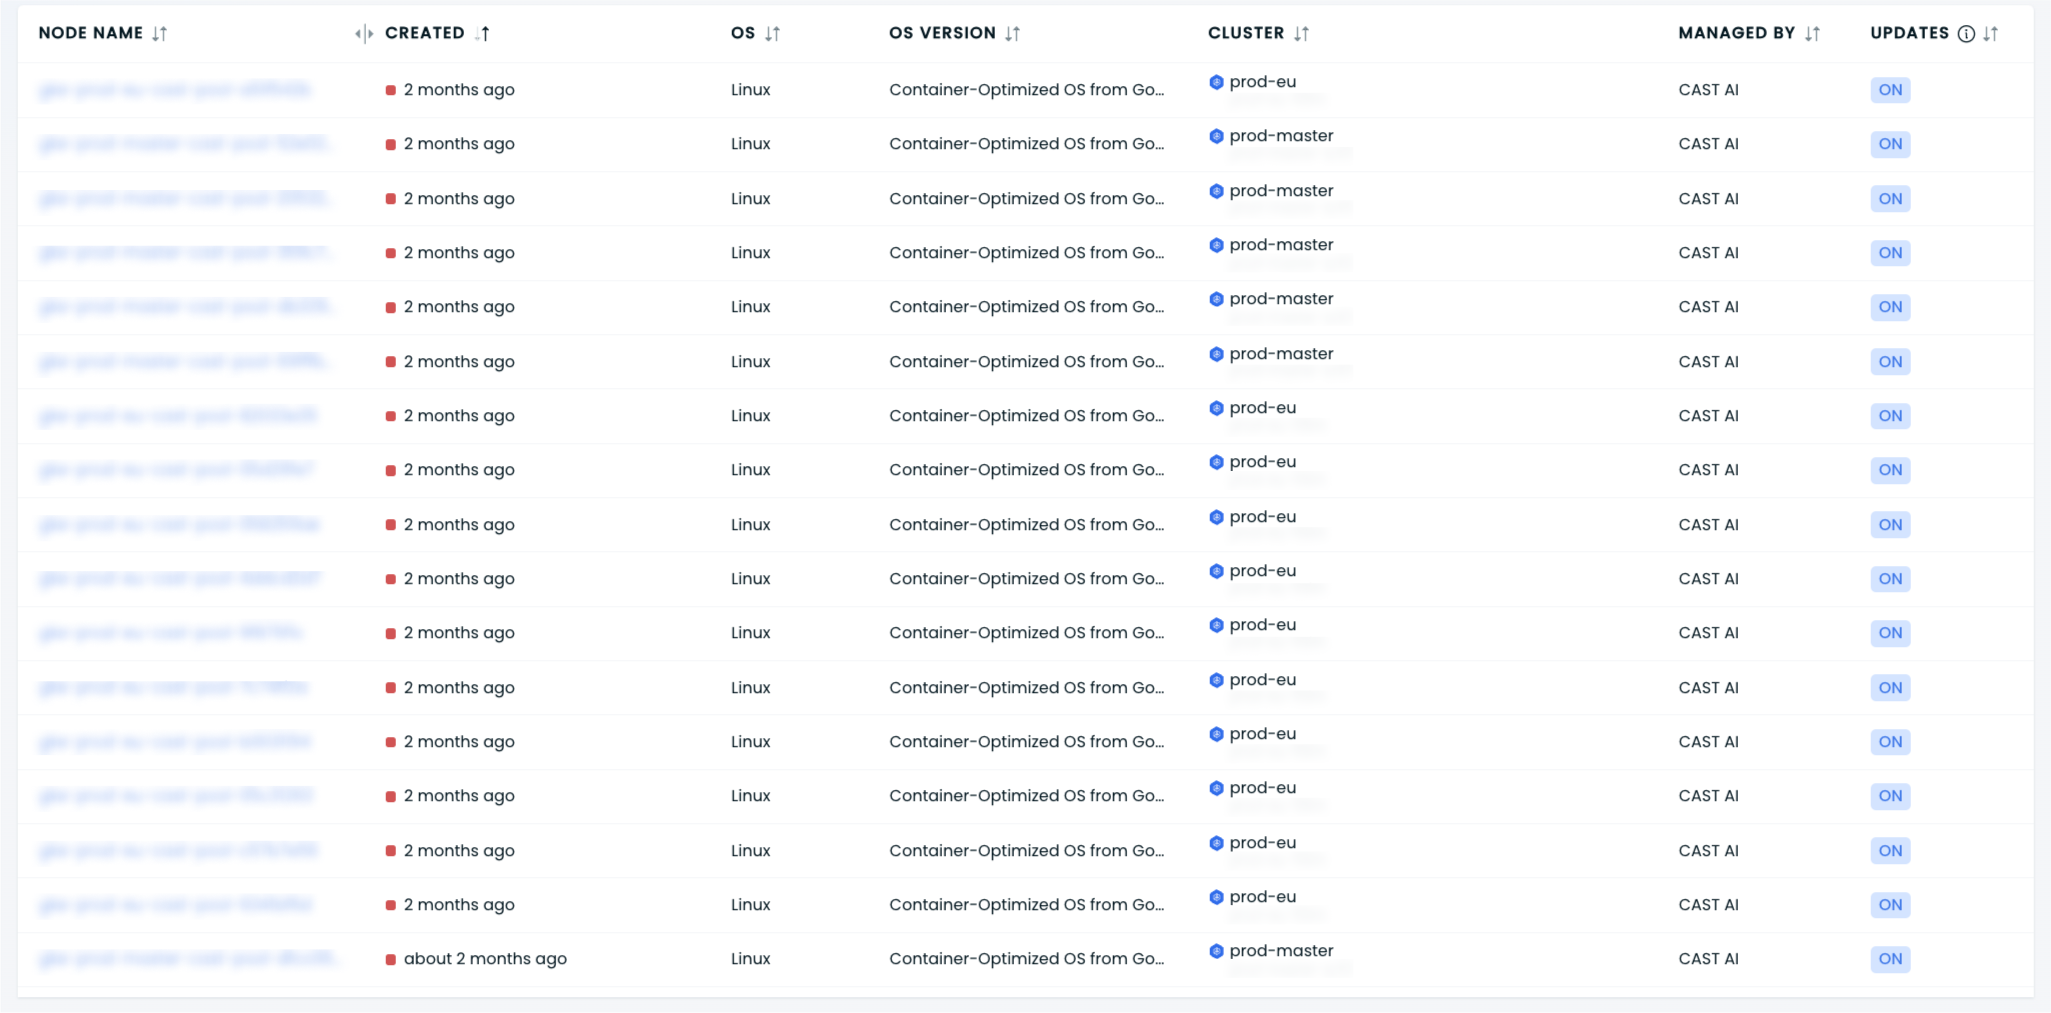
How to understand the Updates column
The Updates column in the node list indicates whether you have enabled the node update automation provided by Cast AI:
ON: the node has an assigned update schedule, and Cast AI will replace current nodes with nodes containing the latest available OS image version according to the defined schedule.OFF: the node's cluster is onboarded and managed by the Cast AI autoscaler, but no update schedules are assigned.UNKNOWN: Cast AI doesn't manage the cluster or node and lacks visibility into whether node updates are enabled through your cloud service provider (CSP) or other automation tools.
How to automate node updates
With Cast AI, you can automate the process of updating nodes to the latest version provided by your CSP, ensuring compatibility with your workers' Kubernetes version.
You can customize settings such as the nodes to update, the update period duration, execution time, and the batch size to update simultaneously.
The following sections dive deeper into enabling and setting the node update automation to match your needs.
Before you enable automation
The node update automation feature is only available to users with onboarded clusters. For more details, refer to the Getting started section.
Node update automation follows the logic of Scheduled Rebalancing, so review the preparation activities to handle potentially problematic workloads and minimize disruption.
Step 1: Create your update schedule
Once your clusters are onboarded, you can start scheduling worker node updates. The first step is to create an update schedule. Click on the Schedule updates button in the top right:
Alternatively, hover over the OFF in the Updates column of the Node update report and use the Create update schedule option:

This step opens a node update schedule creator, which allows you to specify your settings:
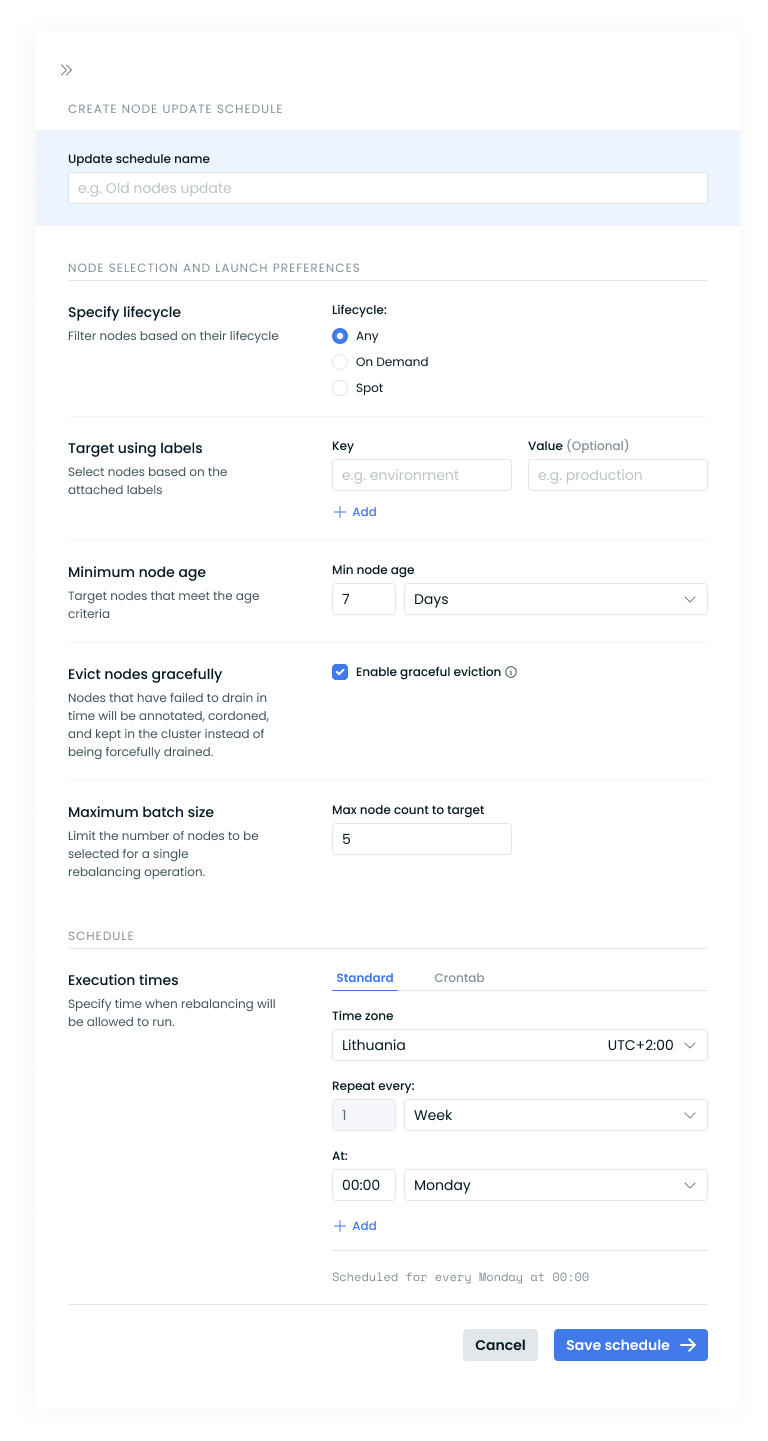
Here's an explanation of each setting:
| Setting | Value | Required? |
|---|---|---|
| Update schedule name | Add the name of the update schedule. We recommend naming your node update schedules meaningfully to distinguish them from rebalancing schedules. | Yes |
| Specify resource offering | Specify the node's resource offering: spot, on-demand, or any. | Yes |
| Target using labels | Select nodes based on their labels. Key-value pairs are provided as NodeSelector terms. If you provide multiple labels, Cast AI uses the AND logic, targeting only the nodes satisfying all listed selector terms. | No |
| Minimum node age | Specify the minimum period between node creation and targeting it with automated schedules. Enter the number of days per your regulatory or security policy requirements for node OS patching. 0 means that Cast AI considers nodes of any age. | Yes |
| Evict nodes gracefully | Decide what happens to nodes that fail to drain until a predefined timeout of 20 minutes. If checked, they receive a rebalancing.cast.ai/status=drain-failed annotation instead of being forcefully drained. | No |
| Maximum batch size | Specify the maximum number of nodes for updating in one operation. 0 indicates that Cast AI selects all nodes in the cluster. | No |
| Execution time | Adjust execution time by providing a timezone or a crontab expression. | Yes |
After configuring the settings and saving your schedule, you can assign it to clusters.
Step 2: Assign the schedule to your clusters
Once you have created an update schedule, you can assign it to clusters to enable automated node updates. You can do this immediately or at a later time.
Access your saved schedules by clicking the View schedules button in the Node updates view:
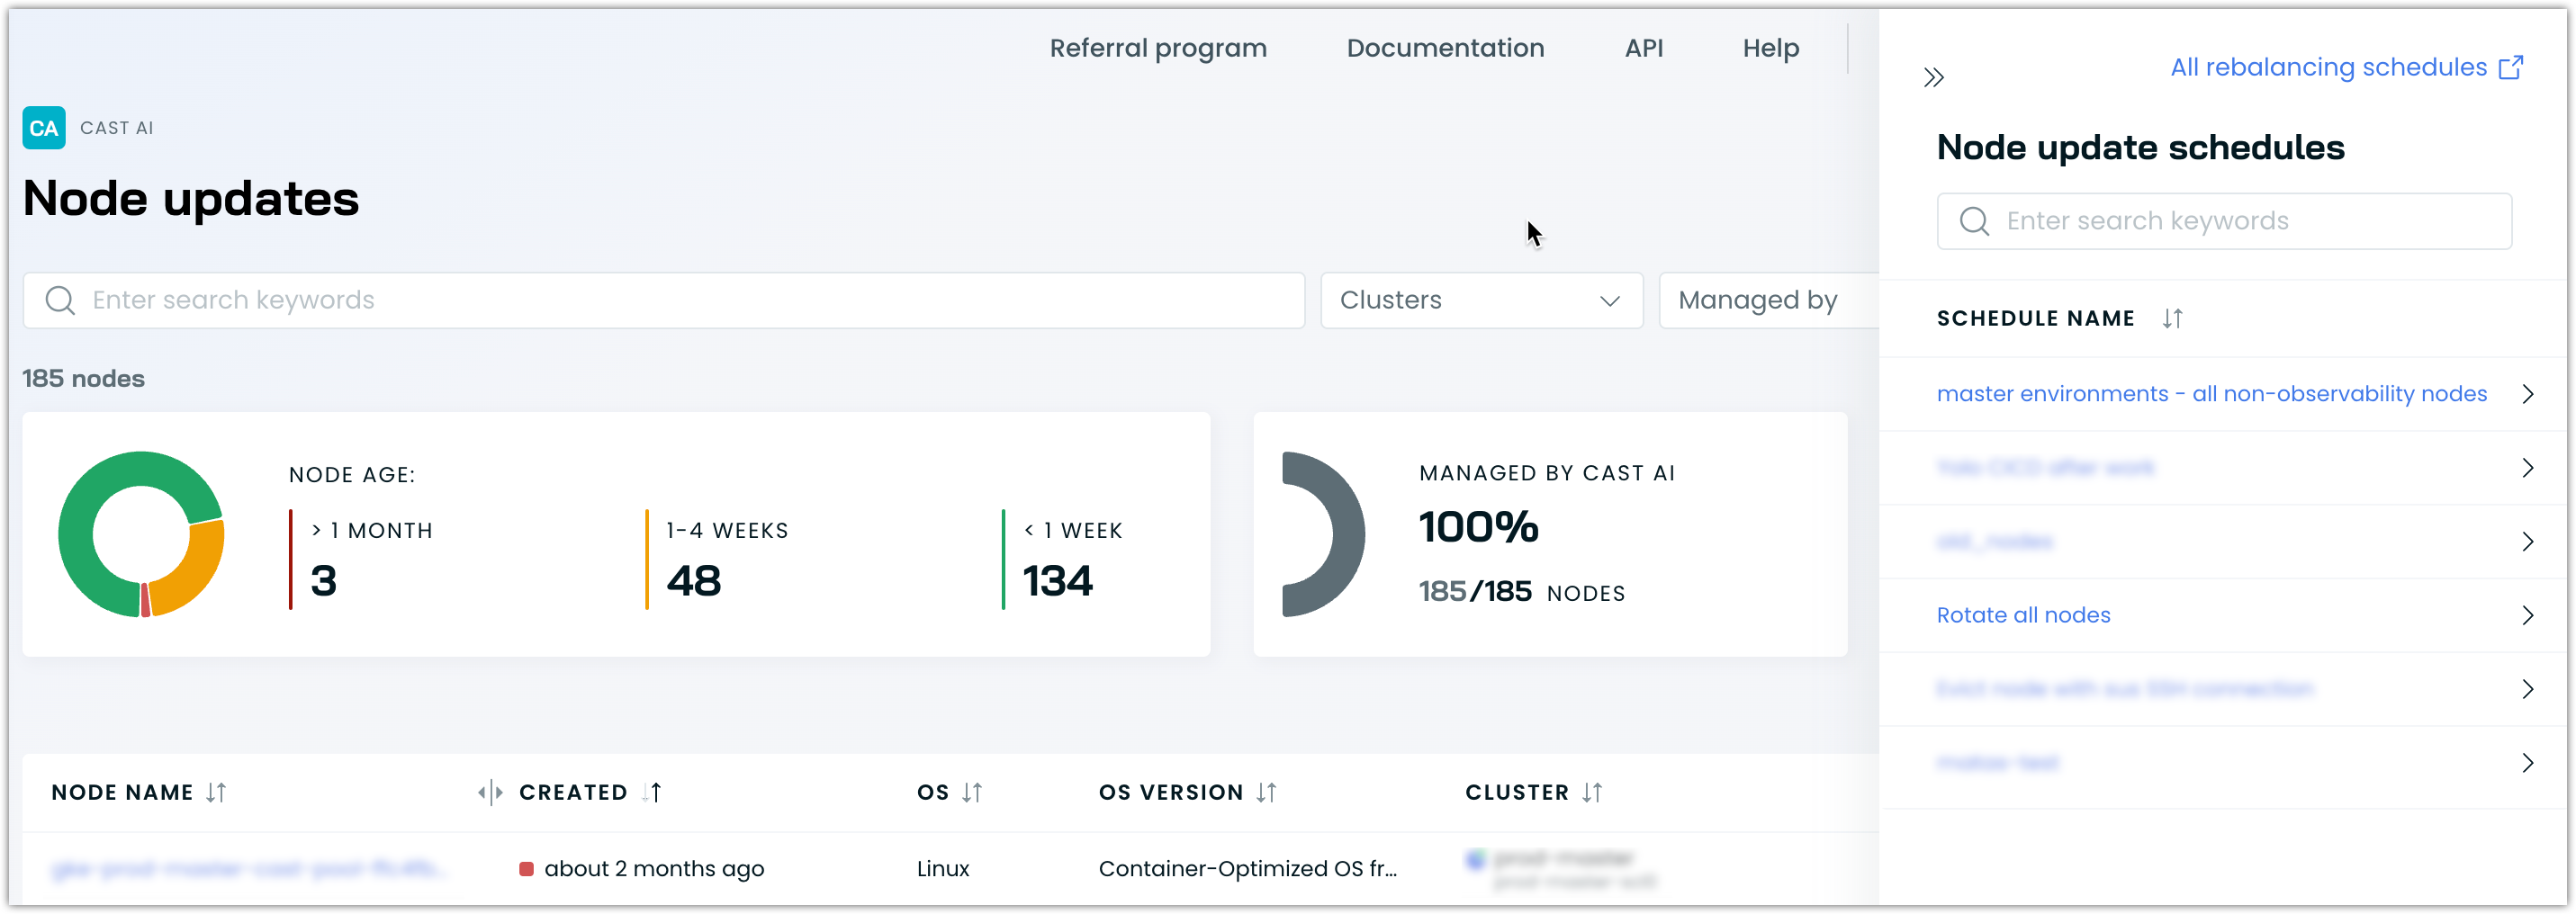
Click on the name of the schedule you want to use and navigate to the Assigned to tab, where you can select the clusters in which you want the schedule to run:
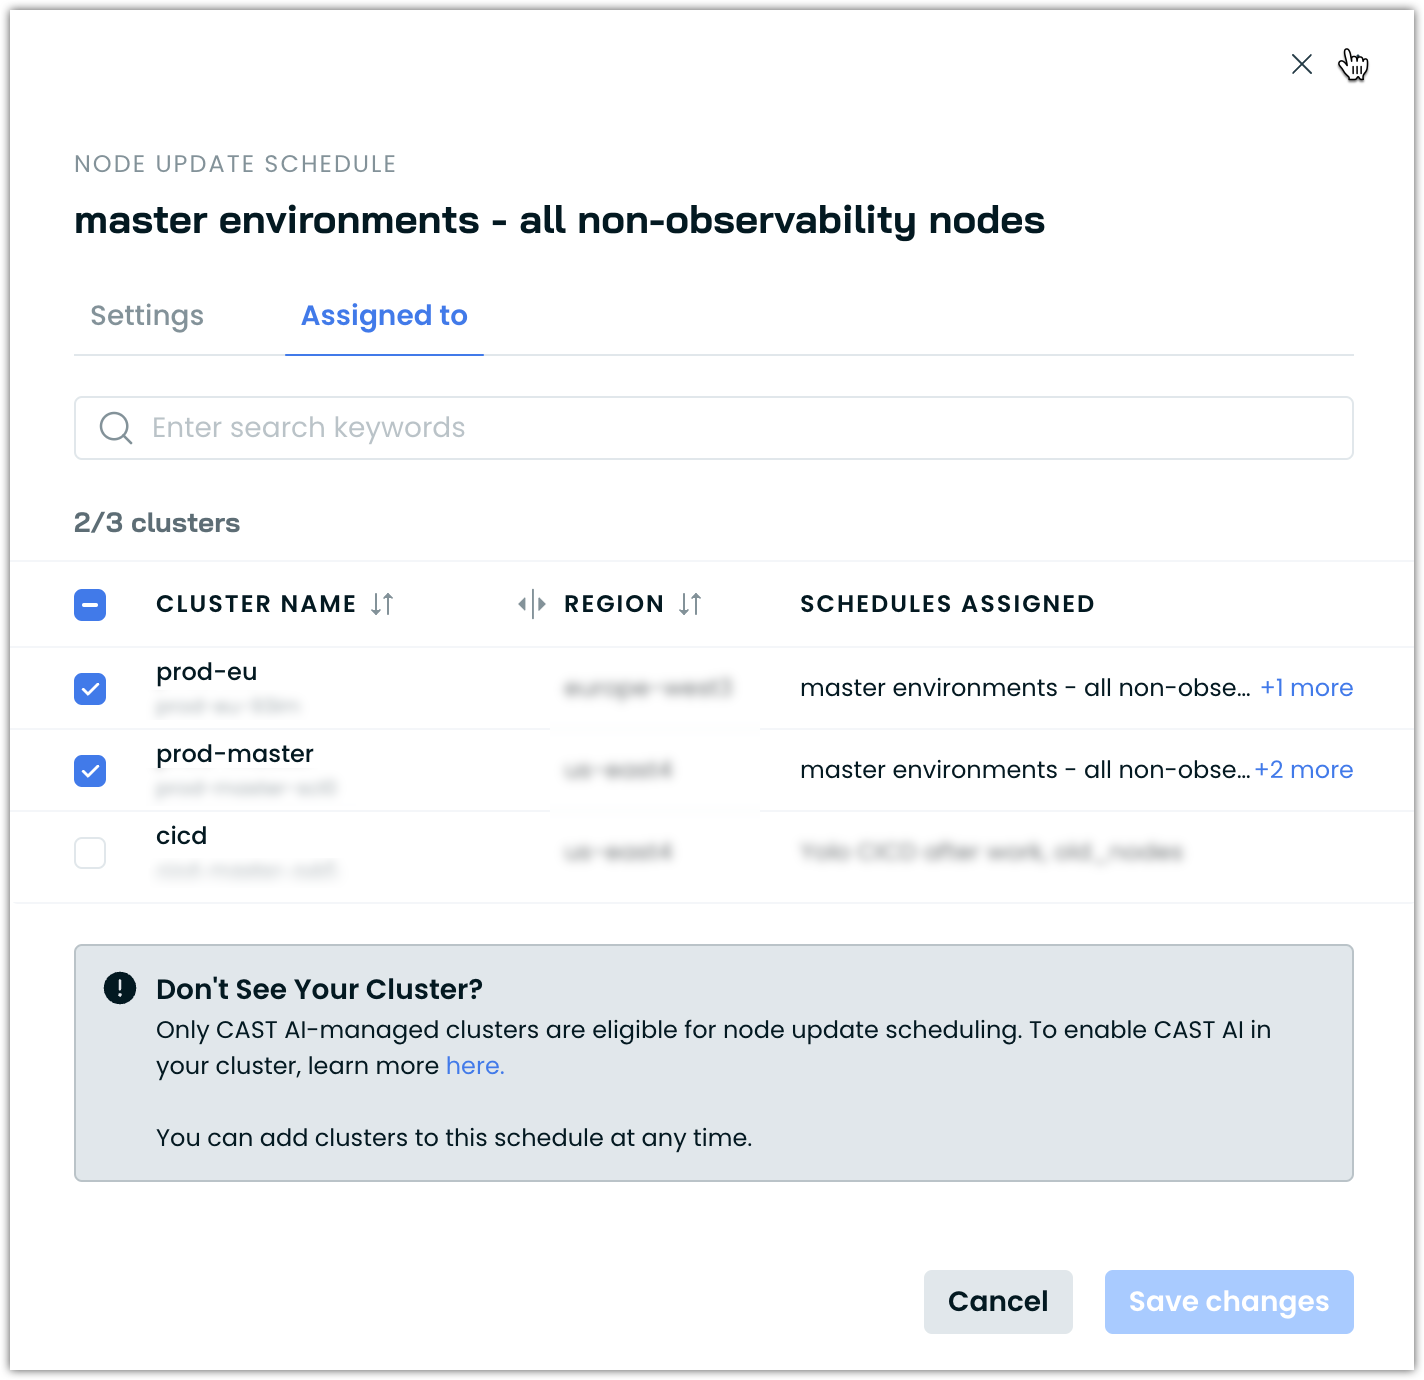
Refer to the Updates column in the node update report to see all nodes assigned to a schedule.
NoteOne node can have multiple schedules assigned. Hover over the
ONstatus in the report to view the assigned scheduled updates and their expected execution times.
