
How-to: Managing existing user groups
Learn how to modify user group settings, manage access controls, and delete groups.
Before you begin
Ensure that:
- You have the Owner role in your organization
- You understand how group changes will affect user access
- You've planned any necessary adjustments to API keys or automated processes
Adding and removing members
All of the operations described below take place on the "User groups" page in the Cast AI console:
-
Navigate to the organization settings
- Select "Manage organization" at the top of the Cast AI console:
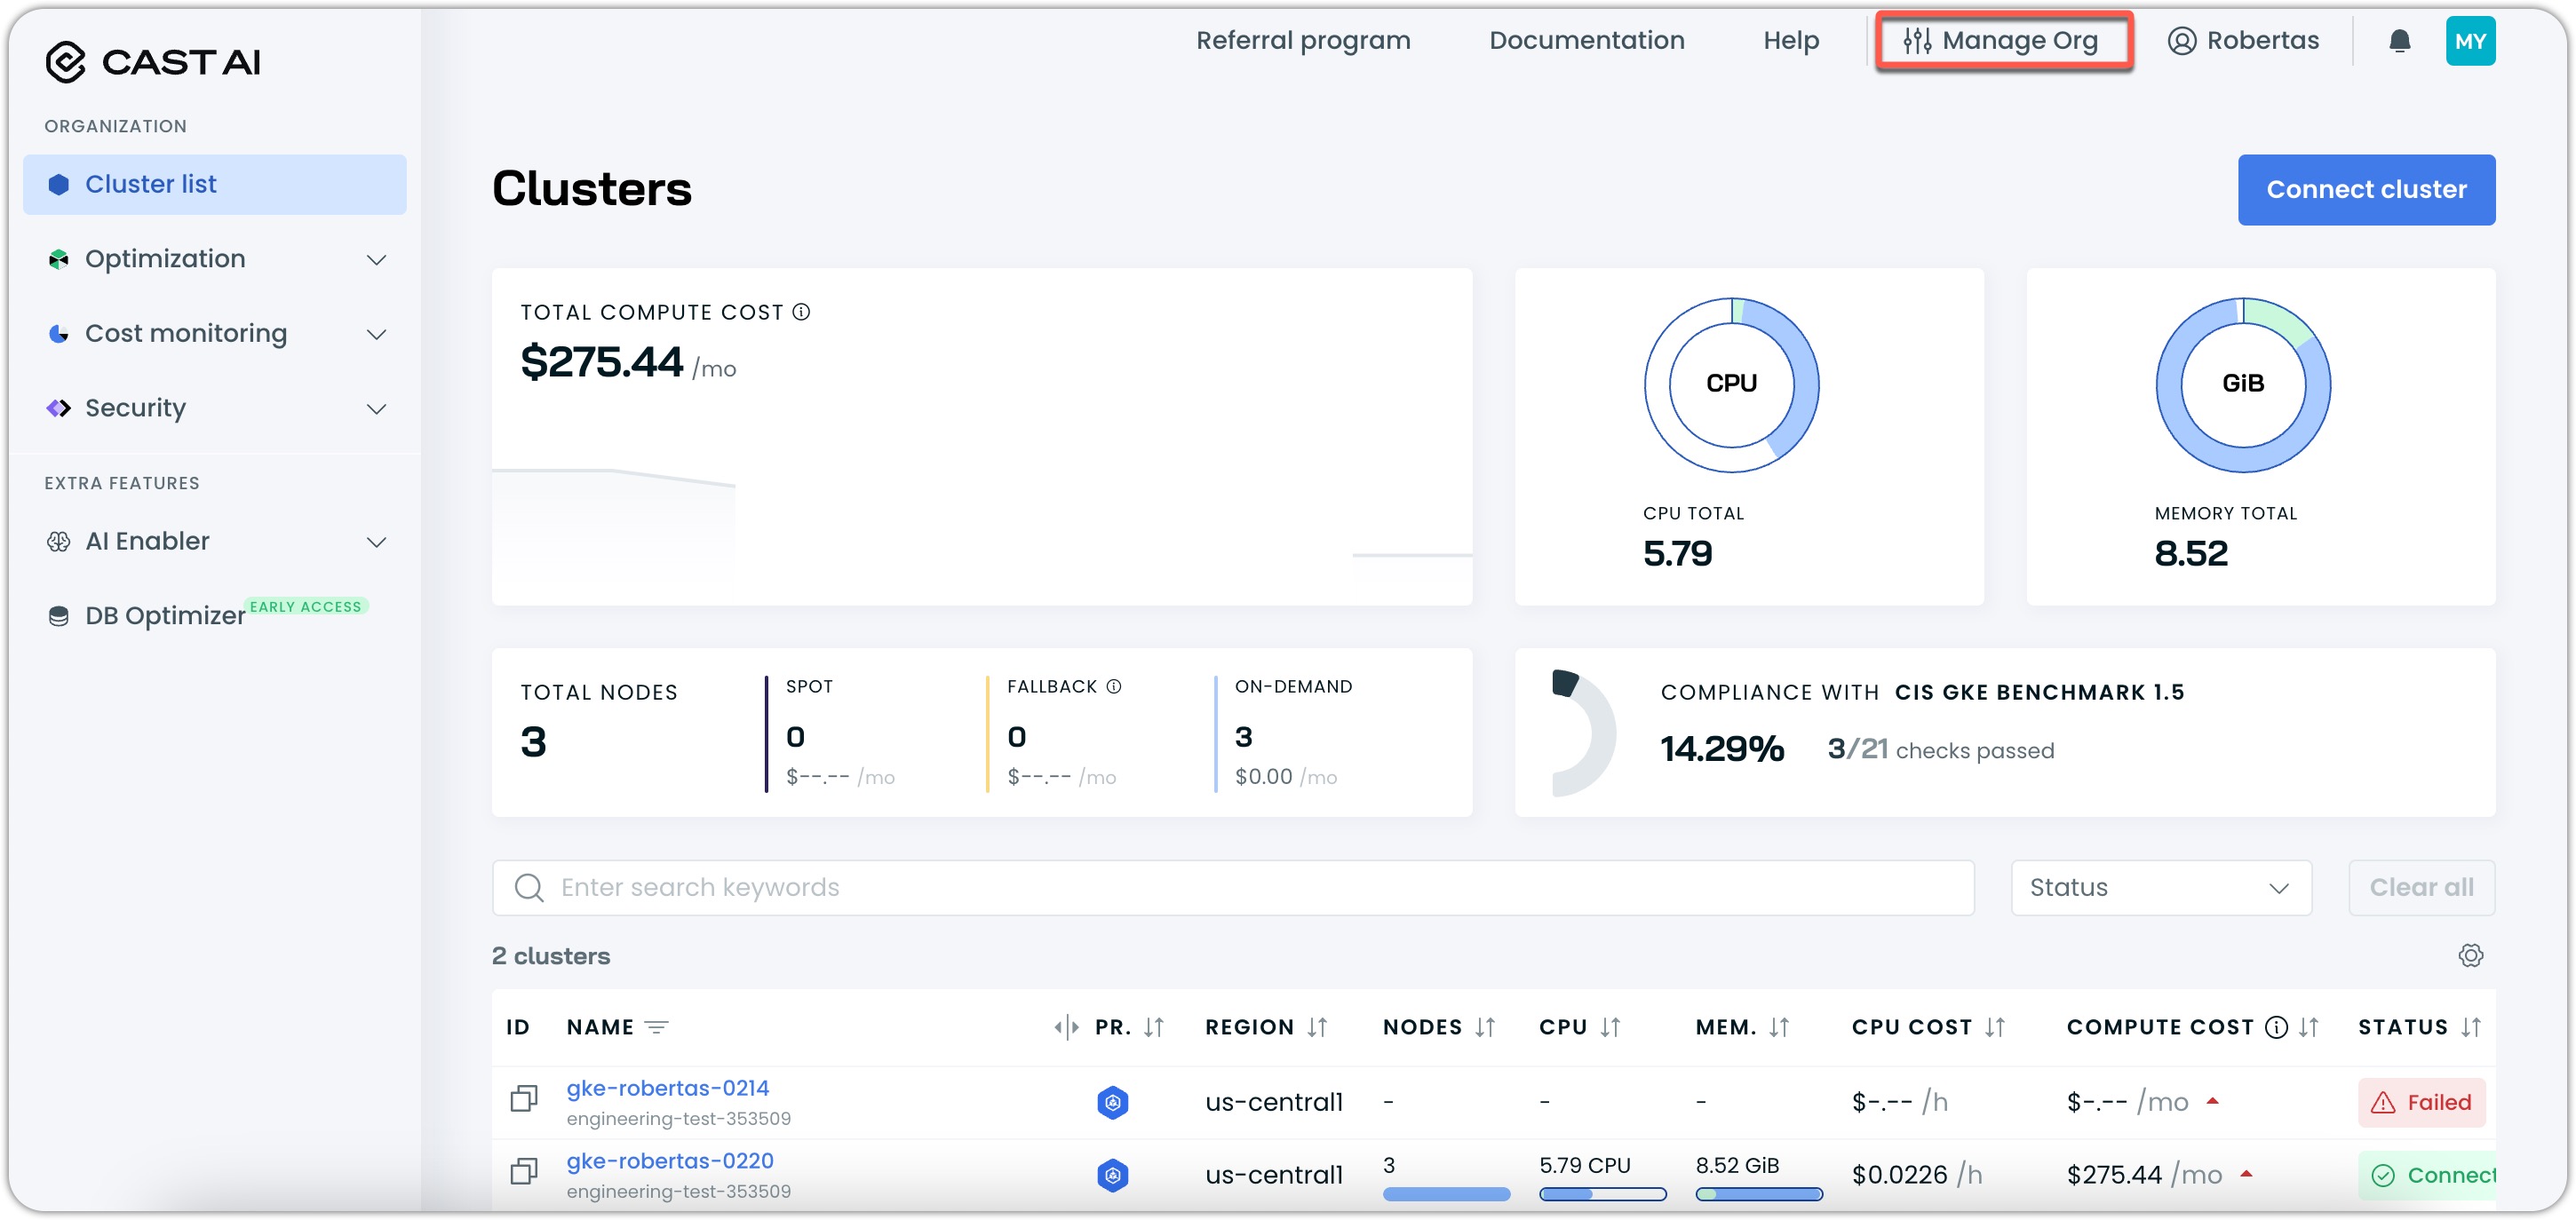
- Select "Manage organization" at the top of the Cast AI console:
-
Go to User groups
-
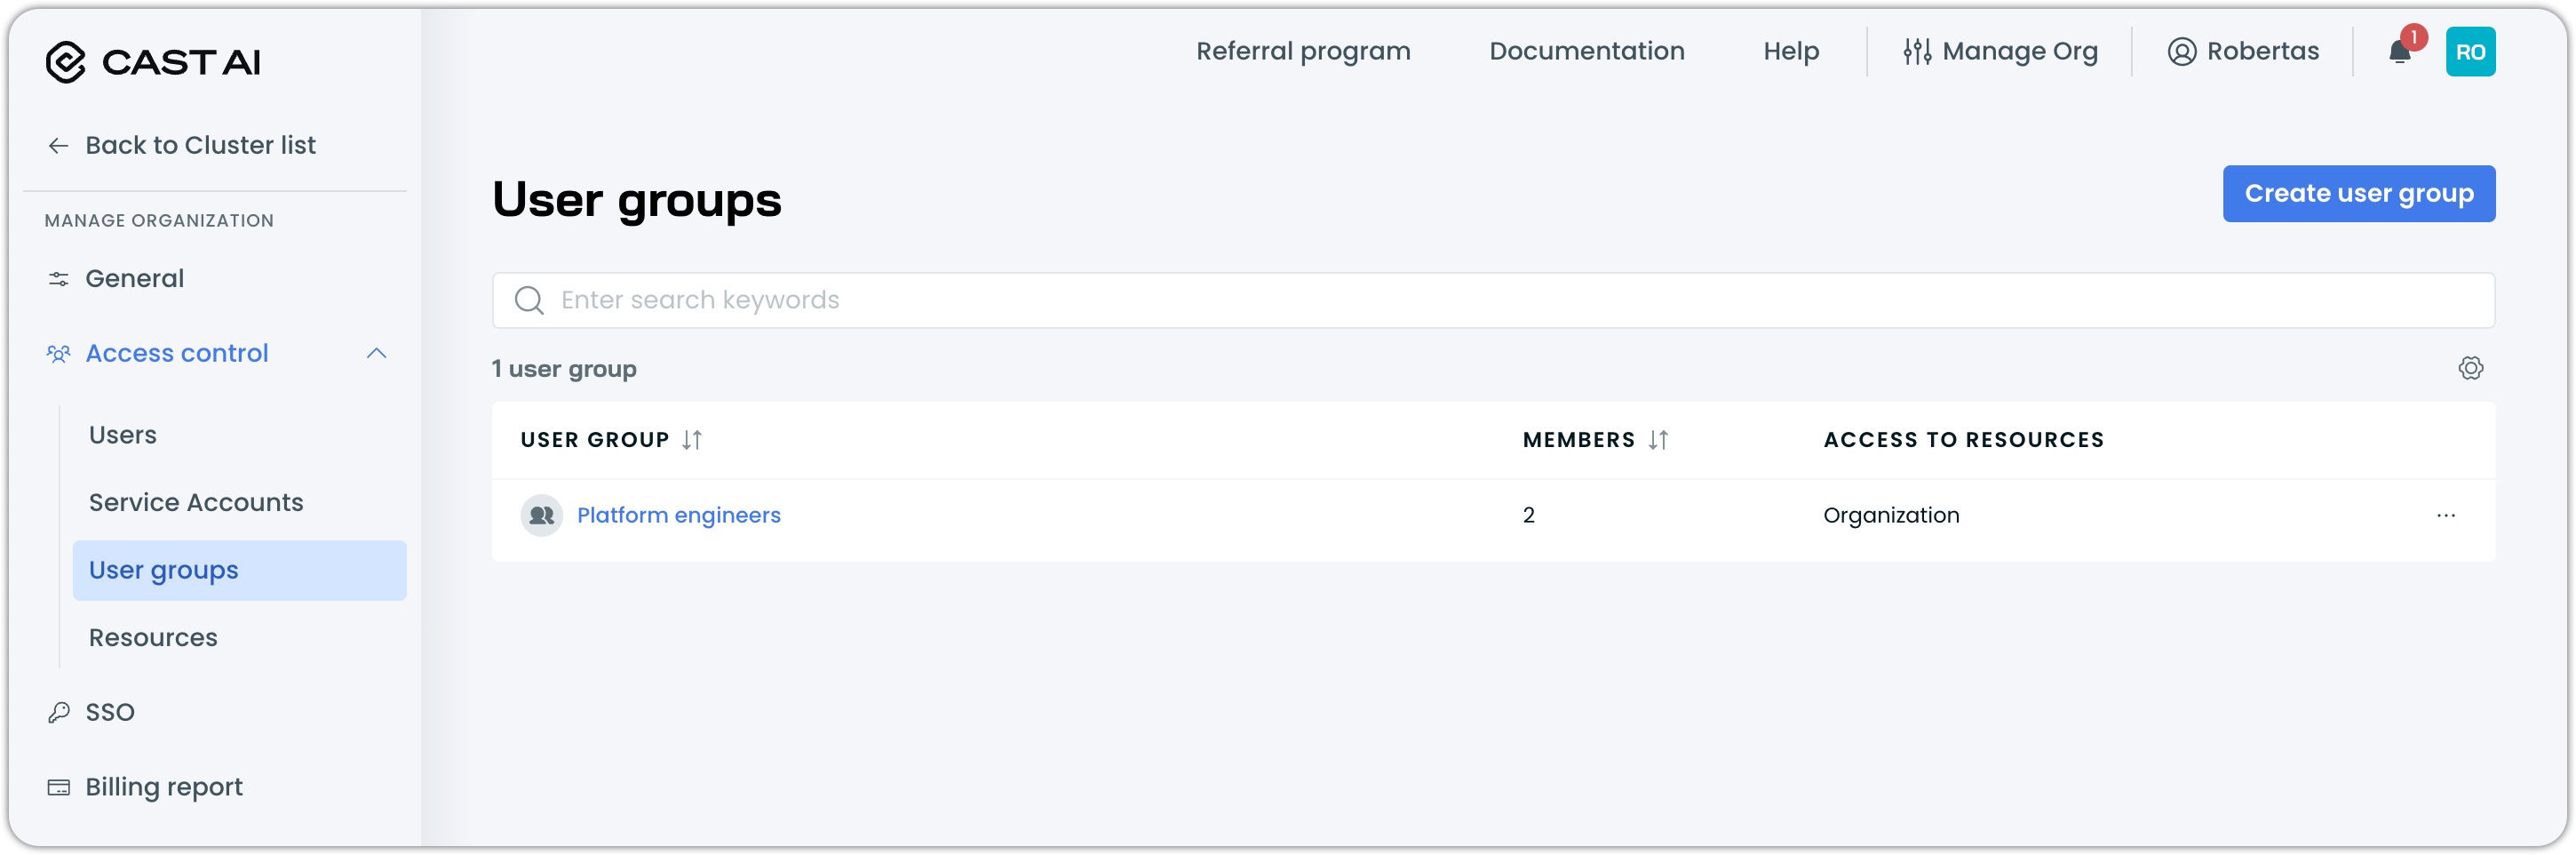
In the organization profile view, go to "Access control" > "User groups" in the navigation sidebar on the left-hand side:
-
Add members to a group
-
Select the group you want to modify:

- This will open a user group configuration drawer.
-
Go to the "Users" tab
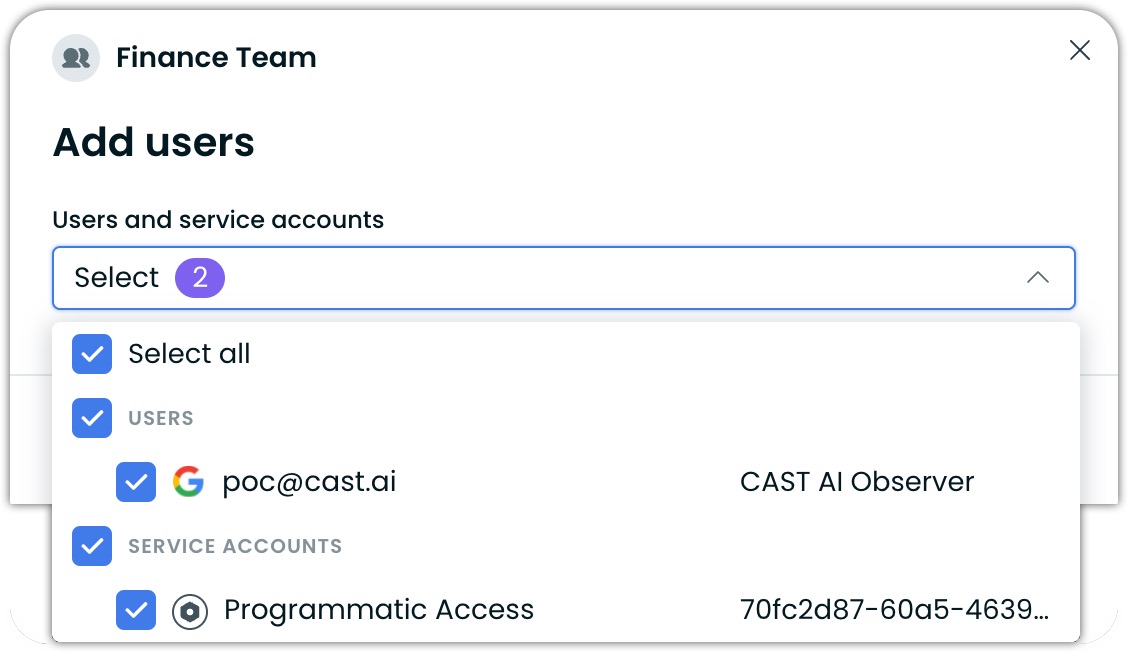
- Click "+ Add users" :

- Select the users
- Select the users and/or service accounts you wish to add from the list from the list:
- Confirm selection
- Click "Add user" to confirm the addition of the selected users and/or service accounts.
The user group will populate with the newly added members immediately.
Remove members from a group
-
Select the group you want to modify:
- This will open a user group configuration drawer.
-
Go to the "Users" tab
-
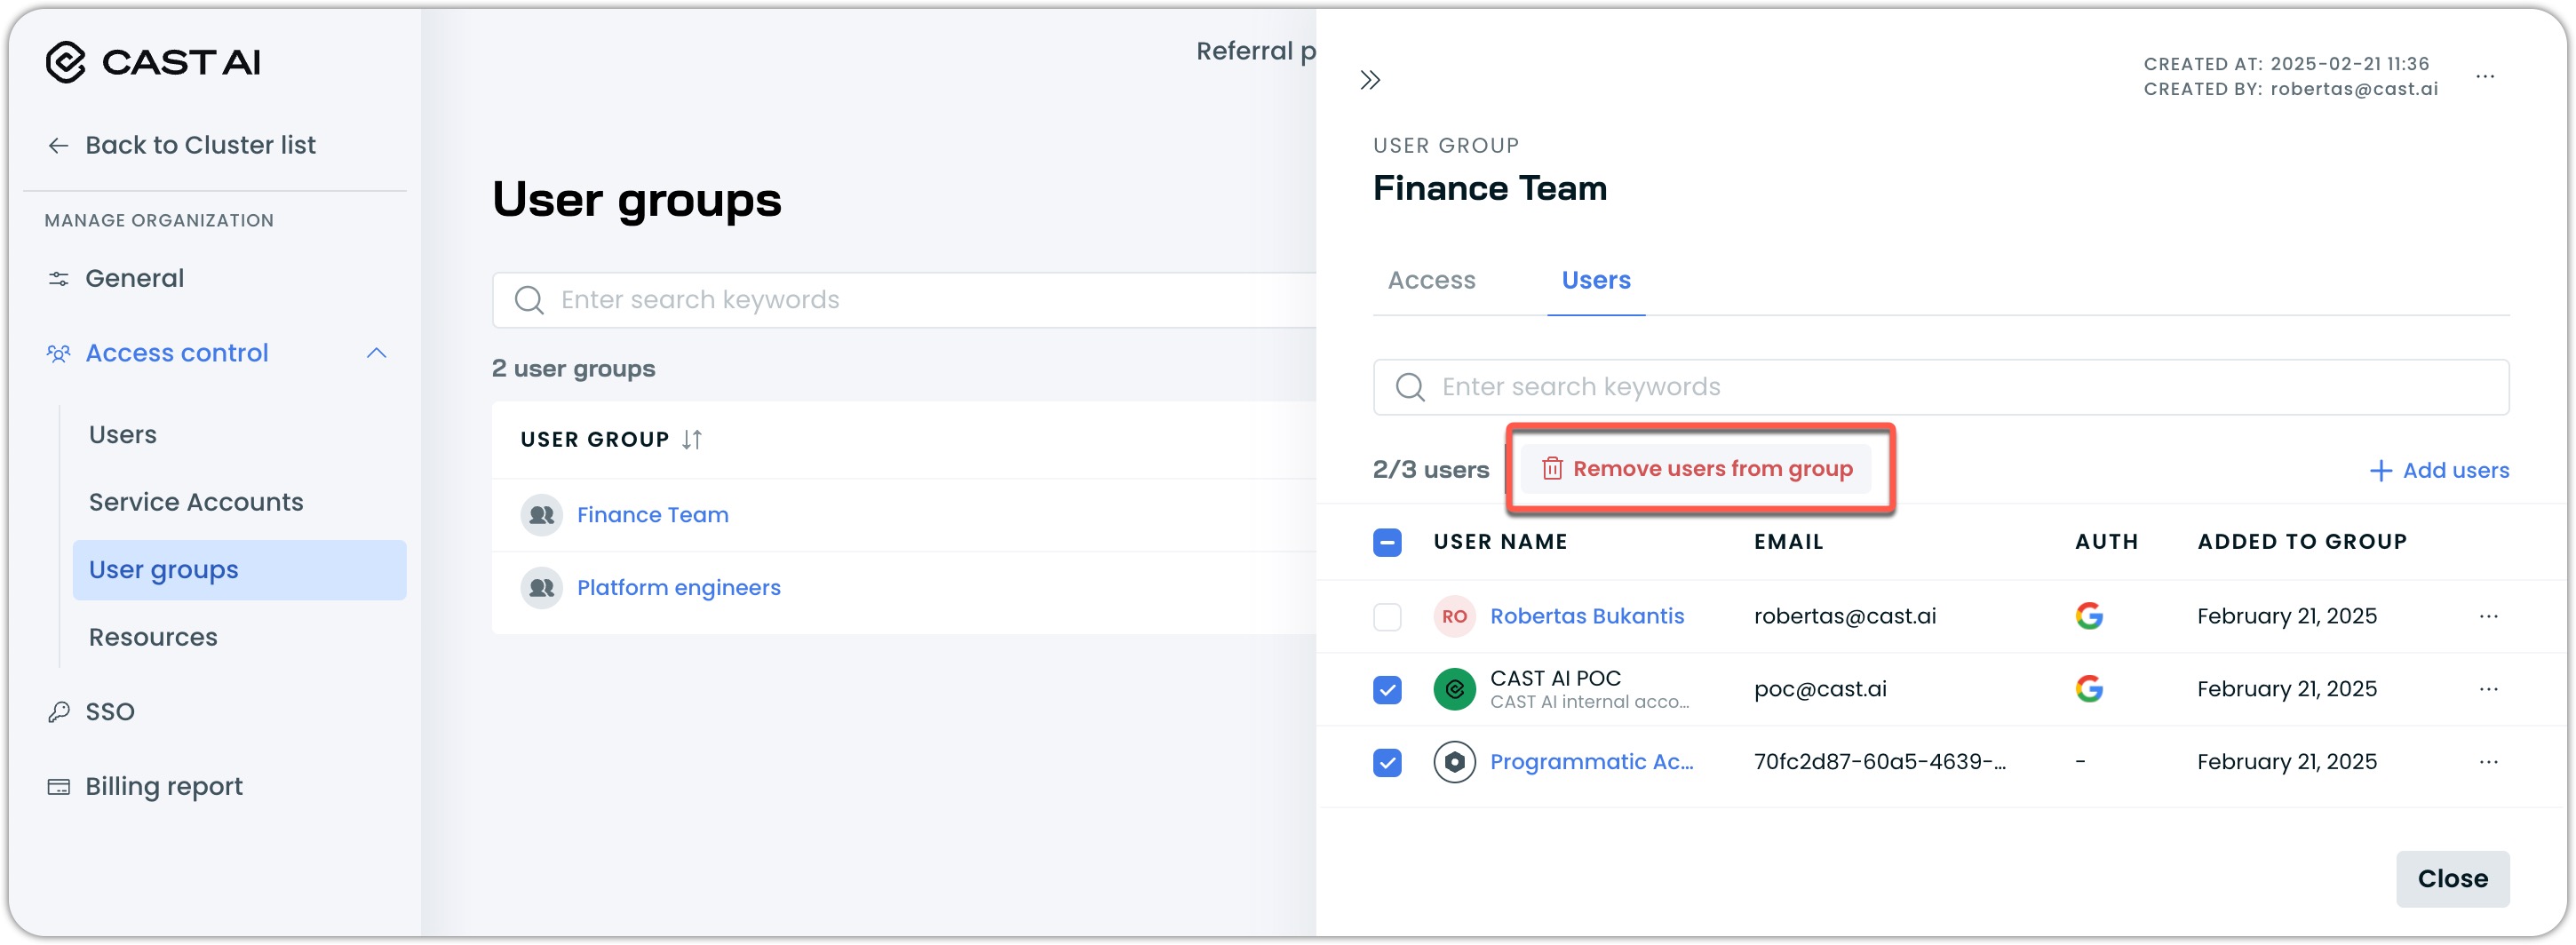
Select the users to remove
You can either remove a single user/service account from the list or select multiple ones and remove them in bulk.-
To remove a single user or service account from the list, click the (
⋮) symbol next to its name and select 'Remove from group":
-
To remove users or service accounts in bulk, select the ones you wish to remove using the checkboxes and click "Remove users from group":
-
-
When prompted to confirm, click "Remove".
Adjusting resource access
Resource access can be configured at both organization and resource (cluster) levels through separate role assignments.
WarningChanging a group's role affects all members simultaneously. This might impact:
- Access to resources
- API key functionality
- Automated processes
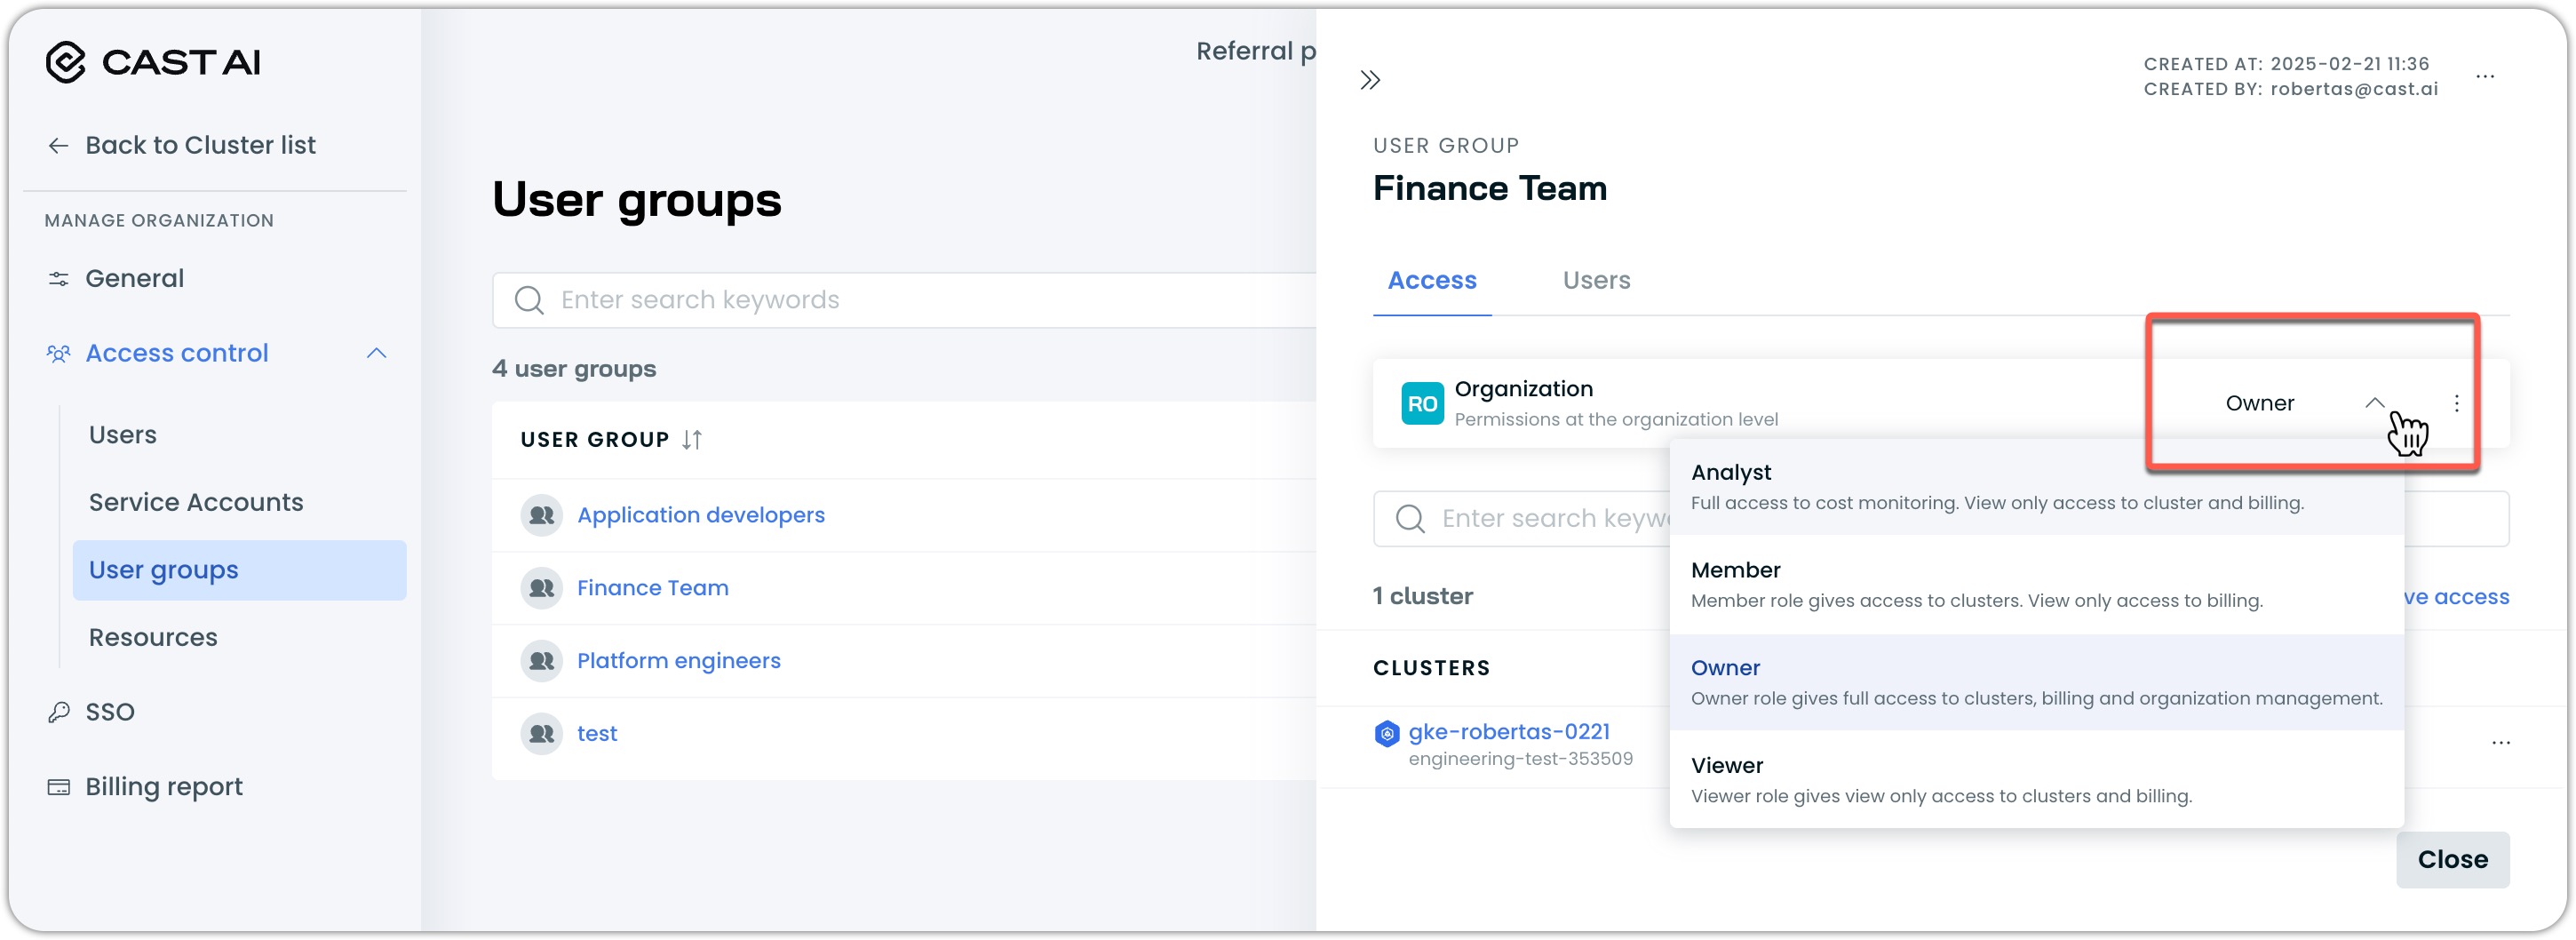
Change organization-level access
To change a user group's access at the organizational level, do the following:
-
Select the group you want to modify:
- This will open a user group configuration drawer.
-
Select role:
-
At the top of the resource access view, set an organization-wide role from the dropdown:
-
This sets the base access level for all resources at the organization level.
Revoke access
To revoke a user group's organizational-level access:
-
Click the (
⋮) symbol in the organizational-level permissions card and select "Revoke access":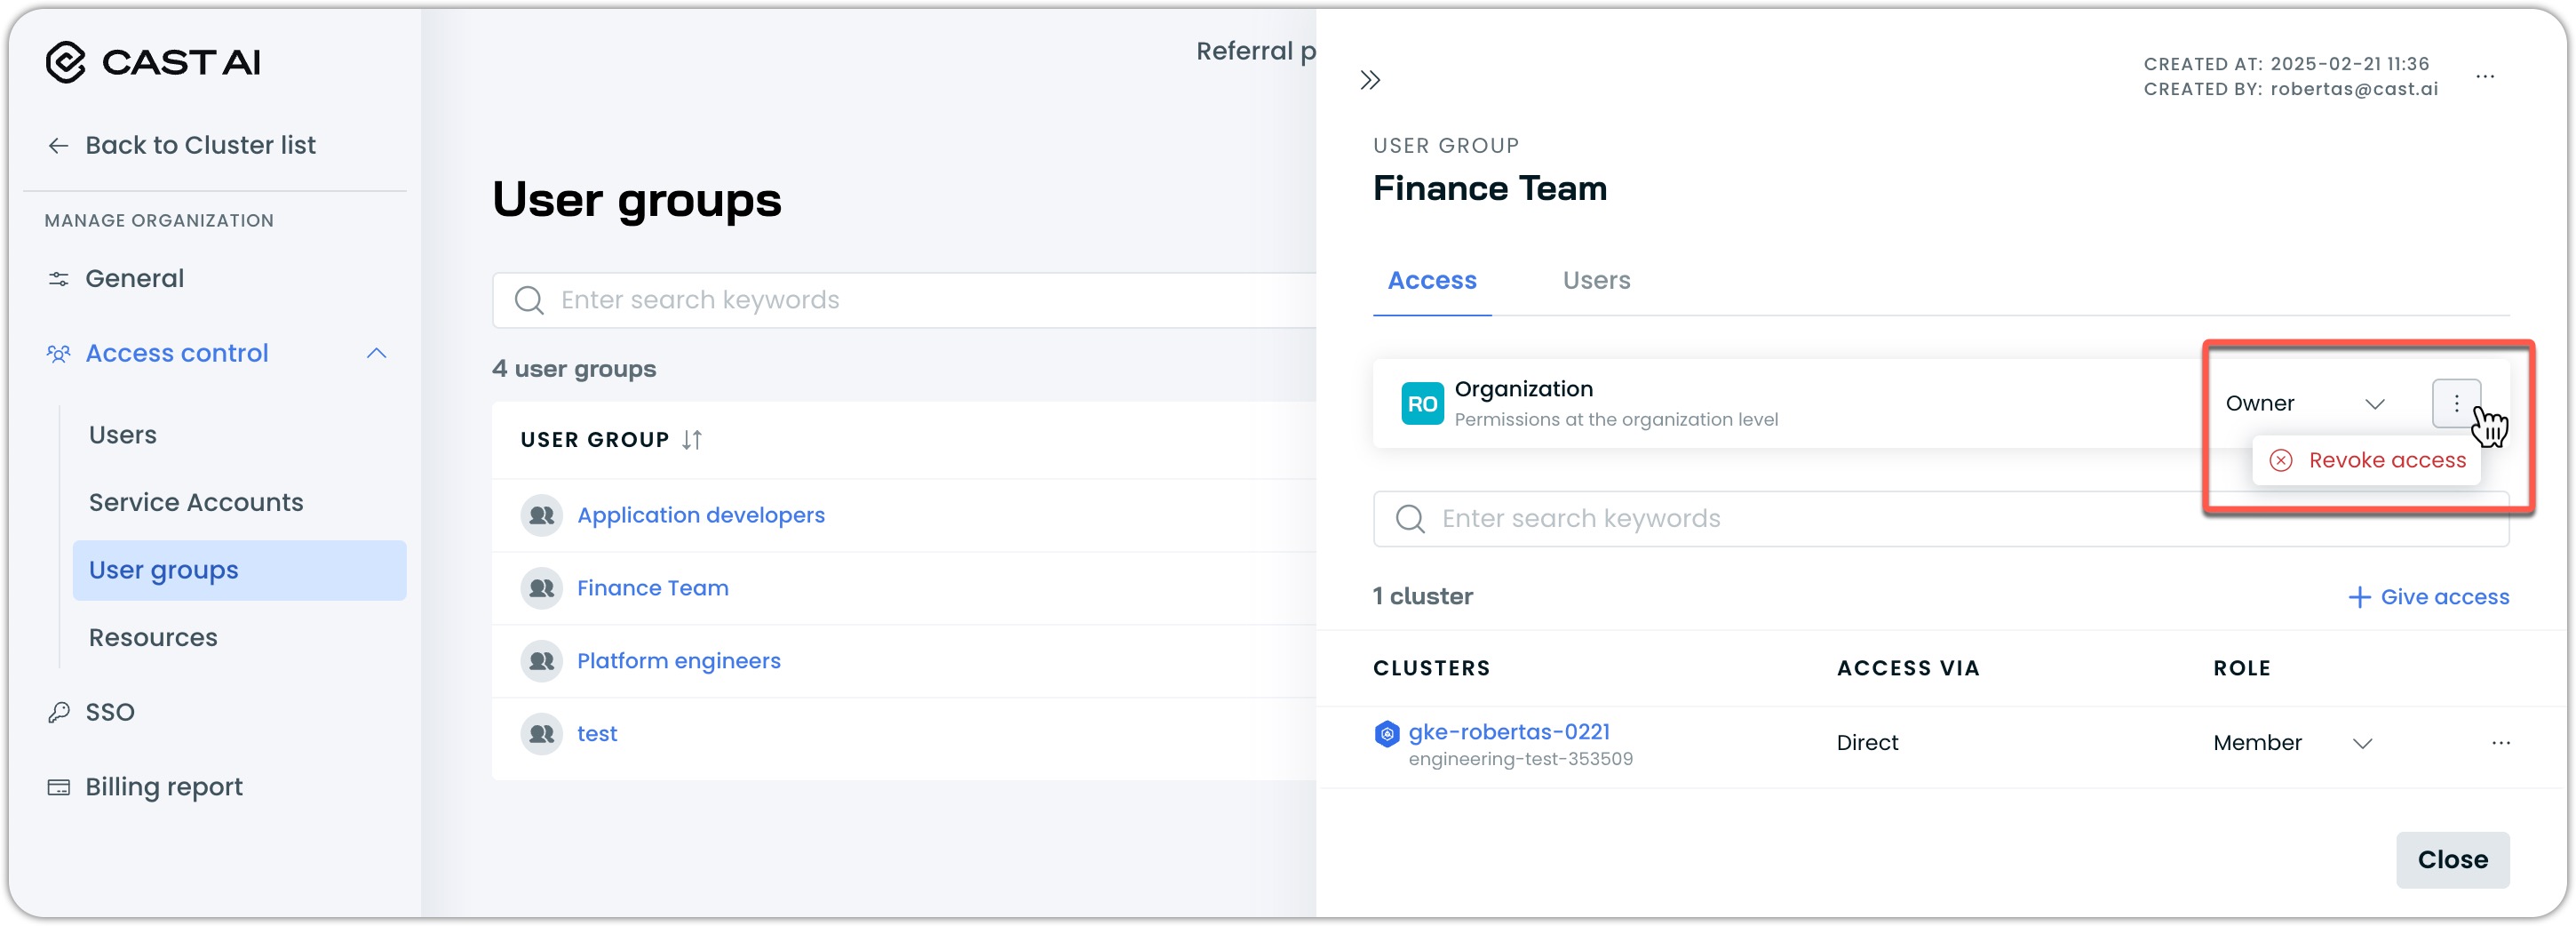
WarningRevoking a user group's organization-level access will leave the group without any access to resources.
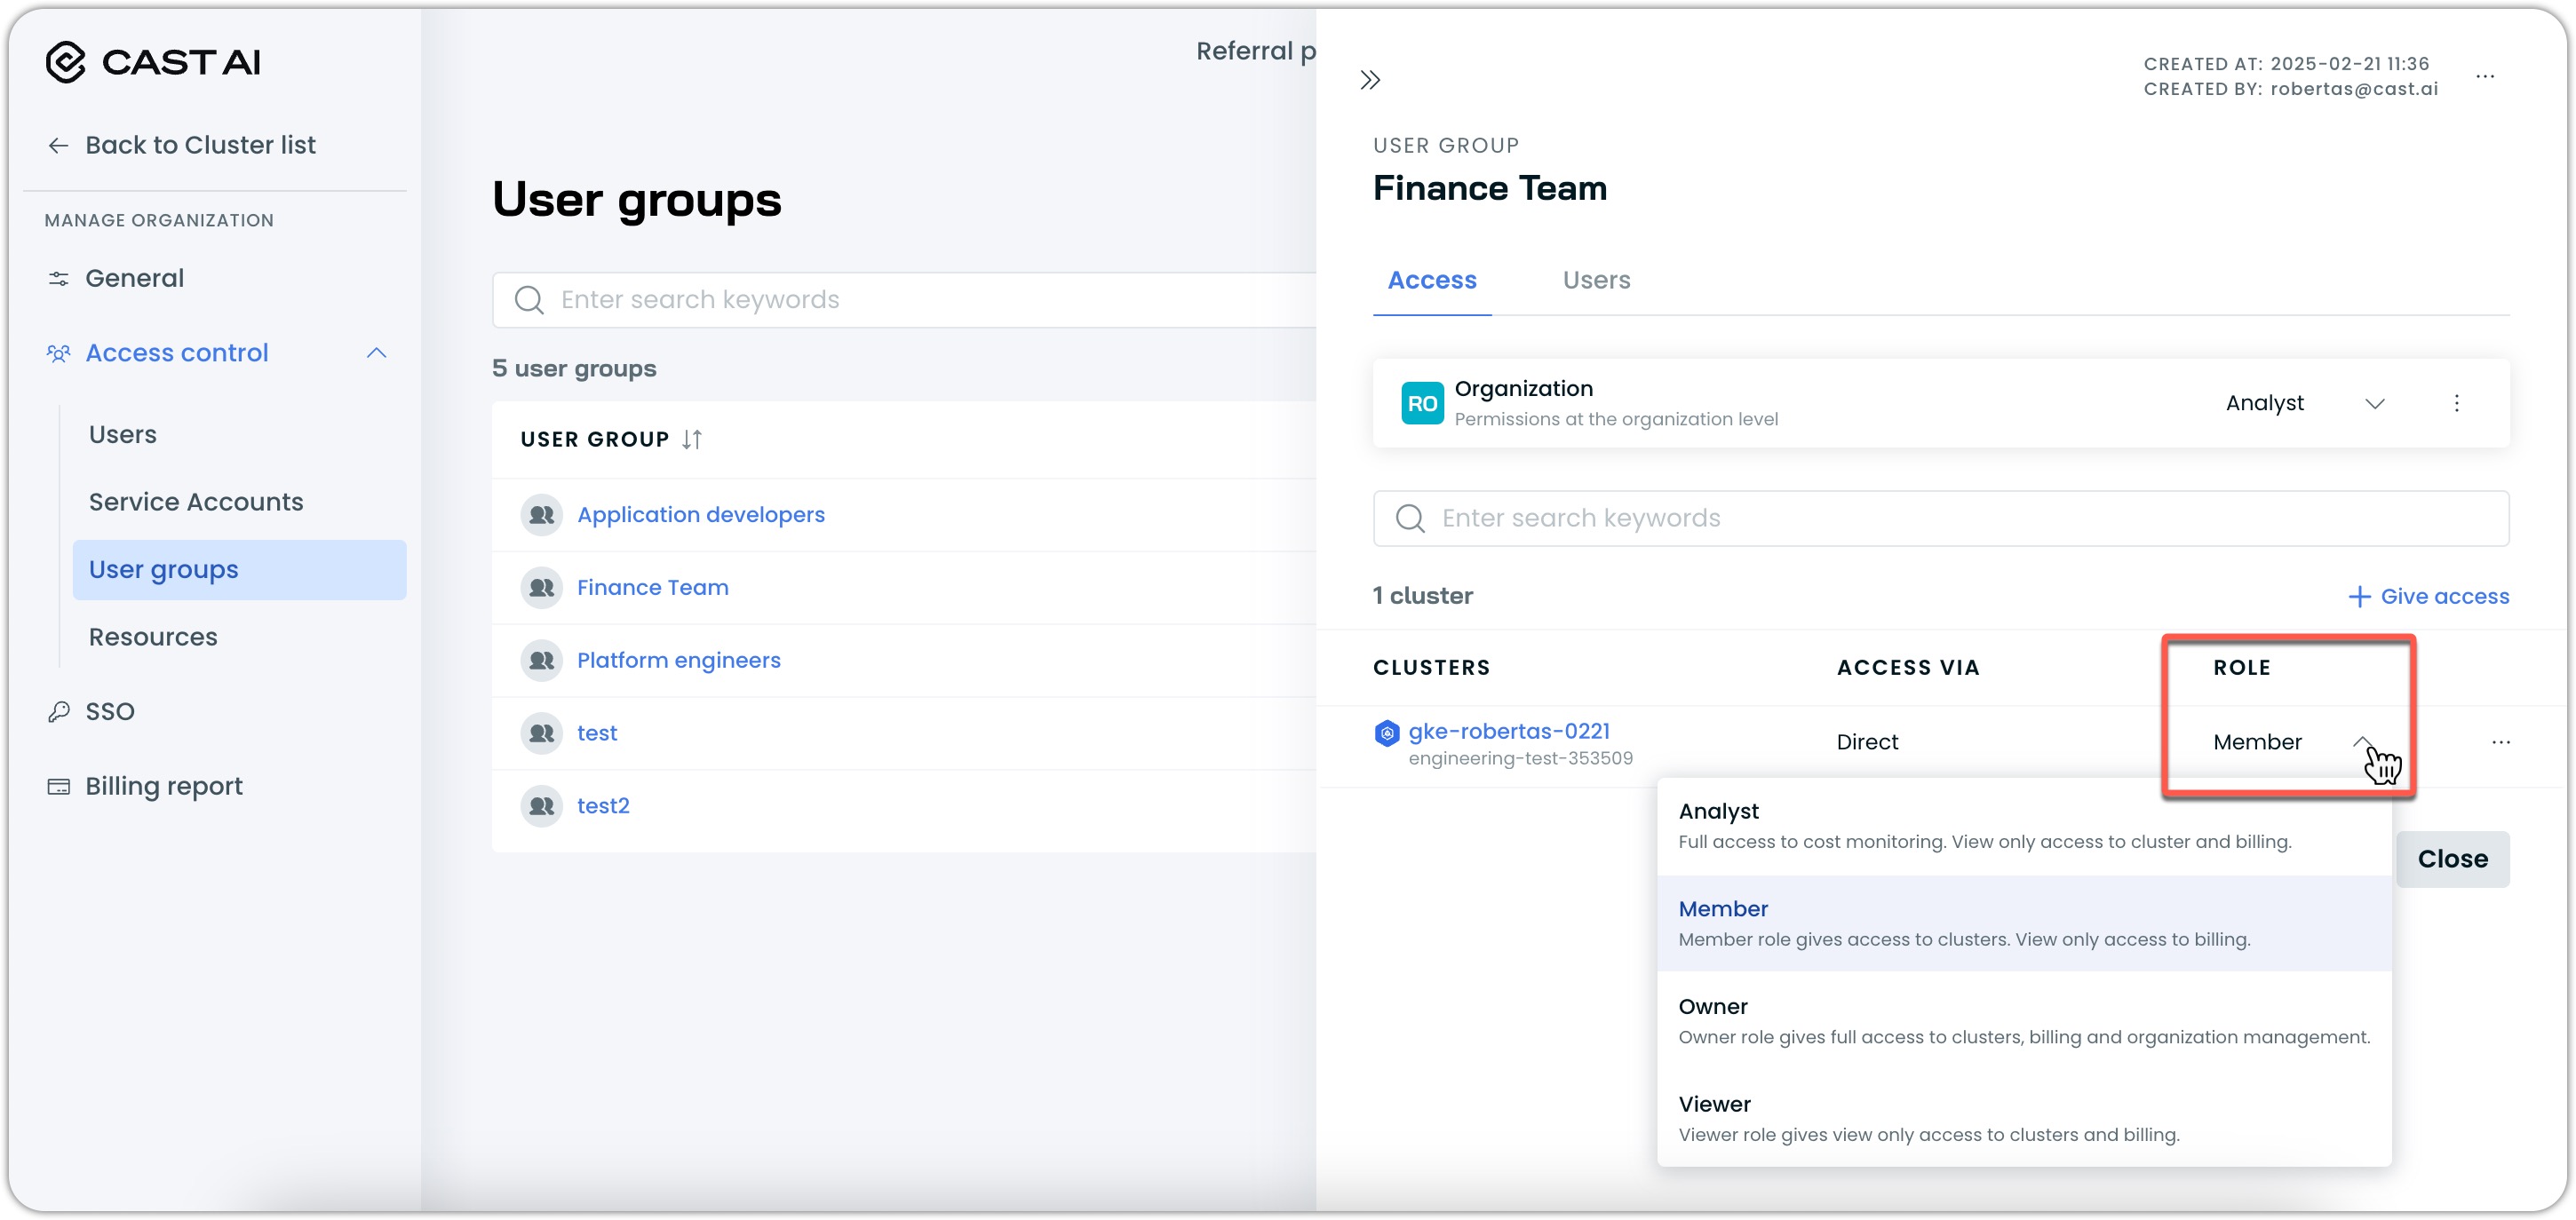
Change cluster-level access
Below the organization-level role, you can:
- See all available clusters for that user group
- Configure cluster-specific roles using individual dropdowns if they are not inherited from the organization-level access of the user group
- Set different roles than the organization-level access
To modify a direct resource access role:
-
Select the group you want to modify:
- This will open a user group configuration drawer.
-
Select role:
-
In the cluster list, set a cluster-wide role from the dropdown for each cluster whose role you wish to modify:
-
This sets the user group's access level for that particular resource.
NoteWhen clusters inherit organization-level access, their individual role dropdowns will be disabled. To change cluster-specific roles, you must first configure "Direct" access to clusters.
Revoke access
To revoke a user group's organizational-level access:
-
Click the (
⋮) symbol in the cluster row card and select "Revoke access":
WarningIf a user group contains service accounts, revoking a user group's cluster-level access will leave the API keys of those service accounts unable to access the cluster, which can break existing integrations.
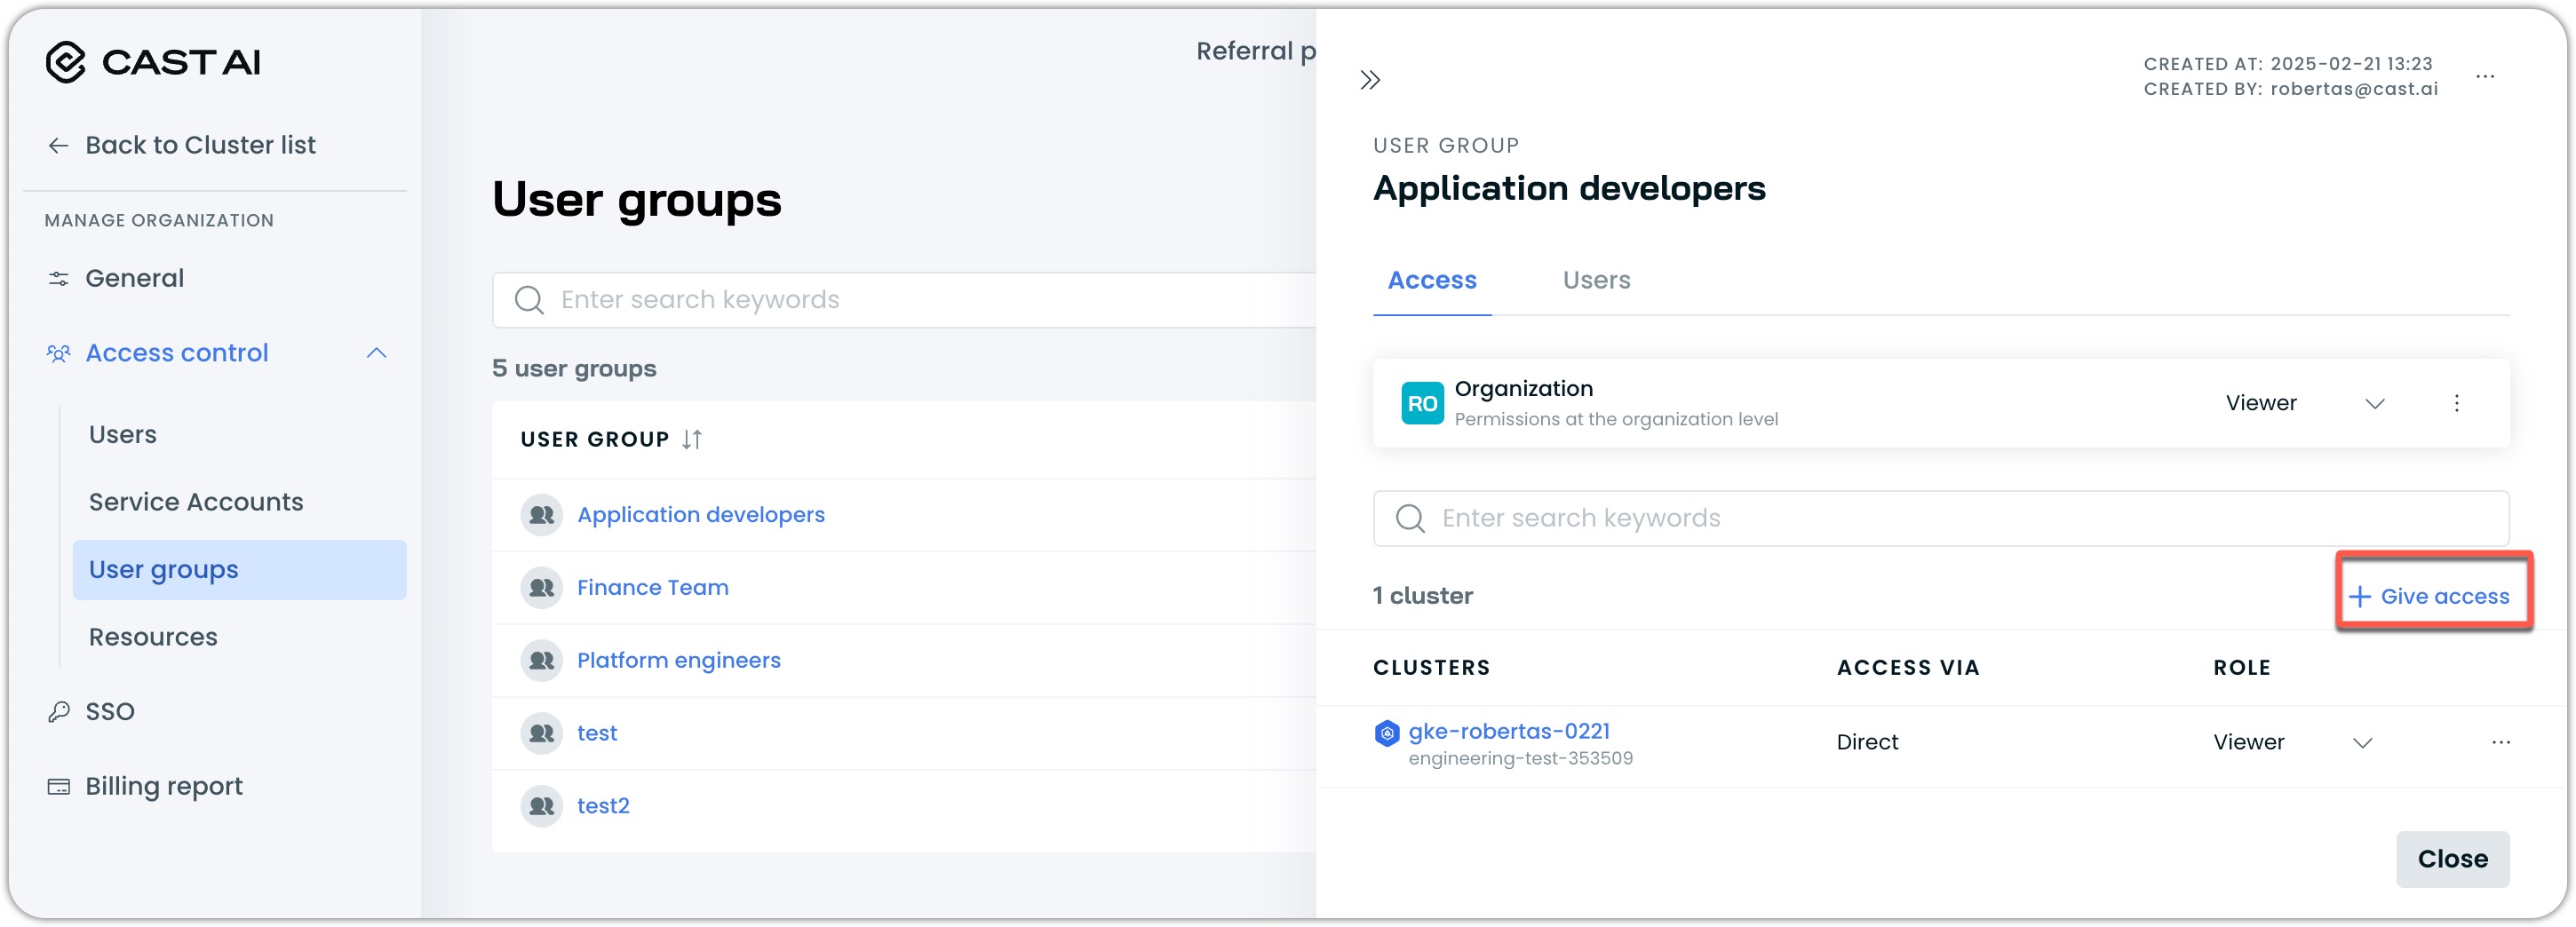
Give access to a resource
Access to more resources can be granted to a user group at any time.
To grant additional access:
-
Select the group you want to modify:
- This will open a user group configuration drawer.
-
Click "+ Give access" in the resource list area:
-
Configure new access:
-
Choose the resource type (Cluster or Organization)
-
For cluster access:
- Select specific clusters from the dropdown
- Choose the role (Owner, Member, Analyst, or Viewer)
-
For organization access:
- Select the role (Owner, Member, Analyst, or Viewer):
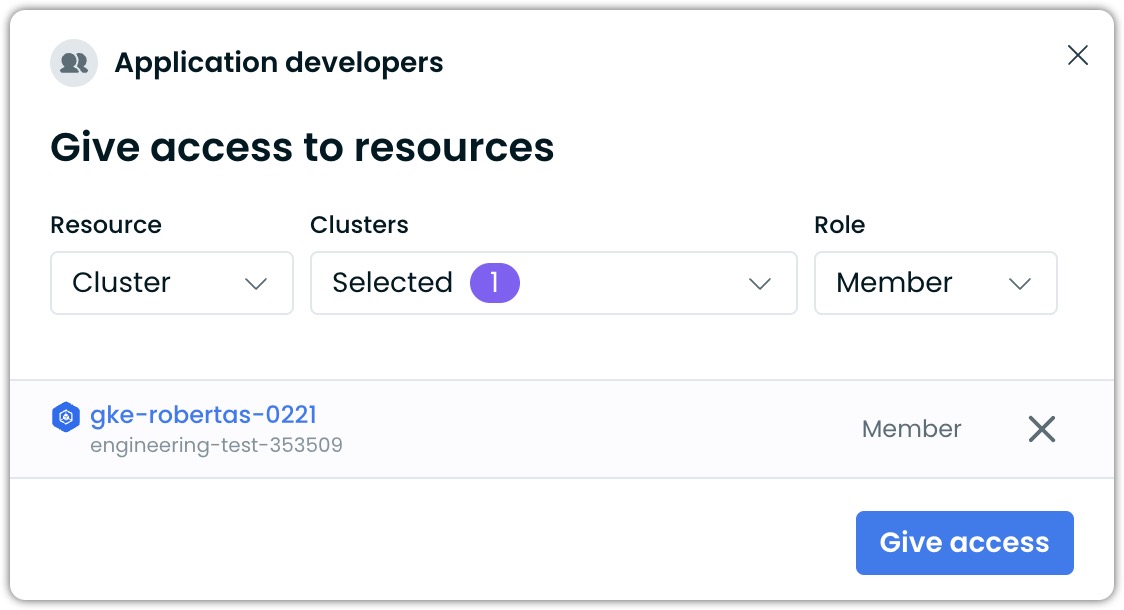
-
-
Click "Give access" to confirm the new access settings. The new bindings will be built momentarily.
NoteAccess can be granted at either organization or cluster level. Organization-level access applies to all current and future clusters in the organization, while cluster-level access is specific to individual clusters.
NoteWhen adding multiple clusters at once, they will all be assigned the same role that you select. For example, if you select three clusters and the Viewer role, all three clusters will be added with Viewer access.
If you need to give different roles for different clusters (like Viewer access to one cluster and Member access to another), you'll need to add them separately through multiple "Give access" operations - one for each role level you want to assign.
Updated 2 months ago