
Workload preparation
Before preparing workloads for rebalancing, confirm that the Unscheduled pods policy is enabled in your autoscaler settings. See Rebalancing prerequisites for details.
Rebalancing replaces your suboptimal nodes with new, optimal ones. However, that is only done on nodes that aren't running problematic workloads. To increase the value of the rebalancing operation, you should decrease the number of problematic pods as much as possible.
Problematic workloads
Problematic workloads are pods that have unsupported node selector criteria. For example, pods that have a declared required node affinity on a custom label are considered problematic due to rebalance being unaware of the custom label:
spec:
  affinity:
    nodeAffinity:
      requiredDuringSchedulingIgnoredDuringExecution:
        nodeSelectorTerms:
          - matchExpressions:
              - key: environment
                operator: In
                values:
                  - production
For a full list of supported node selector criteria, visit the Configure pod placement by topology section.
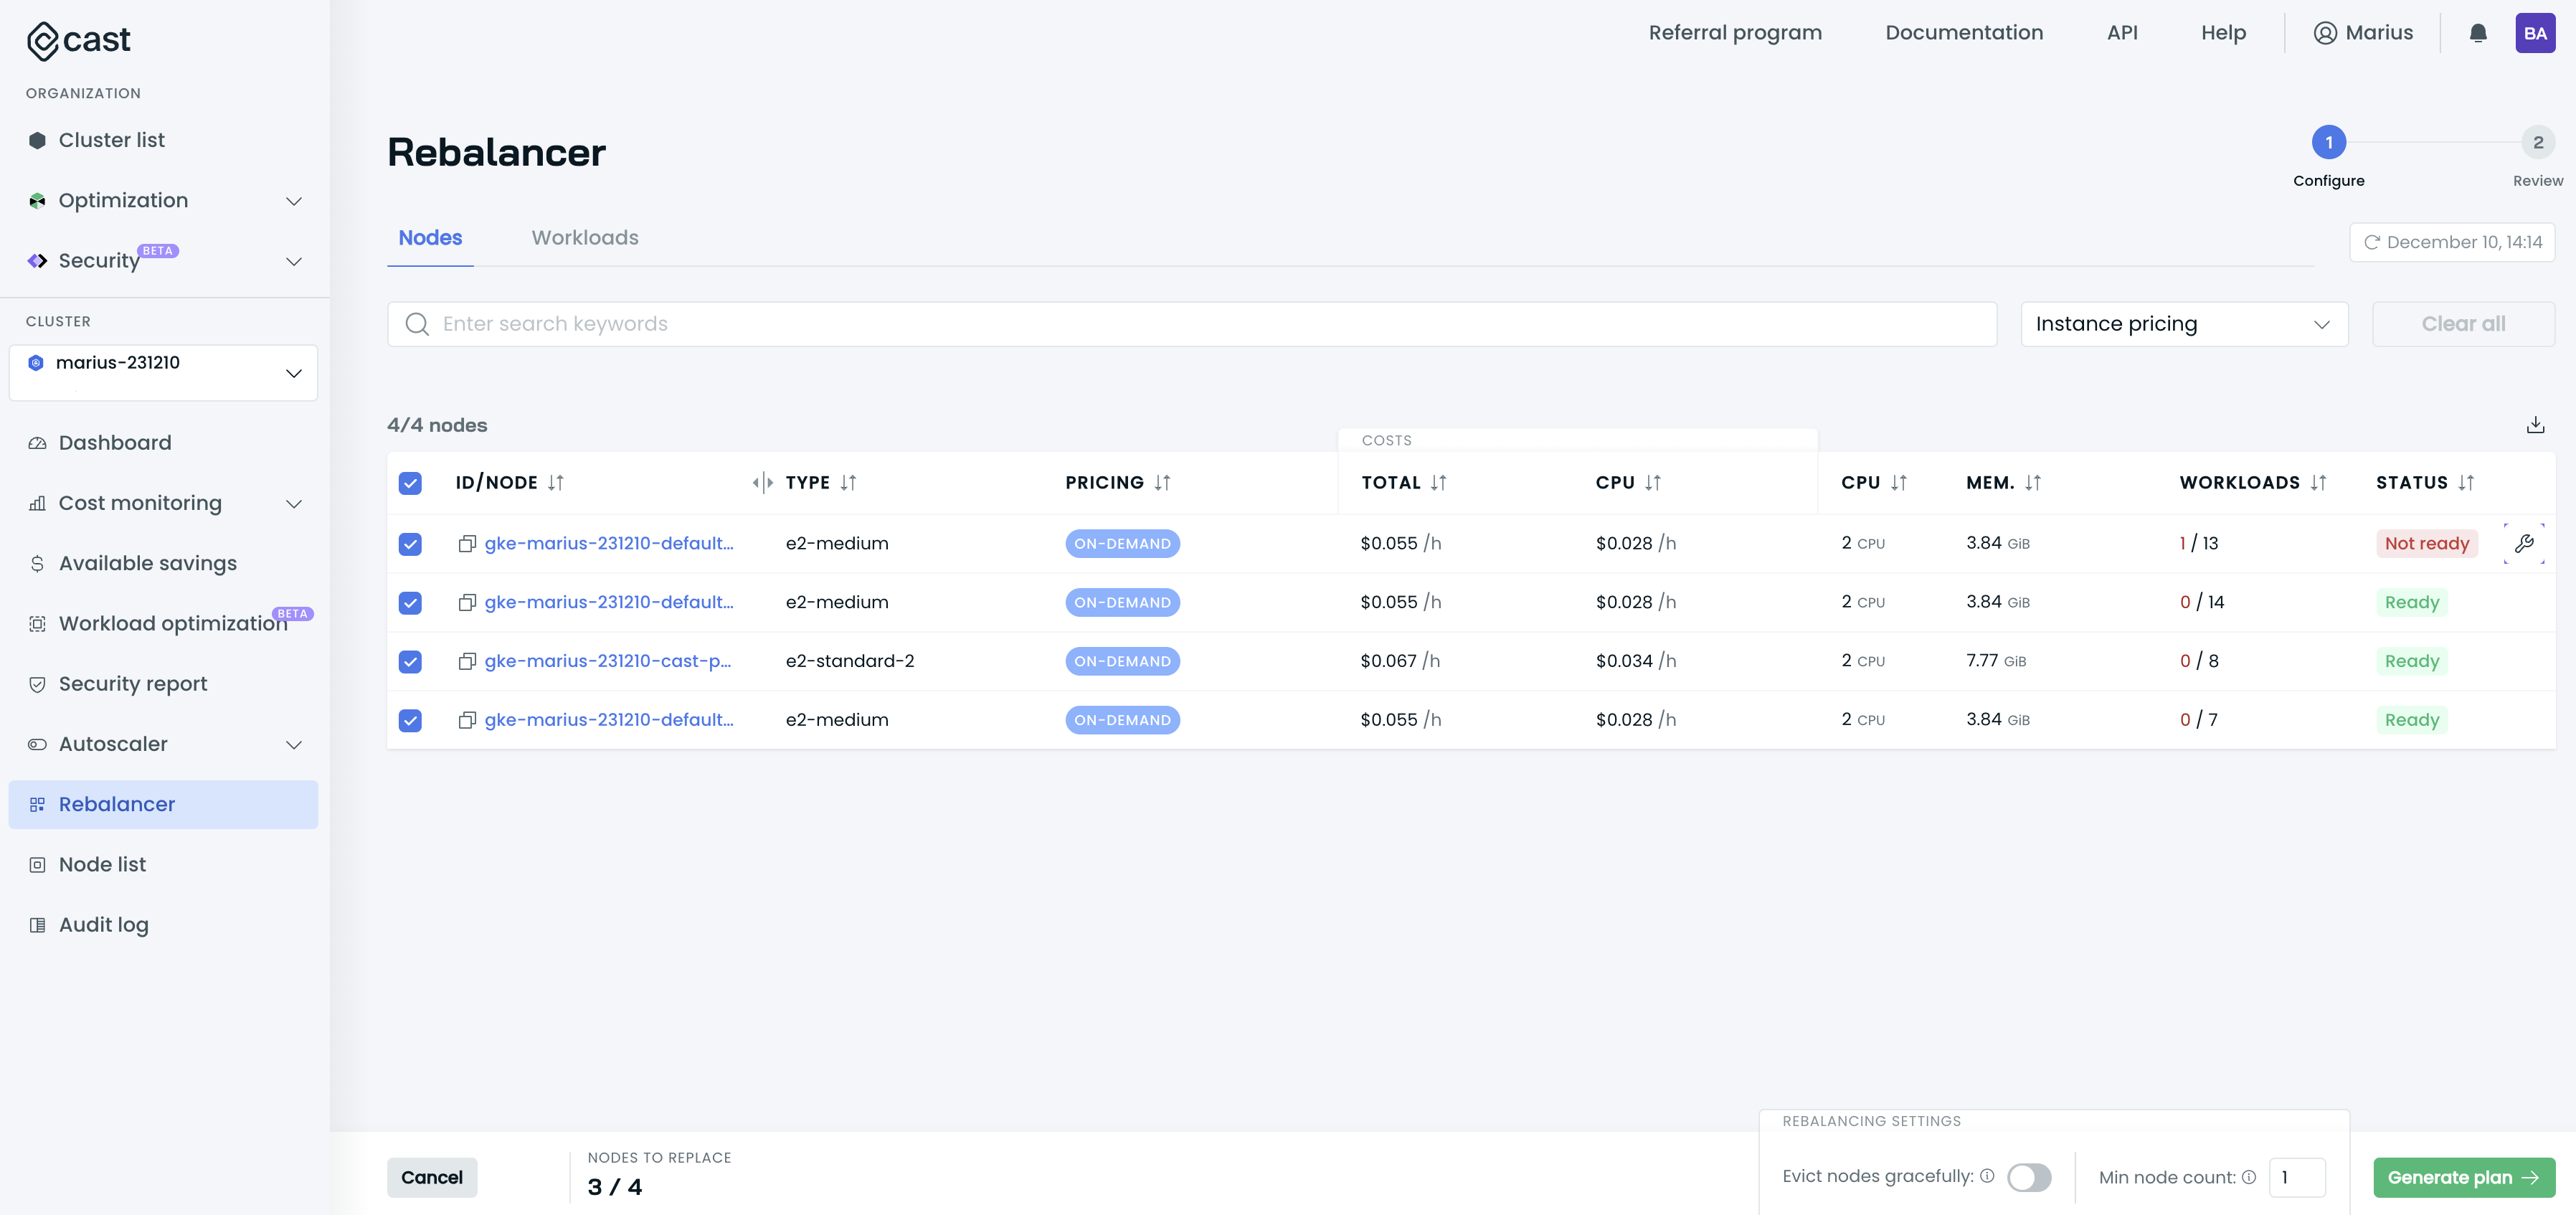
Go to the Rebalancer page of your cluster to find the workloads preventing some nodes from being rebalanced. Check the Status column:
How to resolve a problematic pod
To consider the custom labels, one NodeTemplate should map to the custom labels:

Ignoring problematic workloads
If a workload can't be successfully rebalanced, it gets a Not ready label in the Rebalancer view. You can mark it as disposable to ignore all potential issues detected by rebalancing. To mark a workload as disposable, apply the following label or annotation:
kubectl label pod <POD_NAME> autoscaling.cast.ai/disposable="true"Known limitations
Topology spread constraints with hostname
Rebalancing may not satisfy topology spread constraints using kubernetes.io/hostname as the spread key, particularly with low skew values.
For example, consider a scenario with:
- 5 nodes in your cluster
- 3 of those nodes are fully utilized (100% capacity)
- A topology spread constraint with
skew: 1and spread keykubernetes.io/hostname - A deployment scaling to 10 replicas
In this case, satisfying the constraint would require creating 8 new nodes, each running a single pod to maintain the skew of 1. This is impractical and would significantly increase costs.
Recommended alternatives
Instead of using topology spread constraints with hostname, consider these approaches:
- Use podAntiAffinity: Provides similar pod distribution without the strict per-node requirements
- Adjust replica counts: Scale workloads to numbers that work within your node constraints
- Use soft affinity: Switch from
requiredDuringSchedulingIgnoredDuringExecutiontopreferredDuringSchedulingIgnoredDuringExecutionfor more flexible scheduling
Default node template requirement
Rebalancing requires that all node templates used by pods in your cluster remain enabled. If a node contains pods using a disabled node template, that node will be marked as having problematic workloads and excluded from rebalancing.
This requirement exists because Cast AI must be able to create new nodes for any workload being moved during rebalancing. If a node template is disabled, Cast AI cannot provision nodes of that type.
If you don't want to use the default node template
If you prefer not to use the default node template, ensure all workloads in your cluster explicitly specify:
- Node selectors that match other enabled templates, or
- Taints and tolerations that target specific enabled templates
As long as no pods use the default node template, you don't need to keep it enabled. The requirement only applies when workloads actually depend on a template.
Minimize disruption
During the rebalancing, existing nodes will be drained, and workloads will be migrated to the new nodes. This means that this process might be disruptive to some workloads. Rebalancing aims to minimize disruption by first creating new nodes and then draining the old ones.
You might need to take special care if workloads do not tolerate interruptions. You have multiple options:
-
Execute the rebalancing during maintenance hours. This step would help you achieve the most cost savings.
-
Disable rebalancing for certain nodes. You can achieve this by labeling or annotating the nodes running critical pods or by annotating critical pods. Please note that Evictor will not rebalance and evict annotated nodes, and this can reduce savings. It is recommended that some nodes dedicated to critical workloads be annotated rather than annotating multiple pods, which could be scheduled on multiple nodes and prevent their optimization.