
Cloud SQL Proxy quick start
This guide walks you through deploying Database Optimizer (DBO) on Google Kubernetes Engine (GKE) with Cloud SQL Proxy for secure connections to your Cloud SQL instances.
Architecture
DBO connects to Cloud SQL through the Cloud SQL Proxy, which runs as a sidecar container in each DBO Pod.
The diagram below shows the traffic flow within your GKE cluster:
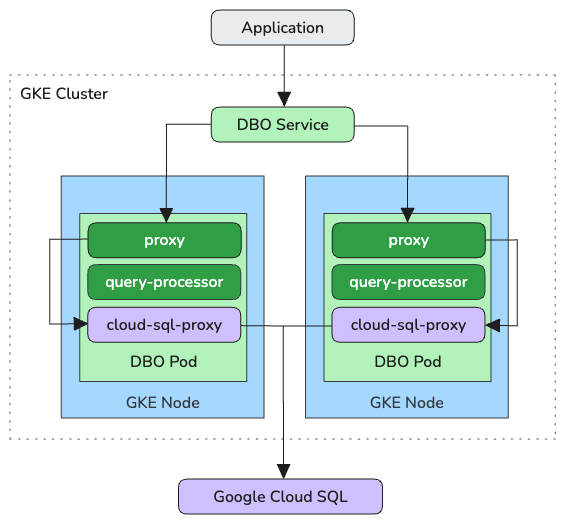
Each DBO Pod runs three containers:
proxy– Receives incoming requests from your application and serves responses from either the cache or the upstream databasequery-processor– Observes incoming queries to determine optimal cache TTL settingscloud-sql-proxy– Securely connects theproxycontainer to your Cloud SQL instance(s)
Your application connects to DBO through a Kubernetes Service that load-balances traffic across the DBO Pods. The cloud-sql-proxy sidecar in each Pod forwards database requests to the target Cloud SQL instance.
Prerequisites
Before you begin, ensure you have:
- A GKE cluster with network access to your Cloud SQL instances
kubectlconfigured to access your clusterhelmCLI installed- Appropriate IAM permissions for your Cloud SQL instances
Configure Cloud SQL Proxy
Configure Cloud SQL Proxy by creating a custom Helm values file that you'll pass to the castai-db-optimizer Helm chart during deployment.
Step 1: Create a Helm values file
Create a new file named values.yaml:
touch values.yaml
vi values.yaml
Step 2: Enable Cloud SQL Proxy
Add the following configuration to enable the Cloud SQL Proxy sidecar:
cloudSqlProxy:
  enabled: true
Step 3: (Optional) Configure Private IP connectivity
If your Cloud SQL instances use Private IP, add the privateIp setting:
cloudSqlProxy:
  enabled: true
  privateIp: true
This directs Cloud SQL Proxy to connect over your VPC network instead of the public internet.
Step 4: (Optional) Enable IAM authentication
To use IAM database authentication, enable automatic IAM token generation:
cloudSqlProxy:
  enabled: true
  privateIp: true
  autoIamAuthn: true
Deploy DBO
Step 1: Locate your Cloud SQL connection name
In the Google Cloud Console:
- Navigate to your Cloud SQL instance.
- Copy the Connection name displayed in the instance details.
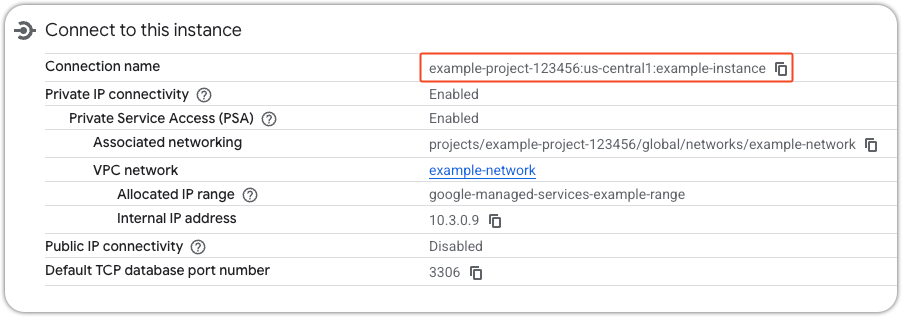
The connection name follows the format: PROJECT_ID:REGION:INSTANCE_ID
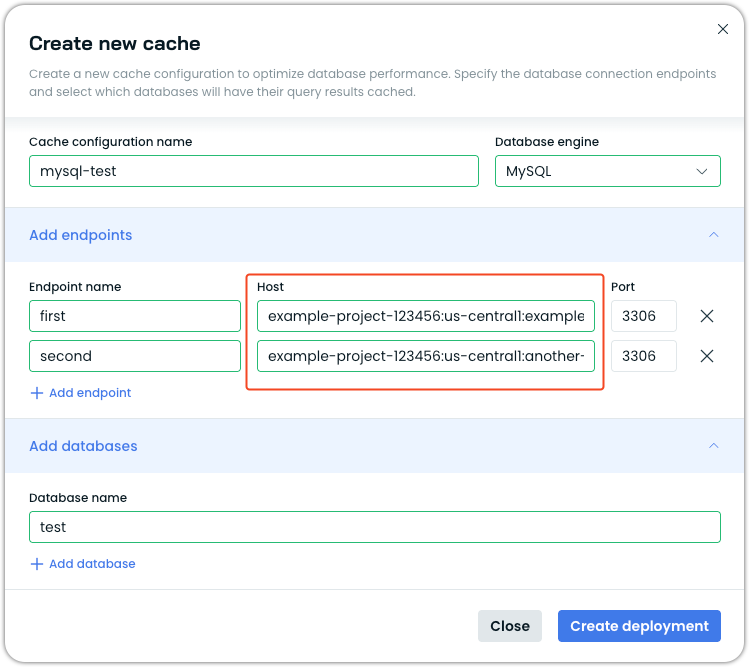
Step 2: Create a cache configuration
In the Cast AI Console:
-
Navigate to DB Optimizer > Caches.
-
Click Add cache.
-
Configure your cache and specify the Cloud SQL connection name for each instance you want DBO to access.
-
Click Create deployment to continue.
Step 3: Run the deployment script
The Console provides a deployment script. Before running it, configure the script to use your custom Helm values file.
Set the HELM_ARGS environment variable:
export HELM_ARGS="-f values.yaml"Copy the deployment script from the Console and run it. The script deploys DBO using the Cloud SQL Proxy configuration from your values.yaml file.
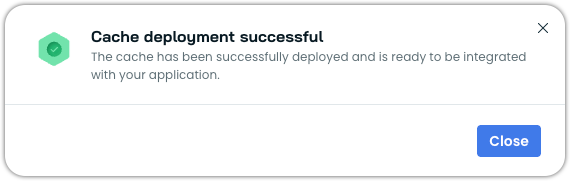
Step 4: Verify the deployment
After the deployment completes, you'll see a confirmation message in the Console:
To verify the deployment in your cluster, check that the DBO Pods are running:
kubectl get pods -n castai-db-optimizerStep 5: Retrieve the connection string
After deployment succeeds:
- Open the Endpoints tab in your cache configuration.
- View the connection strings for your configured endpoints.
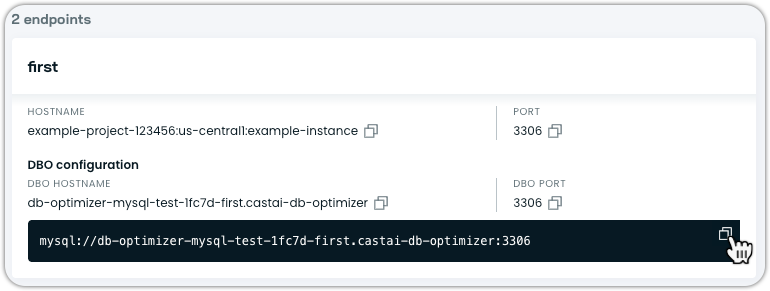
You can now integrate DBO with your application and begin optimizing database performance.
Updated 2 months ago