
Deploy custom model with AI Enabler
Want to run your own fine-tuned model on your own infrastructure, but still keep things simple for your developers?
This tutorial walks you through how to take a model you've stored in Google Cloud Storage (GCS) and deploy it with AI Enabler, so you can call it via an OpenAI-compatible API just like any other model.
Introduction
In this tutorial:
- Base model – a general-purpose model like LLaMA 3, Mistral, etc.
- Fine-tuned model – that base model, further trained on your data (for your domain, tone of voice, tasks, etc.).
- Custom model in AI Enabler – any model whose weights live in your storage and are deployed through AI Enabler into your Kubernetes cluster.
The idea is simple: you train the model wherever you like, store the artifacts in GCS, and then AI Enabler takes over the last mile (infra, GPUs, and deployment).
Prerequisites
Before you follow the steps, you'll need:
- AI Enabler set up and connected to a cluster
- A fine-tuned model saved in a GCS bucket
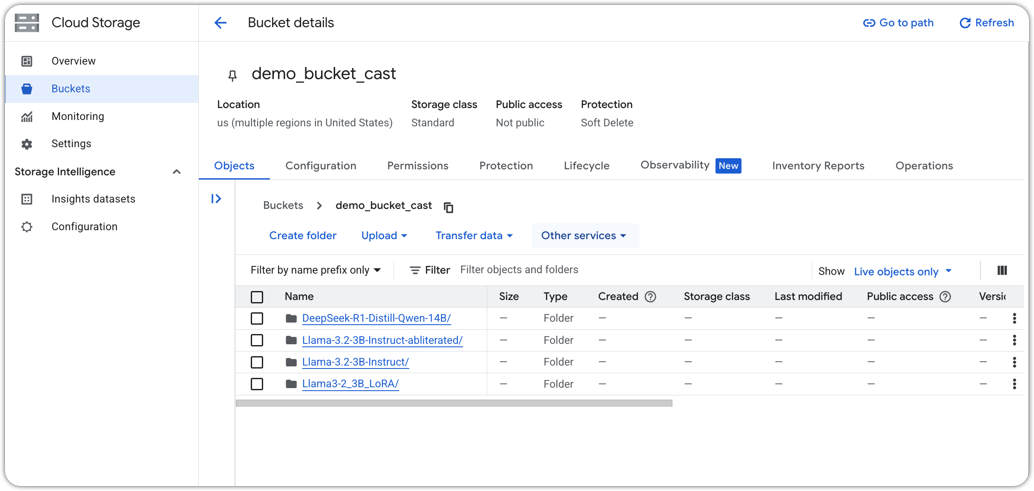
Example GCS bucket
Model artifacts are already exported and uploaded to GCS.
A typical layout might look like:
gs://my-ml-bucket/models/llama3-support-bot-v1/
├── model.safetensors  # or model.bin / similar
├── tokenizer.json
├── config.json
└── metadata.json      # optional, e.g. task, dataset, tags
NoteIf you're unsure about formats, start with Hugging Face-style folders and Safetensors – they're usually the least painful.
Step 1: Prepare your model artifacts in GCS
First, make sure your model artifacts in GCS are:
Complete – you'll typically need:
model.safetensorsorpytorch_model.bin(or equivalent)config.jsontokenizer.json(ortokenizer.model, depending on the stack)
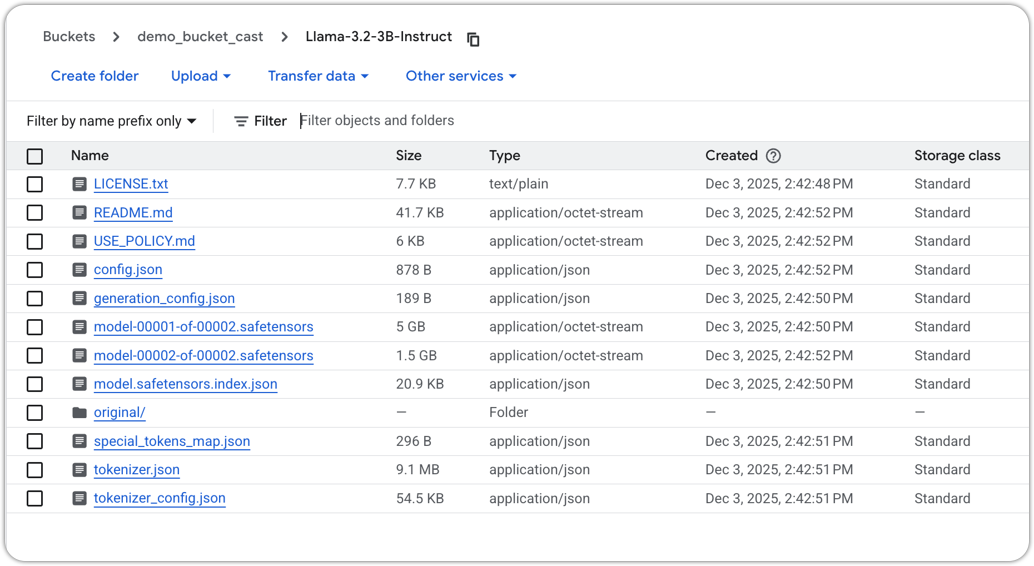
Example model folder structure
In a single folder:
gs://my-ml-bucket/models/llama3-custom-model/
NoteKeep the full GCS path handy, as you'll need to paste it into AI Enabler later.
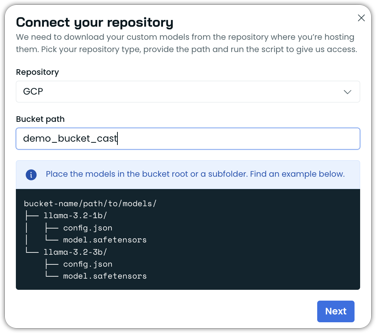
Step 2: Connect your repository in AI Enabler
Now we jump into AI Enabler.
- Log in to the Cast AI console.
- Navigate to AI Enabler → Hosted Models → Repositories
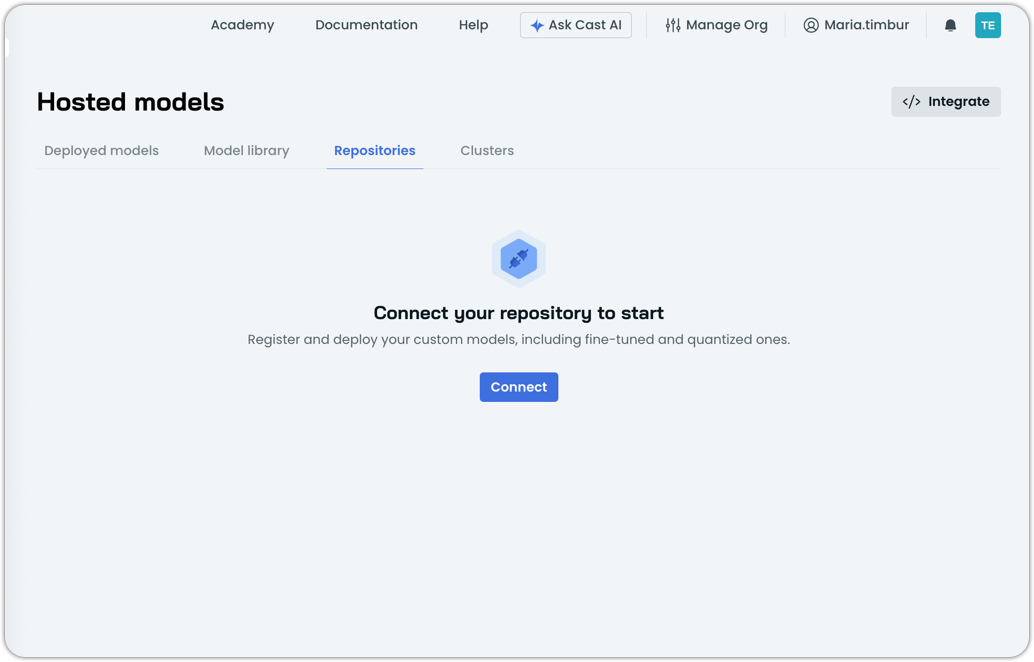
- Click Connect to start the flow.
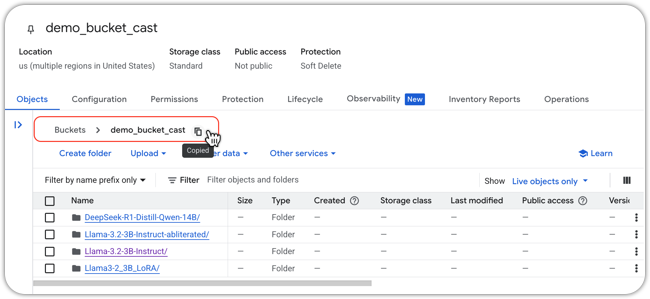
- Copy and paste your bucket path.
-
Click Next.
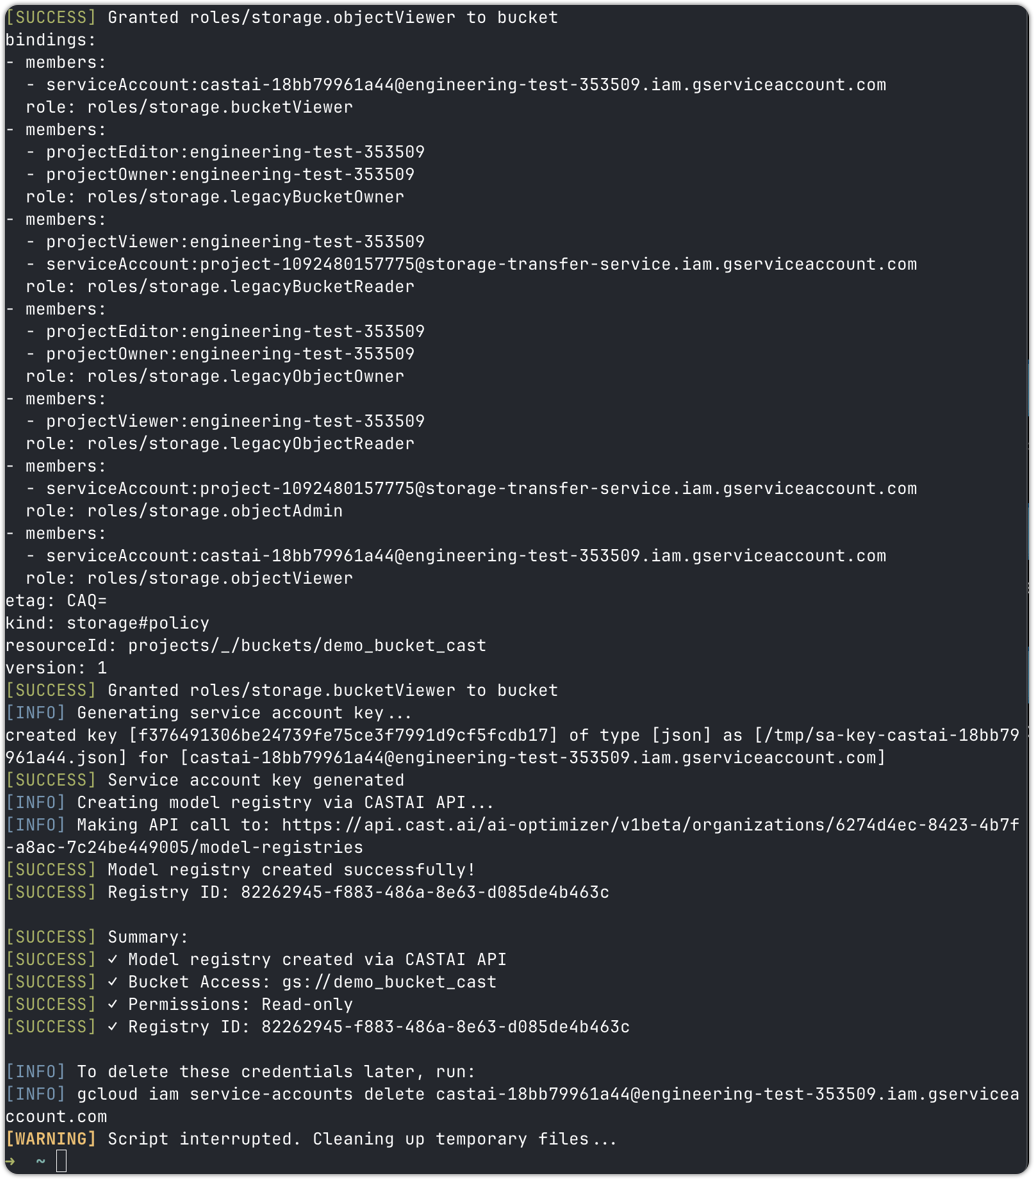
-
Run the script in your console
-
Click I ran the script and wait for the script to finish. You should see the following in your terminal:

- The repository was successfully connected.
-
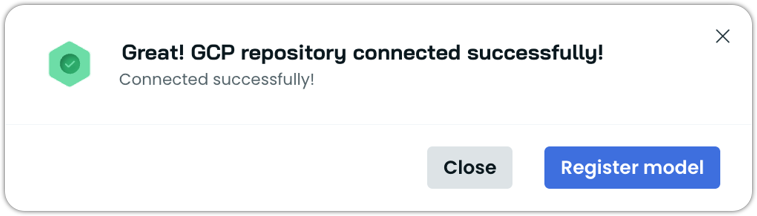
Click Register model
Step 3: Register your custom model
You'll now go through a short form.
Select a model: Choose a model from the list provided in the dropdown. These are the models that were detected in the bucket.
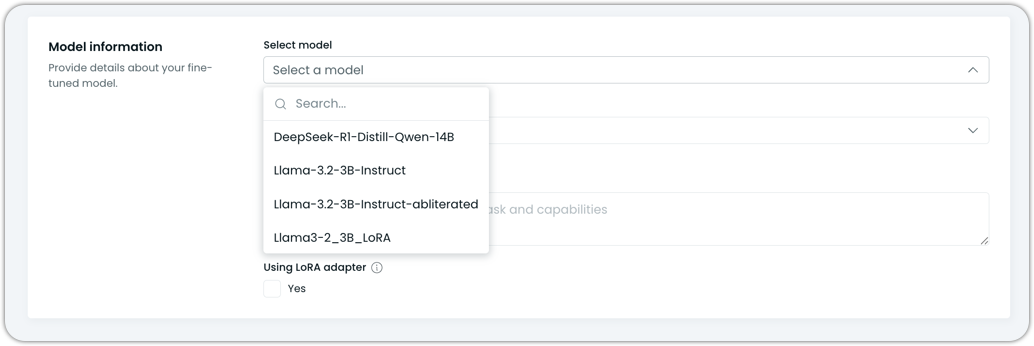
Base model: Pick the base model you fine-tuned from the dropdown.
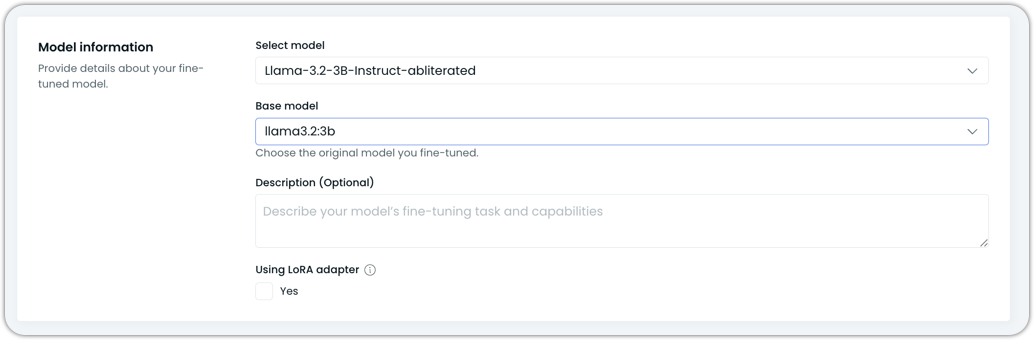
Description: Write a short description of your model.
Using LoRA adapter: Check this box if your custom model is using LoRA adapter. This helps AI Enabler understand what runtime/config to use for deployment and validation.
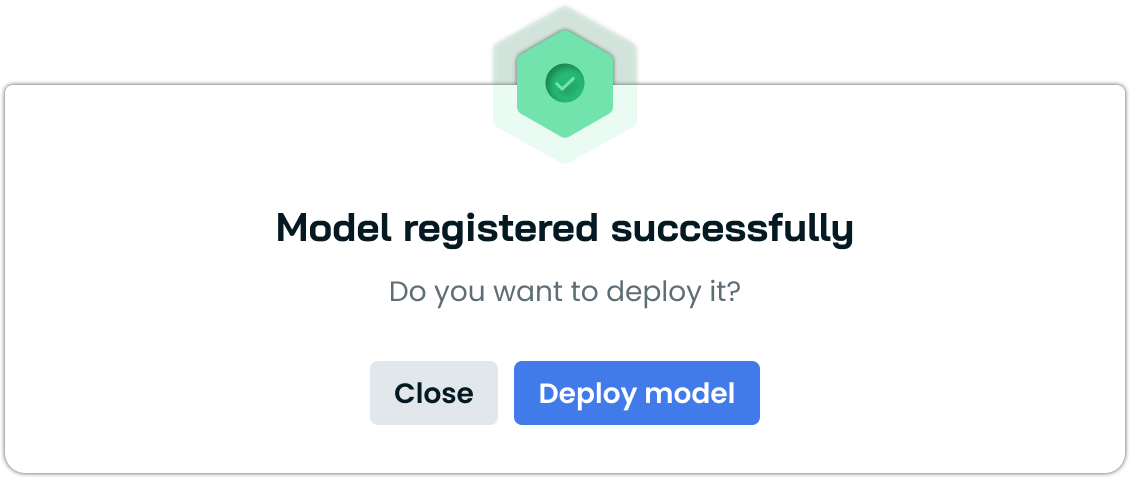
Click Register model, then click Deploy model:
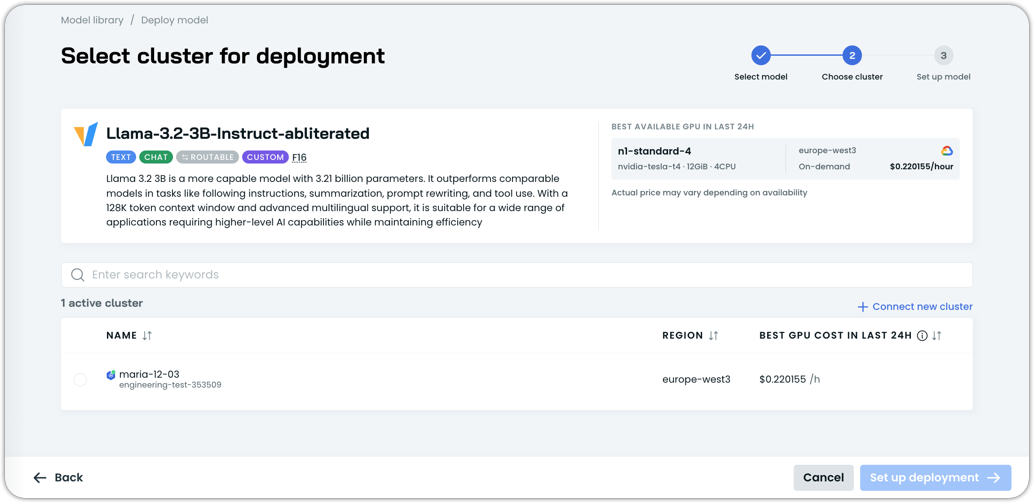
Step 4: Configure and deploy the model
Now that the model is registered, it's time to actually deploy it. You'll be guided through a short deployment flow.
AI Enabler utilizes a specialized node template based on model size and other configuration settings.
Select the cluster your model will get deployed on
Configure the automation and scaling features as desired
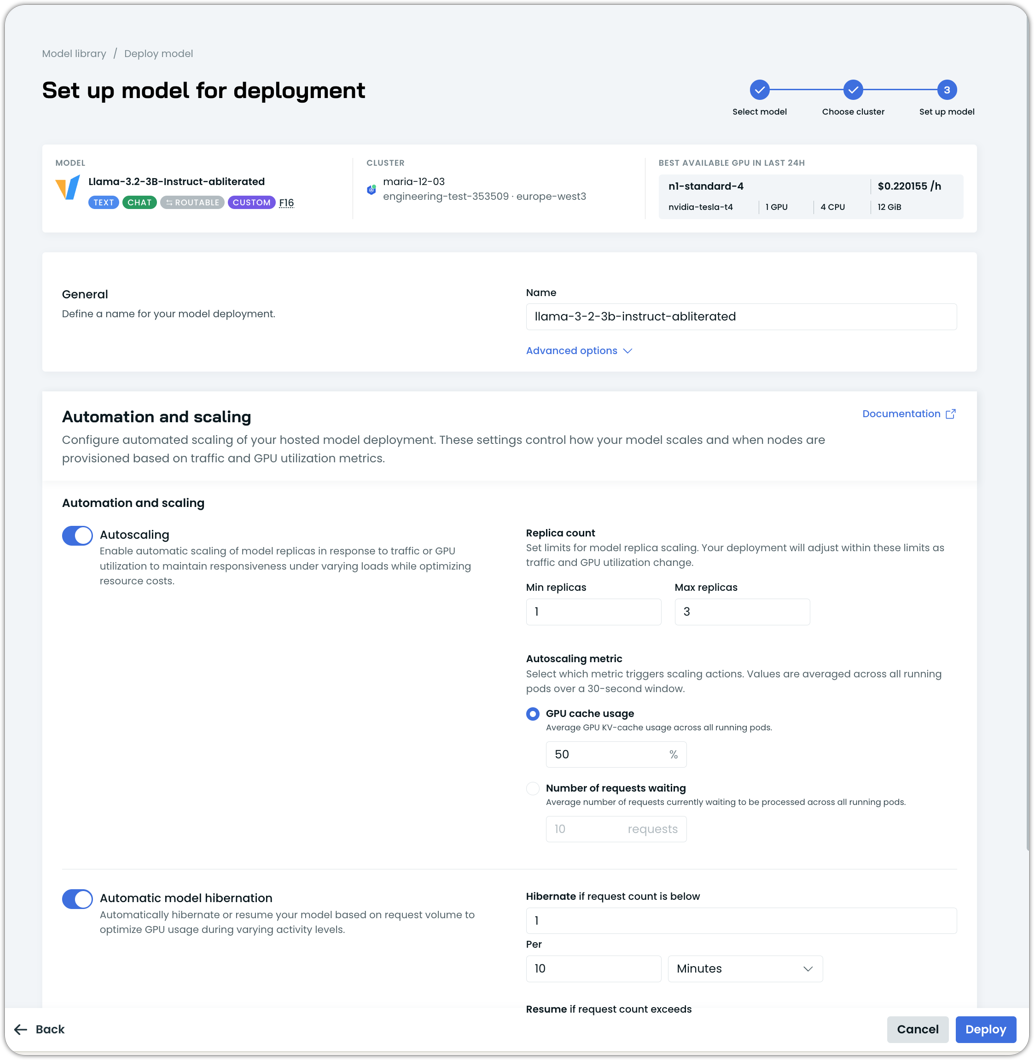
Click Deploy:
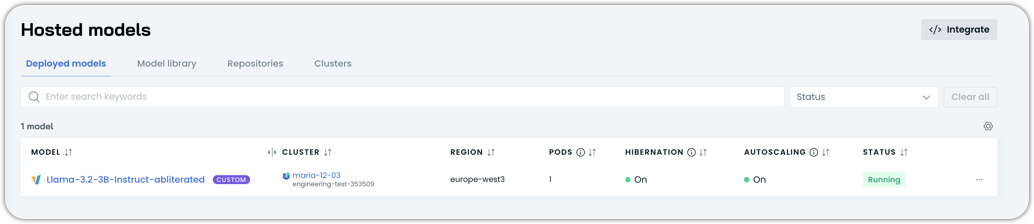
Wait for the model to get deployed. This step may take up to a couple of minutes, depending on the model size.
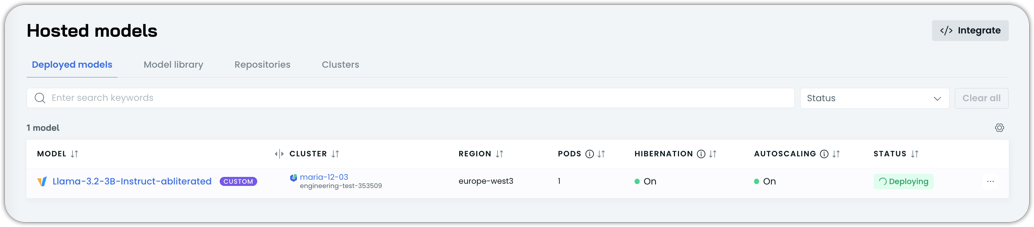
Behind the scenes, AI Enabler will:
- Deploy the Helm chart
- Mount or pull the model from GCS
- Start the model server
- Wait for the model to load
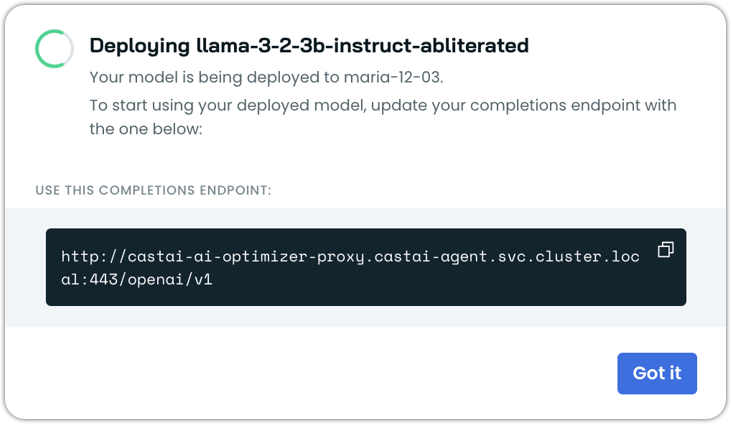
Once the deployment status says Running, your custom model is live.
Step 5: Call your custom model
With the deployment healthy, you can now call the model like any other AI Enabler model.
Since the model is running in your own Kubernetes cluster, we need to run:
kubectl run test-client --rm -i --tty --image=alpine/curl -- /bin/shto create a temporary pod to which we can send cURL requests.
Here's a minimal example (adjust the model name as needed):
curl http://castai-ai-optimizer-proxy.castai-agent.svc.cluster.local:443/openai/v1/chat/completions \
  -H 'Content-Type: application/json' \
  -H 'Accept: application/json' \
  -H 'Authorization: Bearer $CASTAI_API_KEY' \
  -v -X POST -d '{
    "model": "Llama-3.2-3B-Instruct-abliterated",
    "messages": [
      {
        "role": "user",
        "content": "What kind of instance types to use in GCP for running an AI training model?"
      }
    ]
  }'
From here, your application can treat this model like any other OpenAI-style model, just point to AI Enabler, use the custom model name, and you're good to go.
That's it! You've just:
- Registered a custom model in AI Enabler
- Deployed it onto your own cluster
- Called it via an OpenAI-compatible endpoint
Updated 2 months ago