
Okta: Managing IdP user group sync
This guide covers ongoing management of your Okta user group synchronization with Cast AI, including user lifecycle operations, group management, and troubleshooting.
Before you begin
Ensure that:
- You have SSO Group Sync already configured between Okta and Cast AI
- You have administrative access to your Okta organization
- You have the Owner role in your Cast AI organization
Managing users in synced groups
Adding users to synced groups
To add a user to a synchronized group:
-
In your Okta Admin Console, navigate to Directory > Groups
-
Select the group that is synchronized with Cast AI
-
Click the Assign people button
-
Search for and select the user you want to add
-
Click + to add them
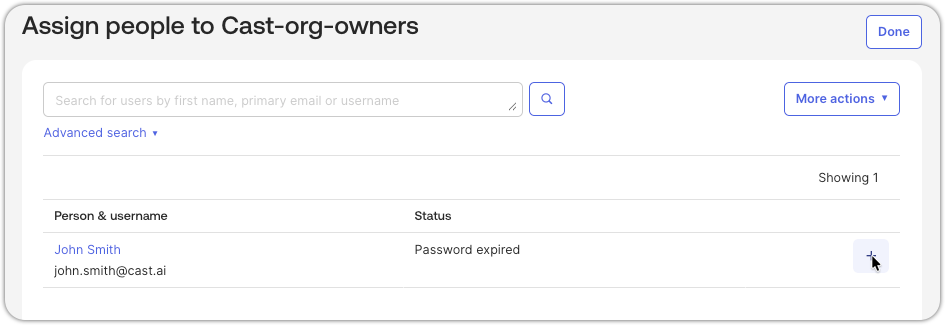
The newly assigned user will appear in Cast AI after synchronization completes. This typically takes up to a few minutes. You can always see the status of a pending group push in the Push Groups tab of your Okta application.
Updating user information
To update a user's information that syncs to Cast AI:
-
In your Okta Admin Console, navigate to Applications > Applications
-
Select your SCIM application for Cast AI
-
Go to the Assignments tab
-
Find the user whose information you want to update
-
Select Edit

-
Modify the relevant fields (e.g., display name)
-
Click Save
The updated information will sync to Cast AI.
NoteNot all specific user attributes sync to Cast AI, beyond things, such asdisplay name, email, and similar. A person's title or contact information, for example, would not sync to Cast AI, because those mappings and fields do not exist in the Cast user system.
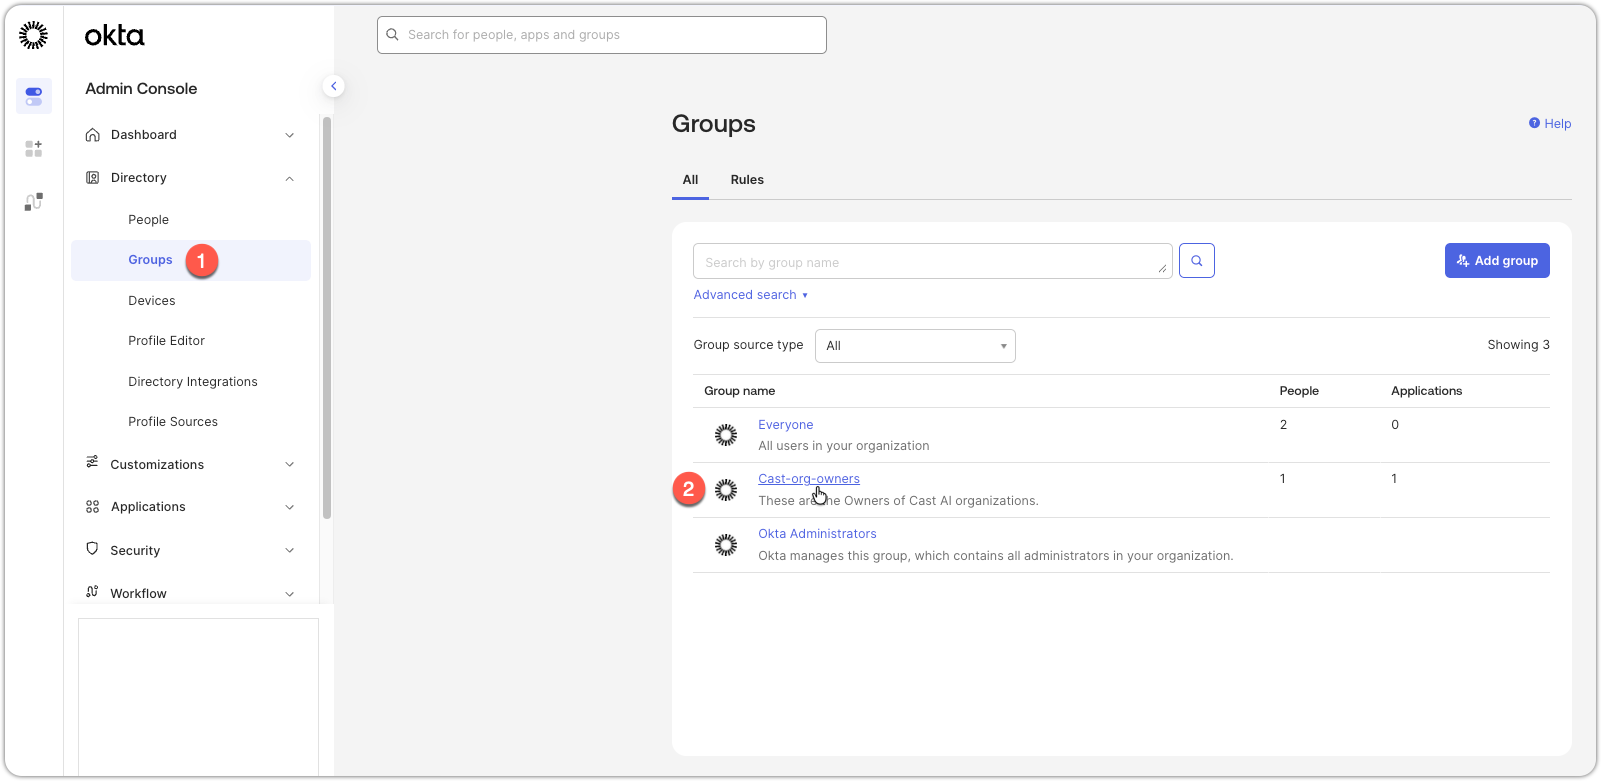
Removing users from synced groups
To remove a user from a synchronized group:
- In your Okta Admin Console, navigate to Directory > Groups
- Select the synced group
- Find the user you want to remove
- Click the X button next to the user
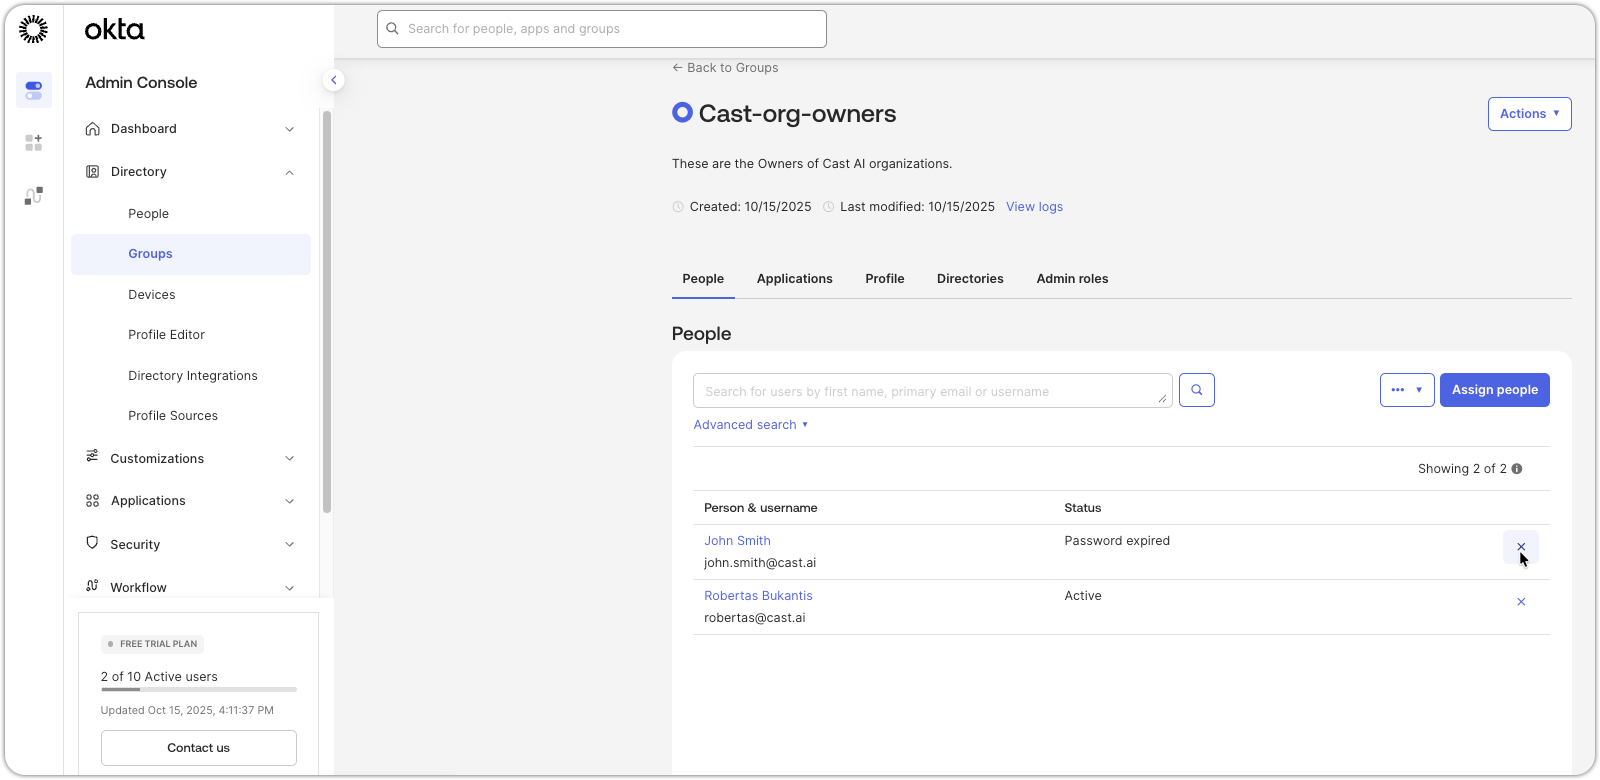
Once removed from the group, the user will lose access associated with that group in Cast AI.
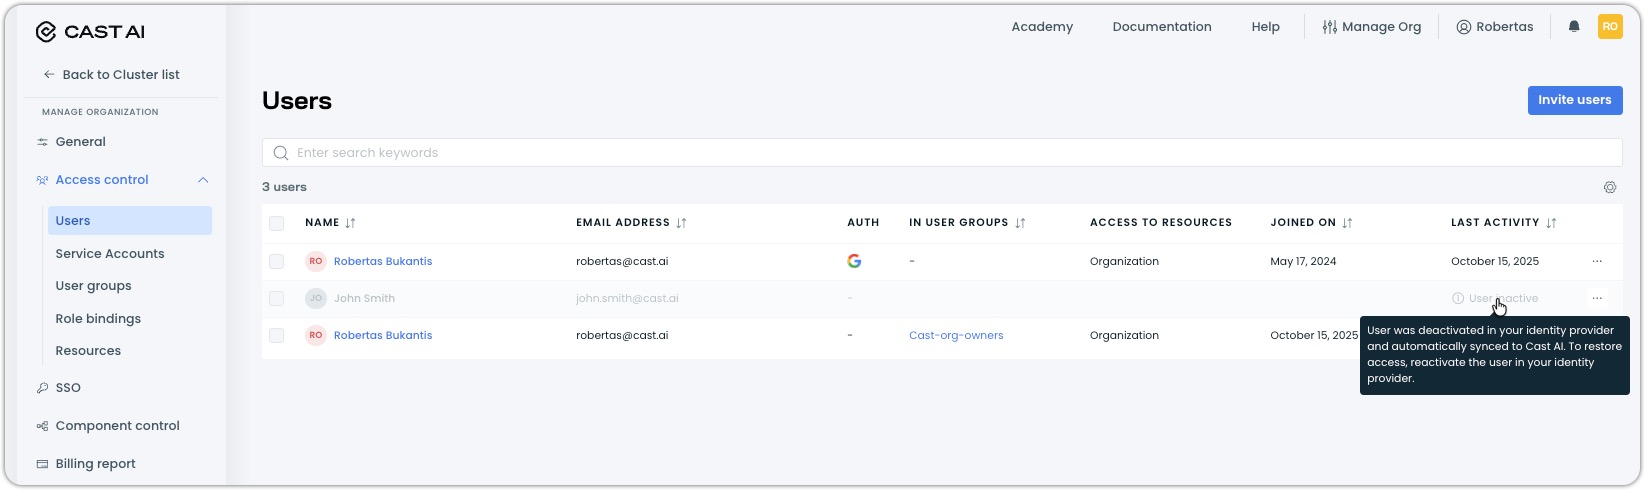
Deactivating users
When you deactivate a user in Okta, they lose all access to Cast AI:
- In your Okta Admin Console, navigate to Directory > People
- Find the user you want to deactivate
- Click on the user's name
- Click More Actions > Deactivate
- Confirm the deactivation
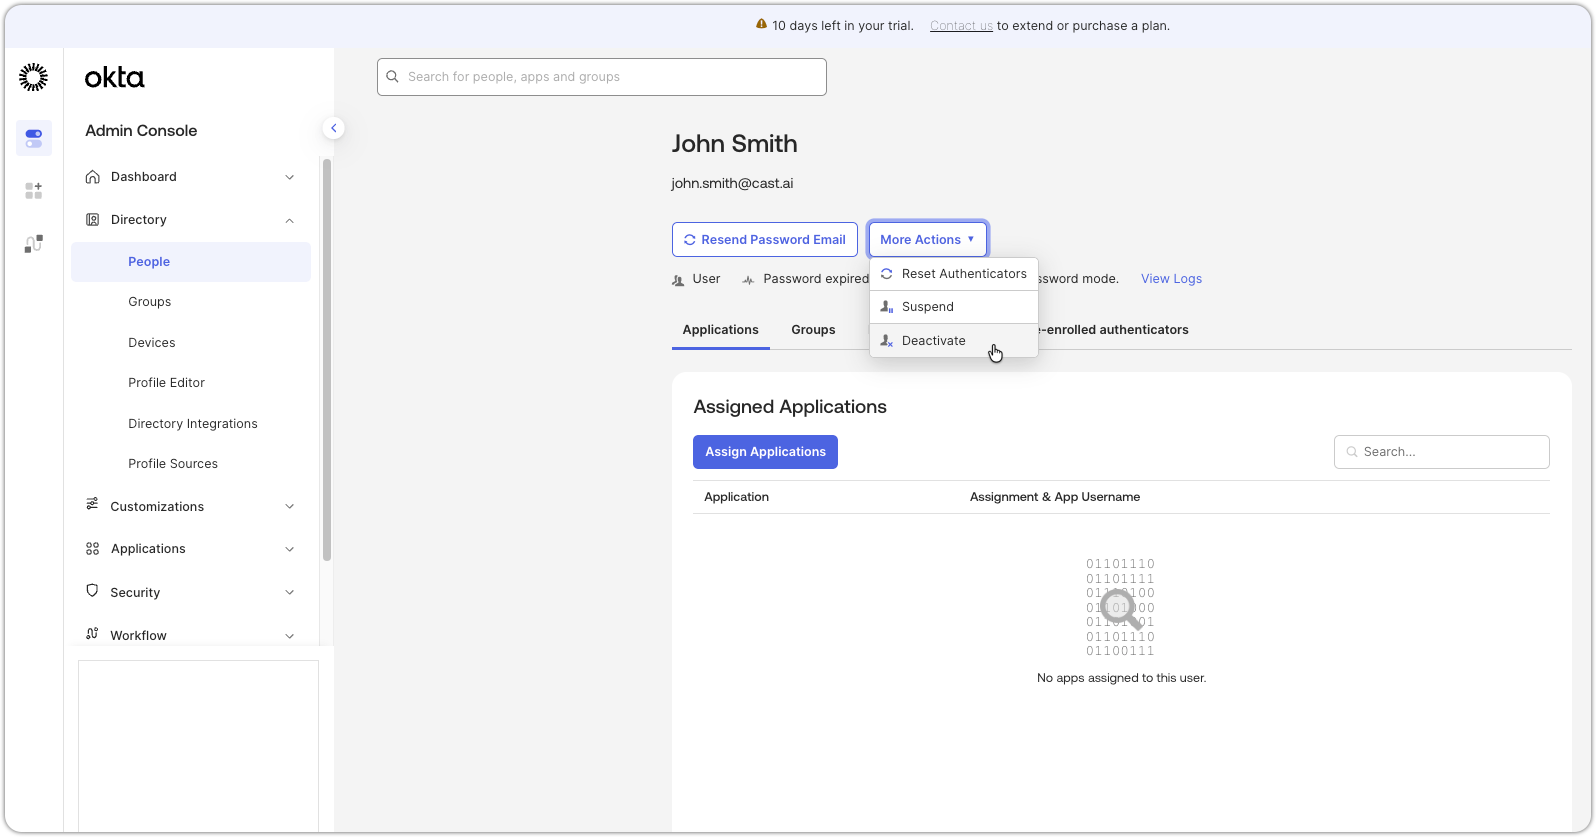
As a result, on Cast AI:
- The user is unable to authenticate via SSO
- Any active sessions will be terminated on the next action attempt
- The user's status in Cast AI will be marked as inactive
Managing synced groups
Adding groups to synchronization
To add additional Okta groups to your existing sync:
- In your SCIM application, go to the Assignments tab
- Click Assign > Assign to Groups
- Select the new groups you want to sync
- Click Assign for each group, then Done
- Navigate to the Push Groups tab
- Click Push Groups and select Find groups by name
- Search for and select the newly assigned groups
- For each group, select Create Group
- Click Save
The new groups will appear in Cast AI after the sync completes.
For more comprehensive instructions, follow the relevant step from Okta: Set Up IdP User Group Sync.
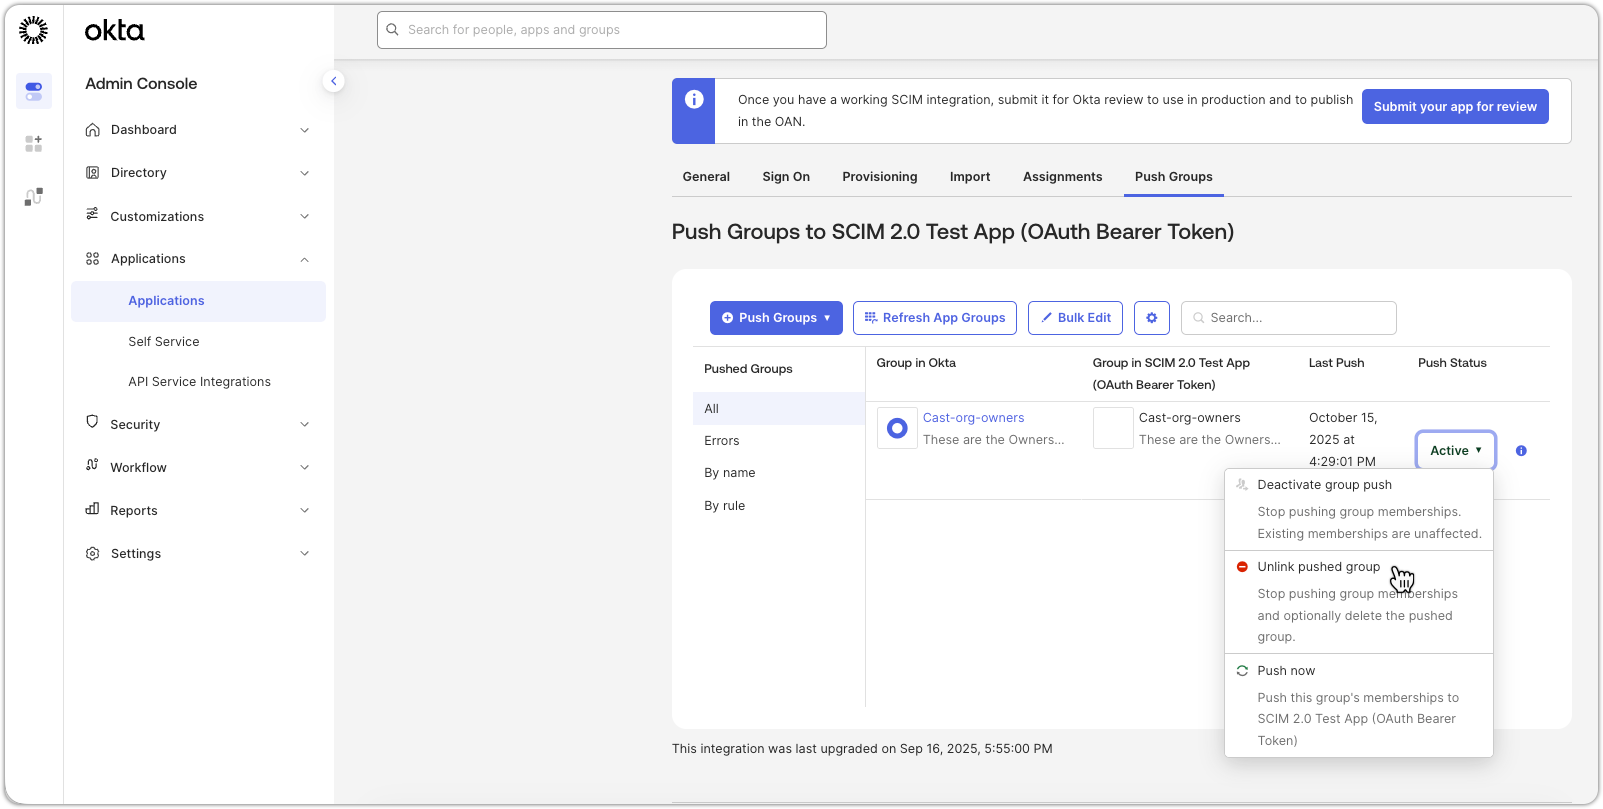
Removing groups from synchronization
To stop synchronizing a group:
- In your SCIM application, go to the Push Groups tab
- Find the group you want to stop syncing
- Click on the Push status and select the appropriate way to unlink that group
- Choose to either maintain or delete the group on Cast AI and confirm the action
Updating group permissions in Cast AI
While group membership is managed in Okta, permissions are assigned in Cast AI.
For synced user groups, the available permissions changes can be made in several different ways, depending on the scope and intended result.
Updating the default role of new joiners
Permissions granted to new joiners (newly synced users) by default can be changed under the established SSO connection powering the sync.
- In the Cast AI console, navigate to SSO
- Click on the SSO connection
- In the SSO configuration drawer, under Default role assigned to new joiners, select the appropriate role
- Save your changes
NoteIn order to make any changes to an existing SSO configuration, you will need to provide the Client secret from Okta each time before saving.
Configuring roles and resource access for synced groups
Beyond the default role for new joiners, you can assign specific roles and resource access to synced groups in Cast AI. This allows you to grant different permission levels to different groups based on their responsibilities.
To configure permissions for a synced group:
- In the Cast AI console, navigate to Access control > User groups
- Find and click on the synced group you want to configure
- Assign roles and resource access following the same process as manual groups
For detailed instructions on configuring group permissions, see:
NoteWhile group membership is controlled by Okta through synchronization, roles and resource access are managed in Cast AI. Changes you make to permissions in Cast AI will not be overwritten by sync operations.
Disabling group synchronization
To stop synchronizing groups from Okta while keeping your SSO connection active:
- In the Cast AI console, navigate to Access control > SSO
- Click on your Okta SSO connection to open the configuration drawer
- Uncheck the Synchronize user groups from the IAM system to Cast AI box
- Enter your Client secret from Okta (required to save any SSO configuration changes)
- Click Save changes
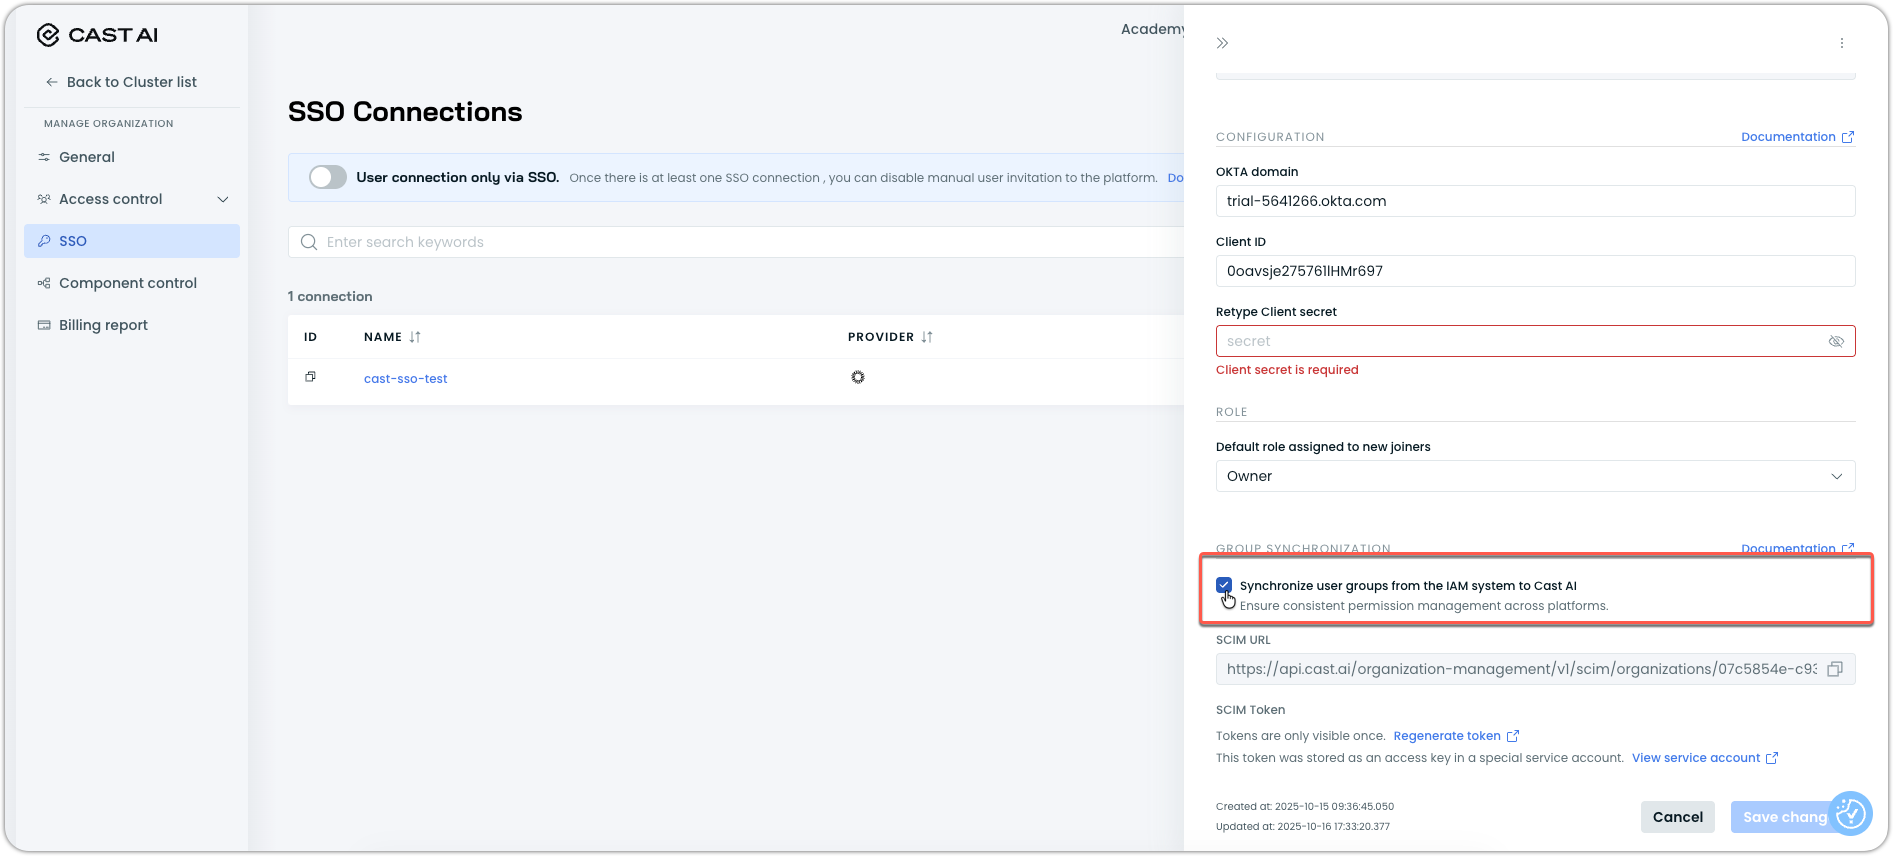
NoteDisabling sync converts existing synced users and groups to regular Cast AI users and groups.
To completely stop synchronization, also remove the Cast AI app from your identity provider.
Updated 2 months ago