
Quickstart
This quickstart guide walks you through installing the Pod Mutator Controller and creating your first pod mutation. By the end, you'll have a working mutation that automatically adds a label to pods in a target namespace.
The quickstart covers:
- Part 1: Install the pod mutator
- Part 2: Create a pod mutation
- Part 3: Configure target filters
- Part 4: Verify the mutation
This guide assumes you have a basic familiarity with Kubernetes concepts, such as namespaces, pods, and labels, and that you can run kubectl commands against your cluster.
Before you start
Before starting this quickstart, ensure you have:
- A Kubernetes cluster connected to Cast AI
- kubectl configured to access your cluster
- The following Cast AI components at minimum versions:
castai-agent: 0.123.0 or highercastai-cluster-controller: 0.85.0 or higher
You can verify your component versions with:
helm list -n castai-agent --filter 'castai-agent|cluster-controller'Example output:
robertas@Robertass-MacBook-Pro ~ % helm list -n castai-agent --filter 'castai-agent|cluster-controller'
NAME              	NAMESPACE   	REVISION	UPDATED                                	STATUS  	CHART                           	APP VERSION
castai-agent      	castai-agent	1       	2025-12-17 10:33:15.856274144 +0000 UTC	deployed	castai-agent-0.129.0            	v0.108.0
cluster-controller	castai-agent	1       	2025-12-17 10:36:27.258252445 +0000 UTC	deployed	castai-cluster-controller-0.86.0	v0.60.0
Part 1: Install the pod mutator
The pod mutator is the controller that applies mutations to pods at creation time. You can install it via the Cast AI console or Helm.
Option A: Install via console
-
In the Cast AI console, select your cluster from the cluster list.
-
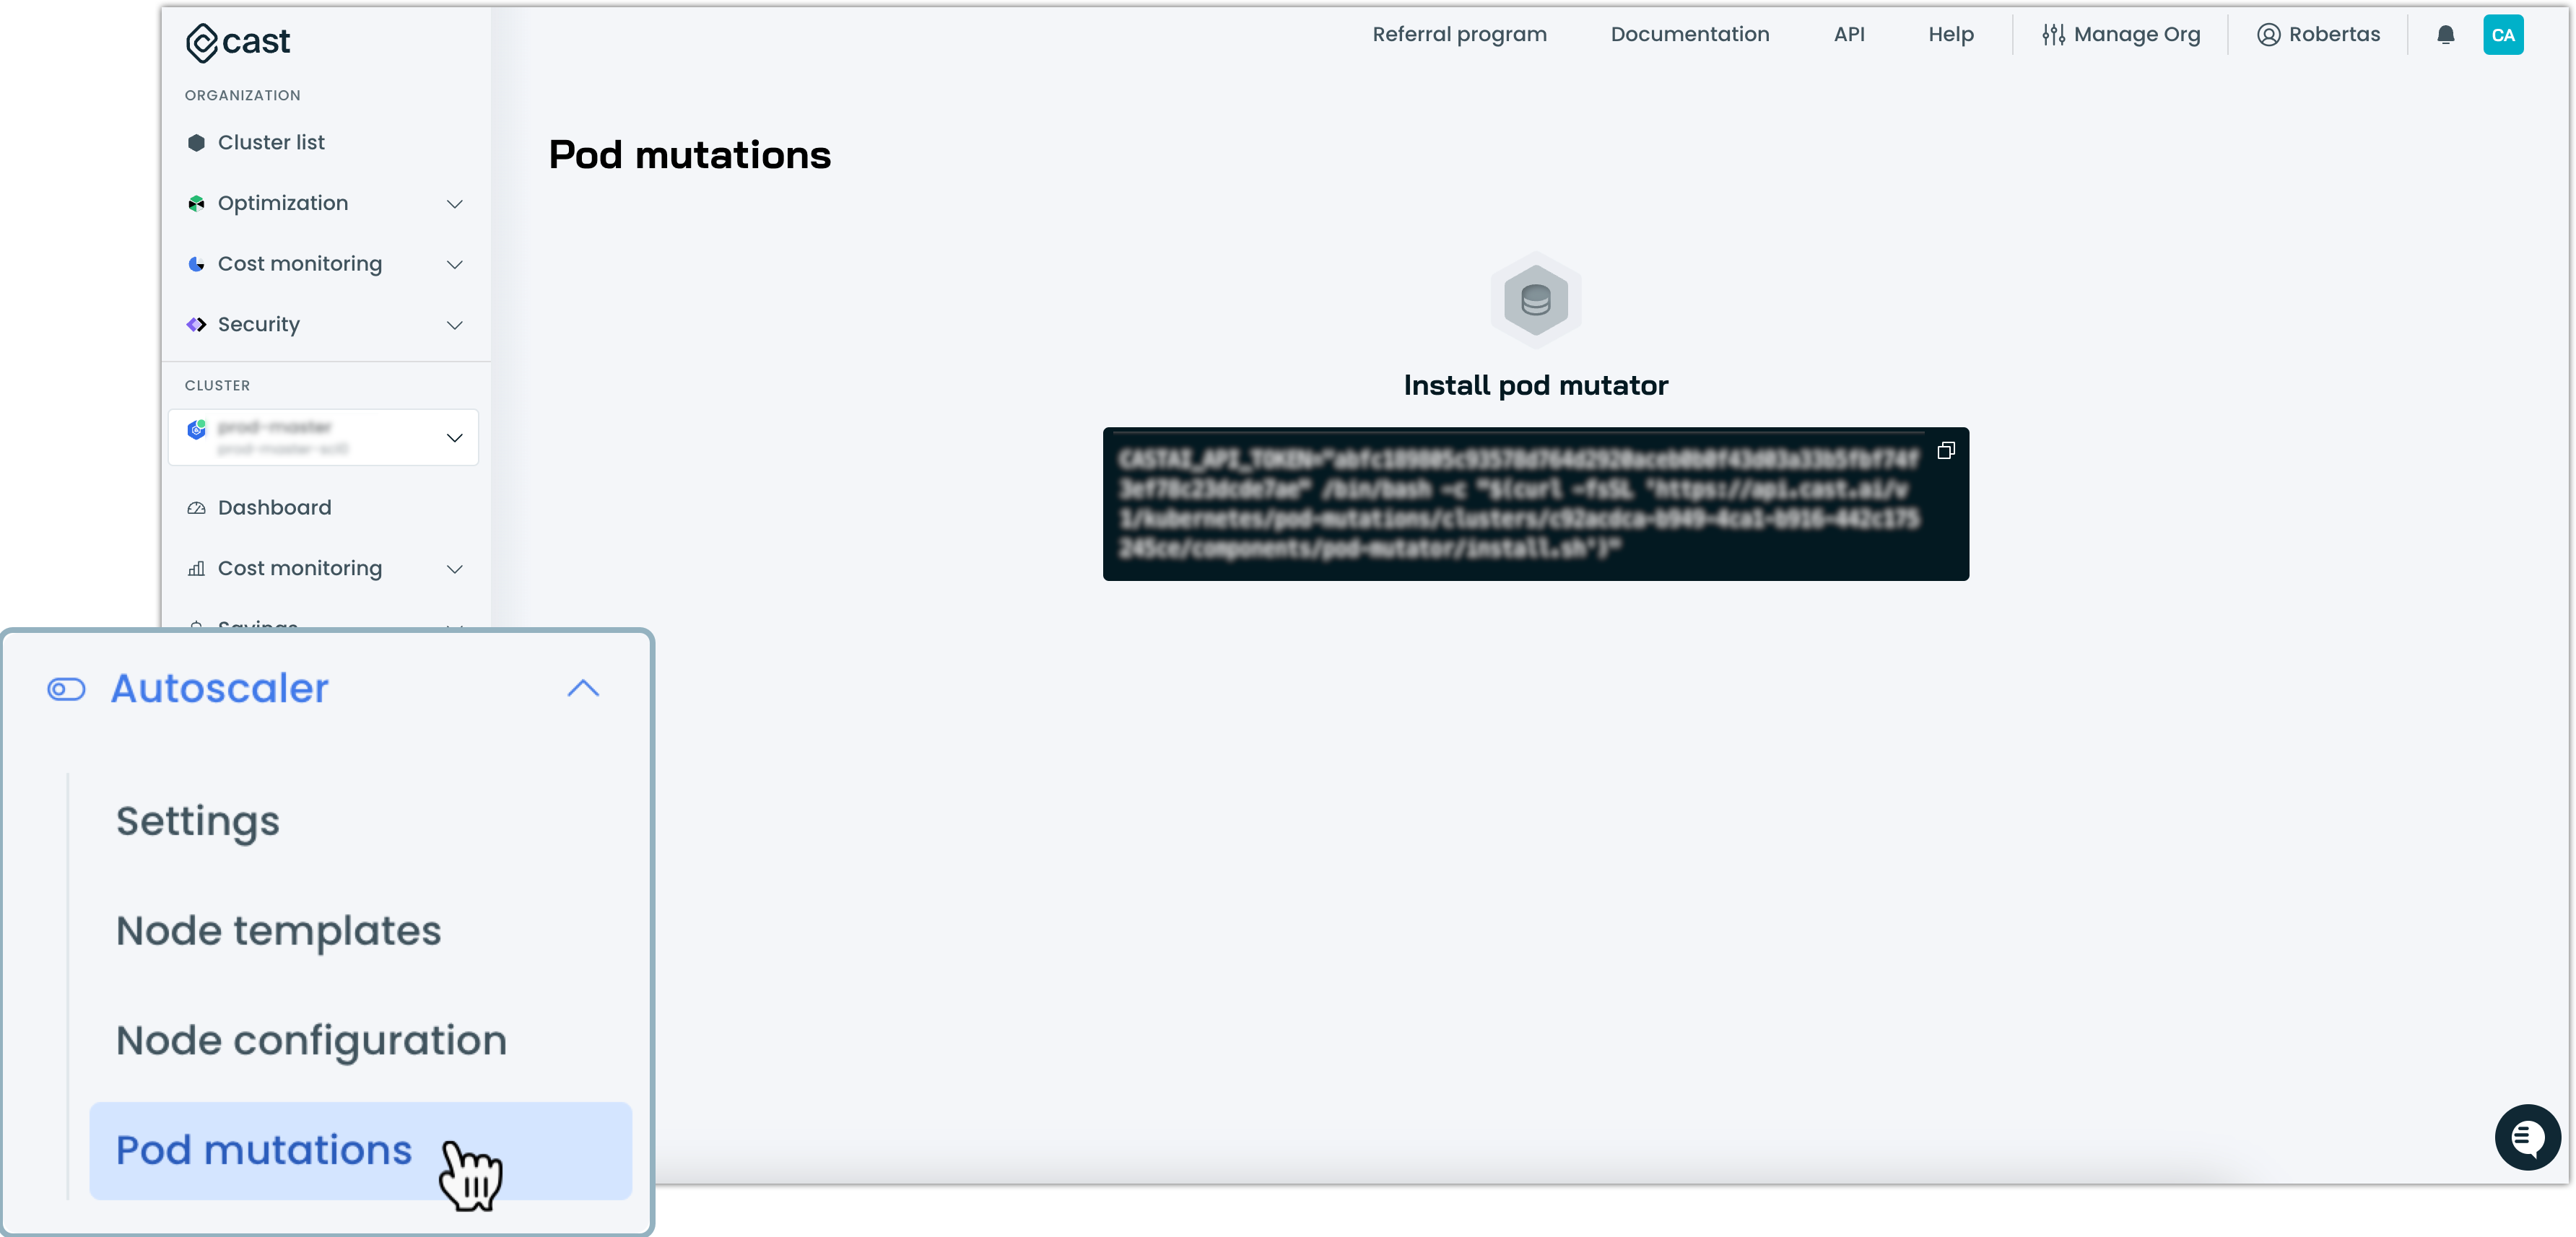
In the Classic console, navigate to Autoscaler → Pod mutations in the sidebar.
I'm using Enhanced console
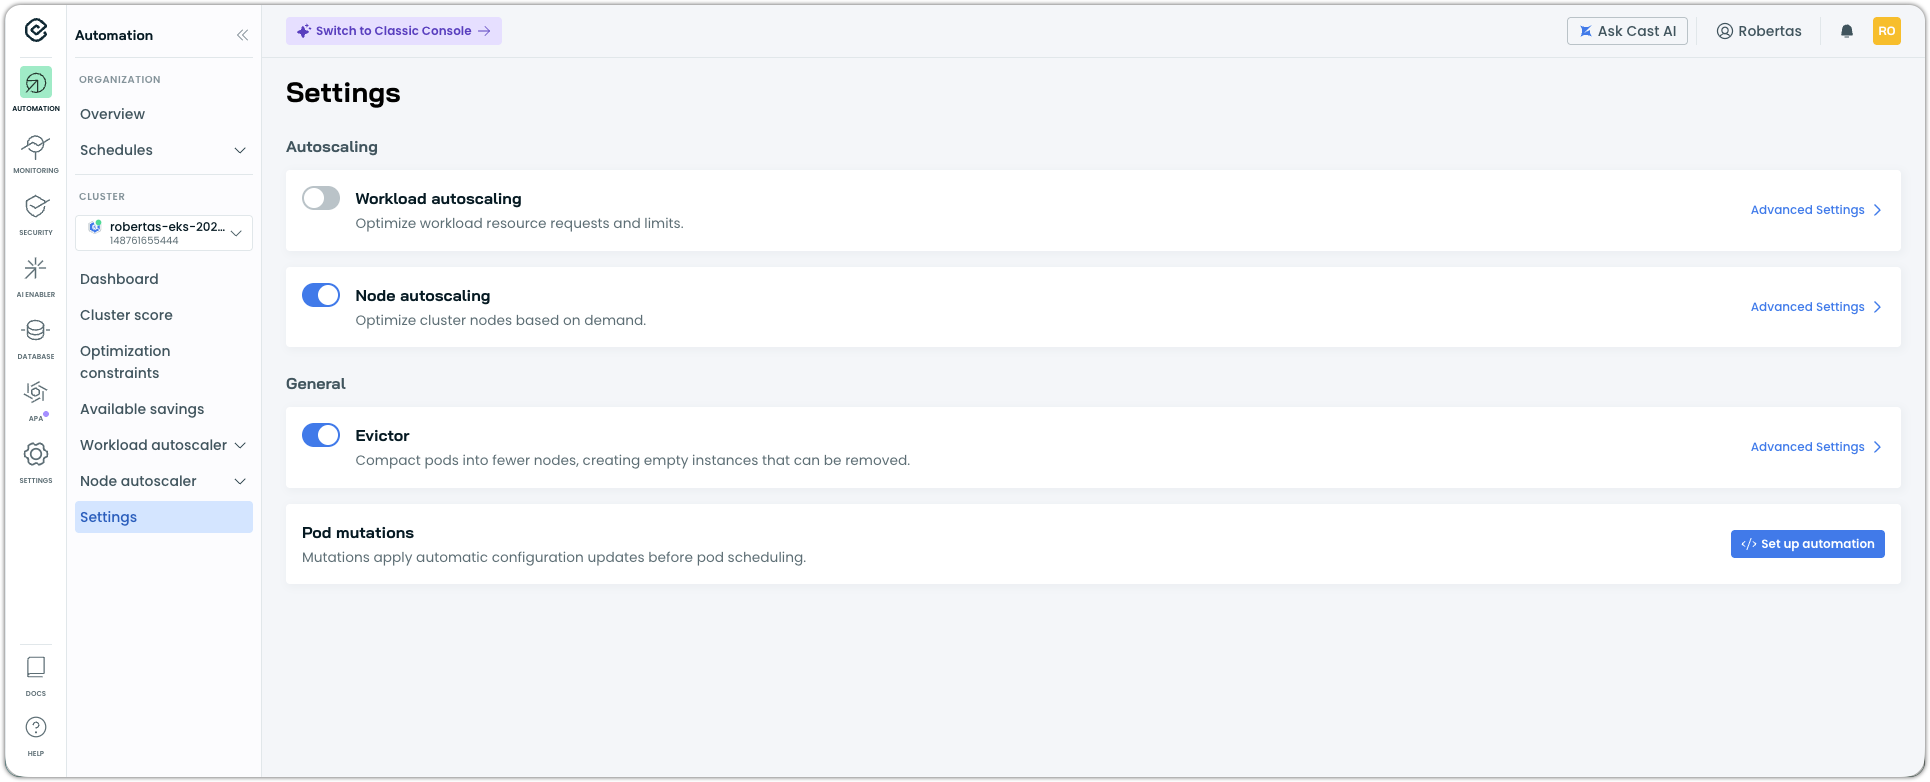
In the Enhanced console, navigate to Settings in the sidebar, then Pod mutations.
If the pod mutator is not installed, you'll see an installation prompt with a script. Copy it.
-
Open your cloud shell or terminal and run the script to install the pod mutator in your cluster.
Option B: Install via Helm
-
Add the Cast AI Helm repository:
helm repo add castai-helm https://castai.github.io/helm-charts helm repo update -
Install the pod mutator:
helm upgrade -i --create-namespace -n castai-agent pod-mutator \
castai-helm/castai-pod-mutator \
	--set castai.apiUrl="$CASTAI_API_URL" \
  --set castai.apiKey="${CASTAI_API_KEY}" \
  --set castai.clusterID="${CLUSTER_ID}"
Replace
${CASTAI_API_KEY}and${CLUSTER_ID}with your actual values. You can find these in the Cast AI console under User → API keys and in your cluster's settings.
Where to find your API key and Cluster ID
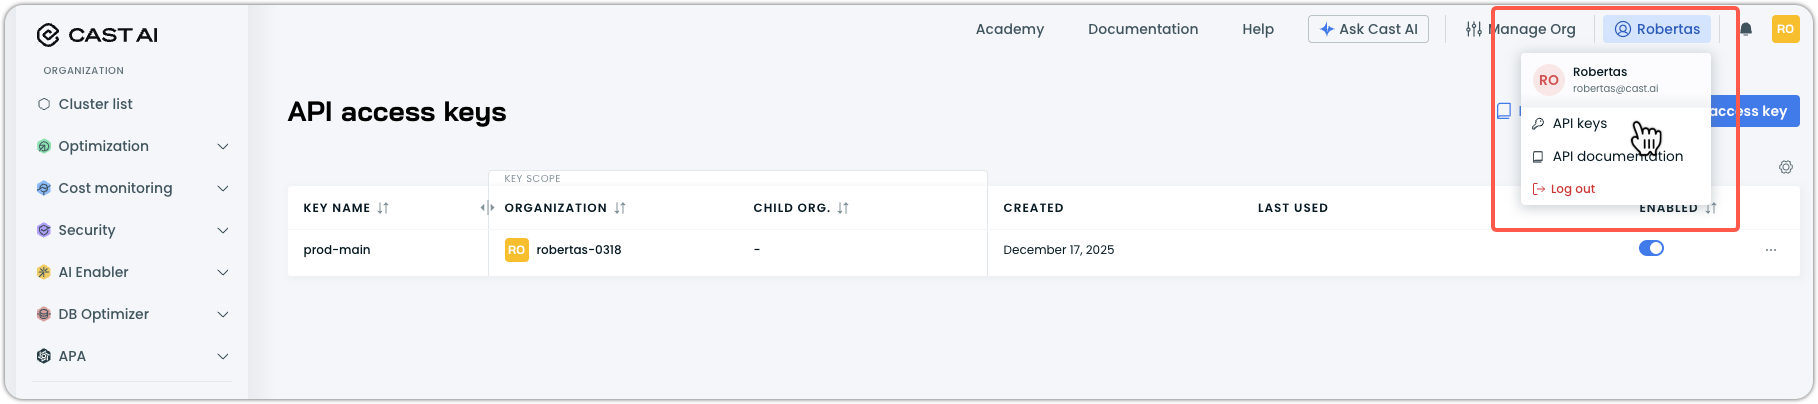
API Key:
- In the Cast AI console, click your profile in the top right corner.
- Select API keys from the dropdown menu.
- Use an existing key, or click Create access key to generate a new one.
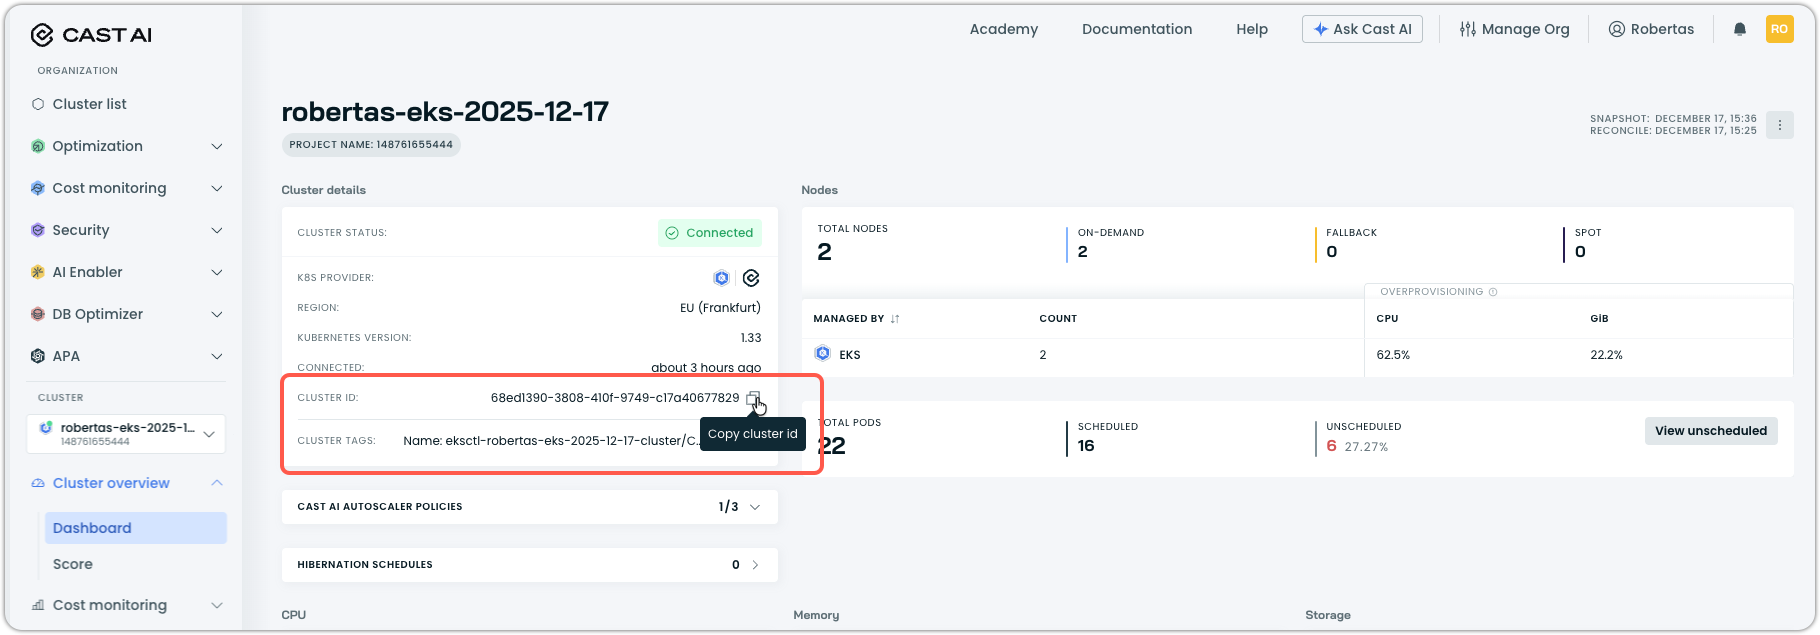
Cluster ID:
- Navigate to your cluster list in the Cast AI console.
- Select the cluster you want to install the pod mutator on. It will take you to Cluster overview > Dashboard in the sidebar navigation.
- Copy the Cluster ID value from the cluster details section.
Verify installation
Confirm the pod mutator is running:
kubectl get pods -n castai-agent -l app.kubernetes.io/name=castai-pod-mutatorExpected output:
NAME                                  READY   STATUS    RESTARTS      AGE
castai-pod-mutator-767d48f477-4tdrw   1/1     Running   0             172m
castai-pod-mutator-767d48f477-d7s45   1/1     Running   1 (97s ago)   172m
Part 2: Create a pod mutation
With the pod mutator installed, you can create your first mutation. This example creates a mutation that adds a label to pods.
-
In the Cast AI console, navigate to Autoscaler → Pod mutations.
I'm using Enhanced console
In the Enhanced console, navigate to Settings in the sidebar, then Pod mutations.
-
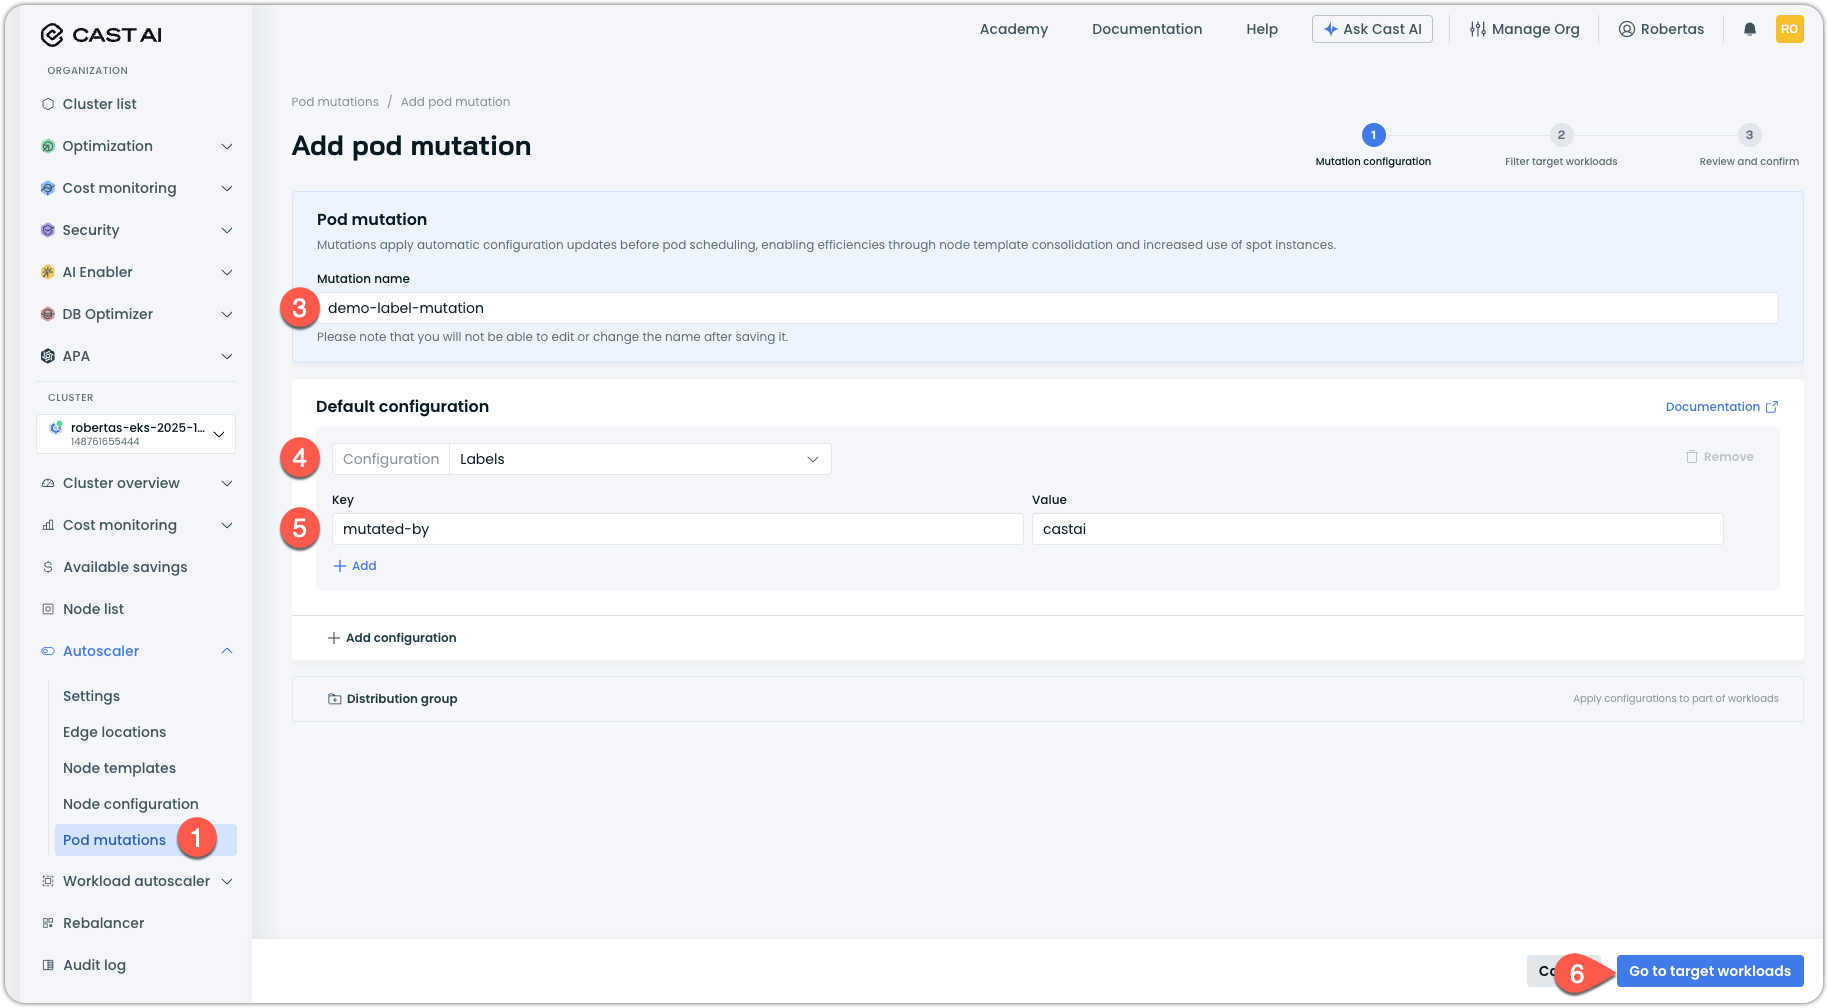
Click Add mutation.
-
Enter a name for your mutation in the Mutation name field:
demo-label-mutationNoteMutation names cannot be changed after creation. Always choose a descriptive name that reflects what the mutation does.
-
Under Default configuration, click the Configuration dropdown and select Labels.
-
In the Labels configuration that appears, add a label:
- Key:
mutated-by - Value:
castai
- Key:
-
Click Go to target workloads to proceed to filter configuration.
Part 3: Configure target filters
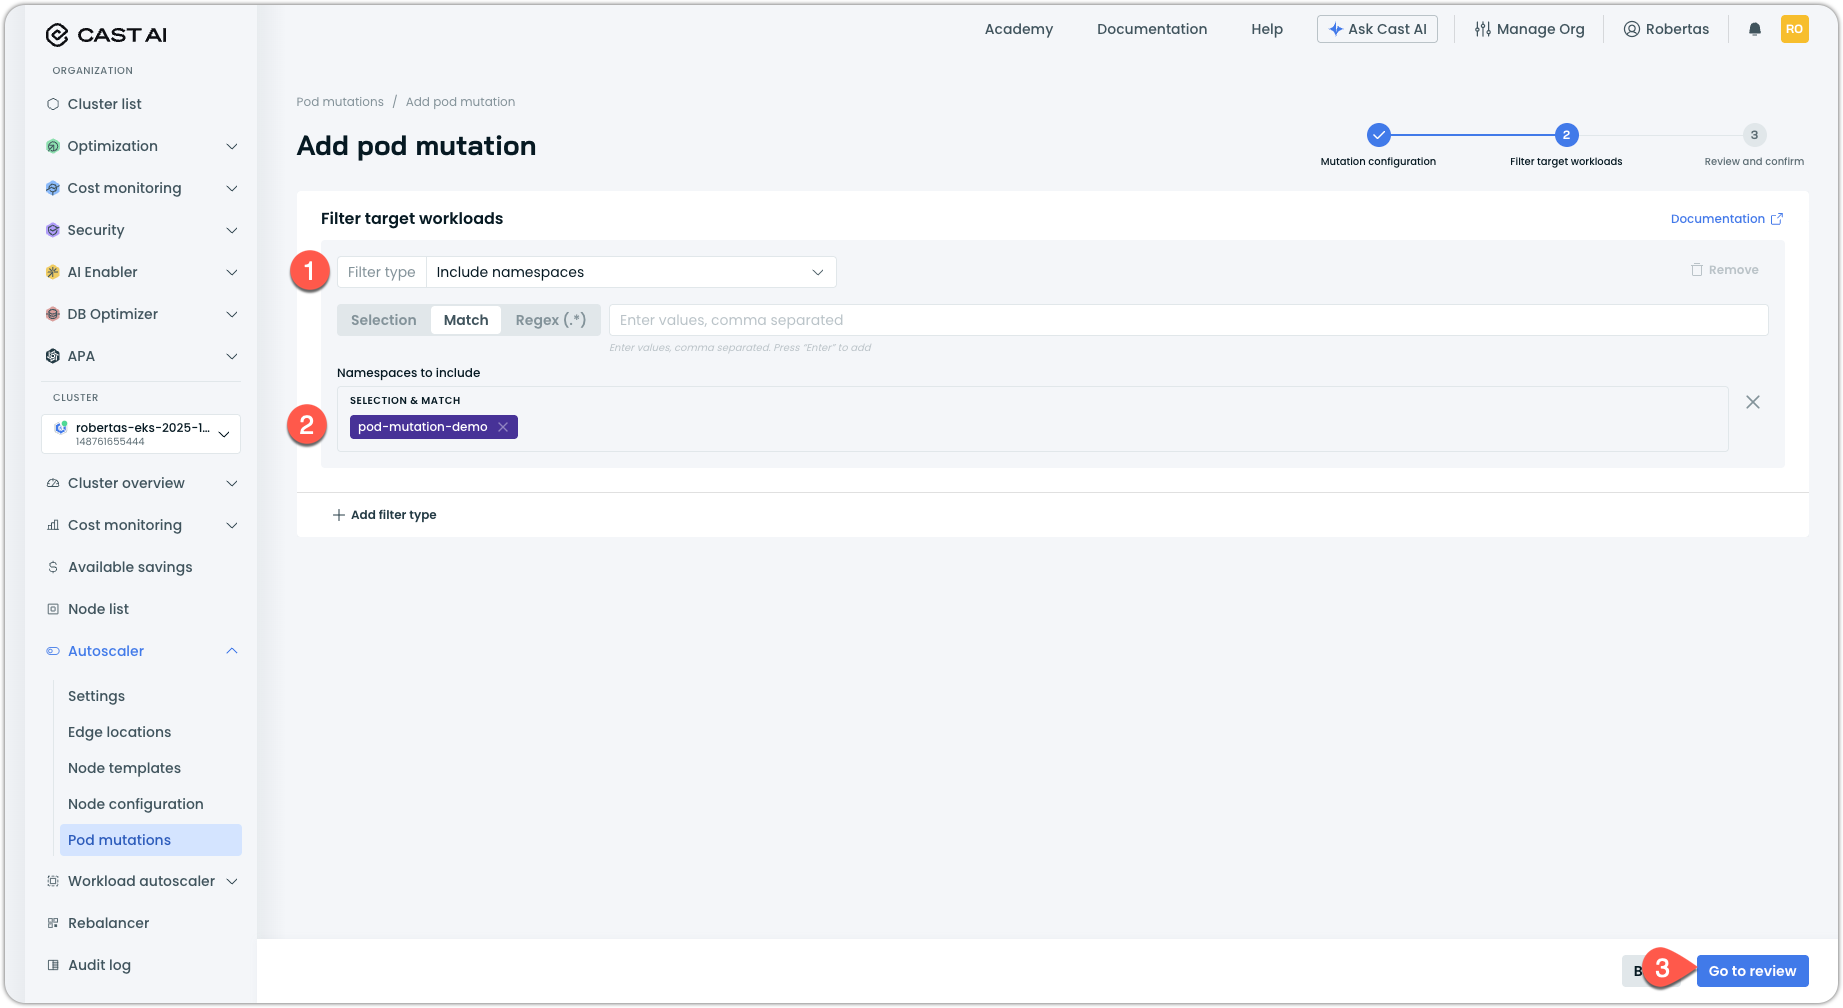
Filters determine which pods receive the mutation. For this quickstart, we'll target pods in a specific namespace.
-
Under Filter target workloads, click the Filter type dropdown and select the Include namespace filter.
-
Select a namespace where you want to test the mutation. If you don't have a test namespace, you can create one:
kubectl create namespace pod-mutation-demoThen select
pod-mutation-demoin the console. -
Click Go to review to review the mutation configuration.
-
(Optional) Review the Configuration summary of your mutation configuration:
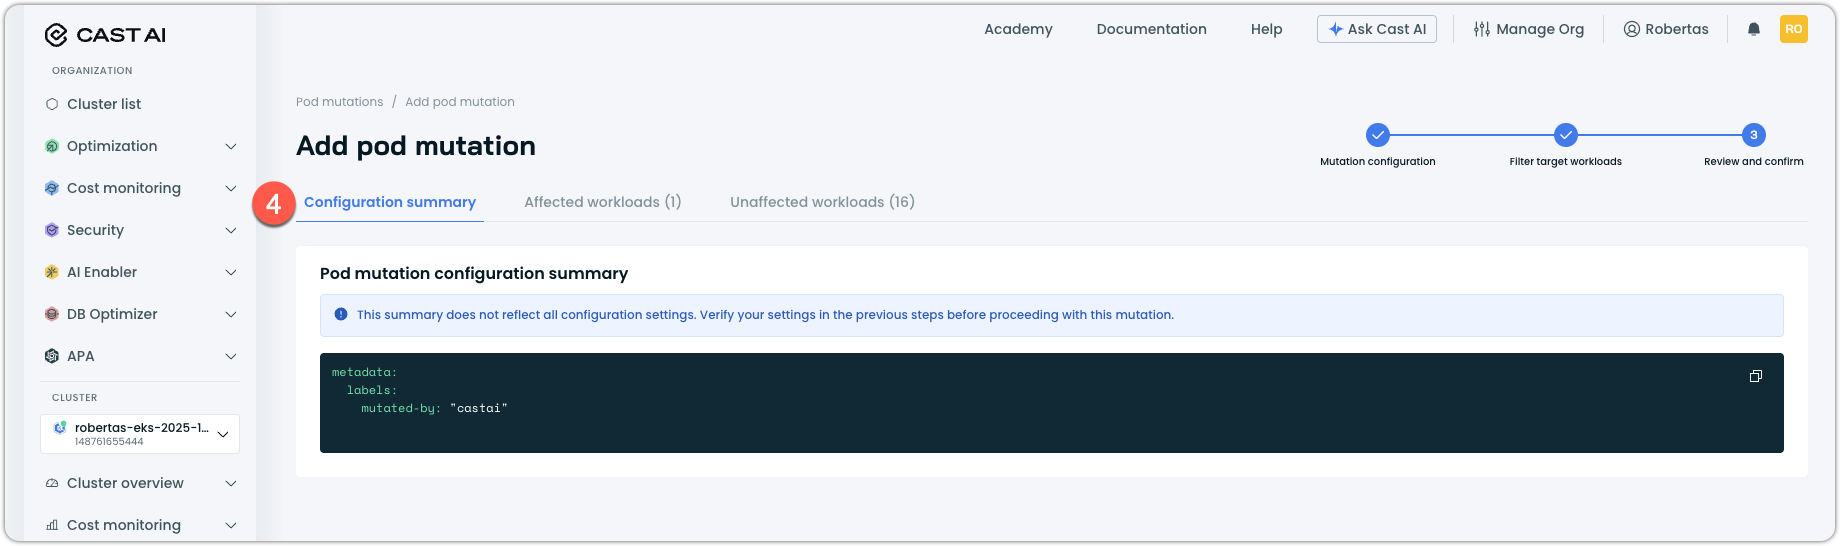
-
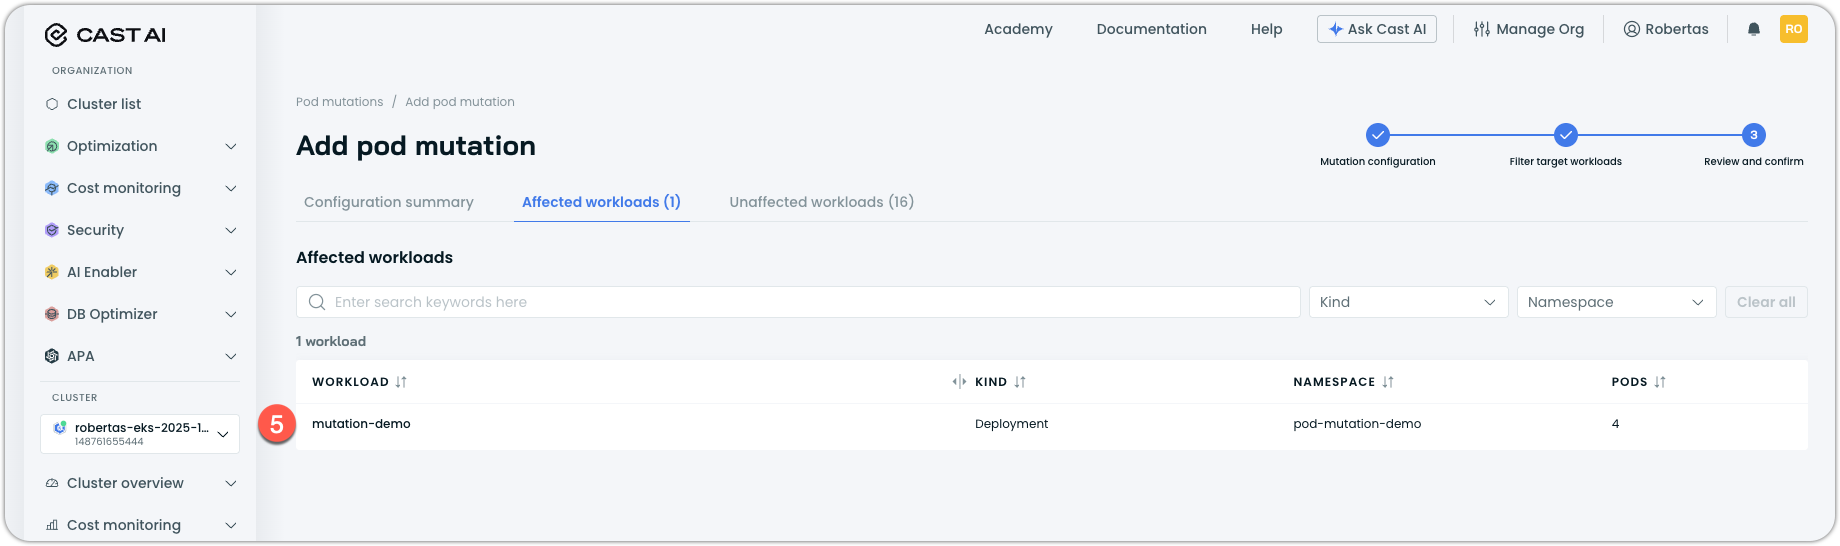
(Optional) Review the Affected/Unaffected workloads. This shows existing workloads match your filter criteria, split into:
- Affected: Workloads that will receive the mutation
- Unaffected: Workloads that will not receive it
For the purpose of this quickstart, we've deployed a simple workload with 4 replicas, called mutation-demo:
- Click Create and confirm enablement to proceed.
The mutation is now active. Any new pods created in the target namespace will automatically receive the mutated-by: castai label.
Part 4: Verify the mutation
Test that the mutation is working by creating a pod in the target namespace.
-
Create a test pod:
kubectl run test-pod --image=nginx -n pod-mutation-demo -
Wait for the pod to be created, then check its labels:
kubectl get pod test-pod -n pod-mutation-demo -o jsonpath='{.metadata.labels}' | jqExpected output (formatted):
{
  "mutated-by": "castai",
  "run": "test-pod"
}
The
mutated-by: castailabel confirms the mutation was applied. -
You can also verify by describing the pod:
kubectl describe pod test-pod -n pod-mutation-demo | grep -A5 "Labels:" -
Clean up the test resources:
kubectl delete namespace pod-mutation-demo -
(Optional) Delete the test mutation in the Cast AI console by navigating to Autoscaler → Pod mutations, clicking on
demo-label-mutation, and selecting Delete mutation: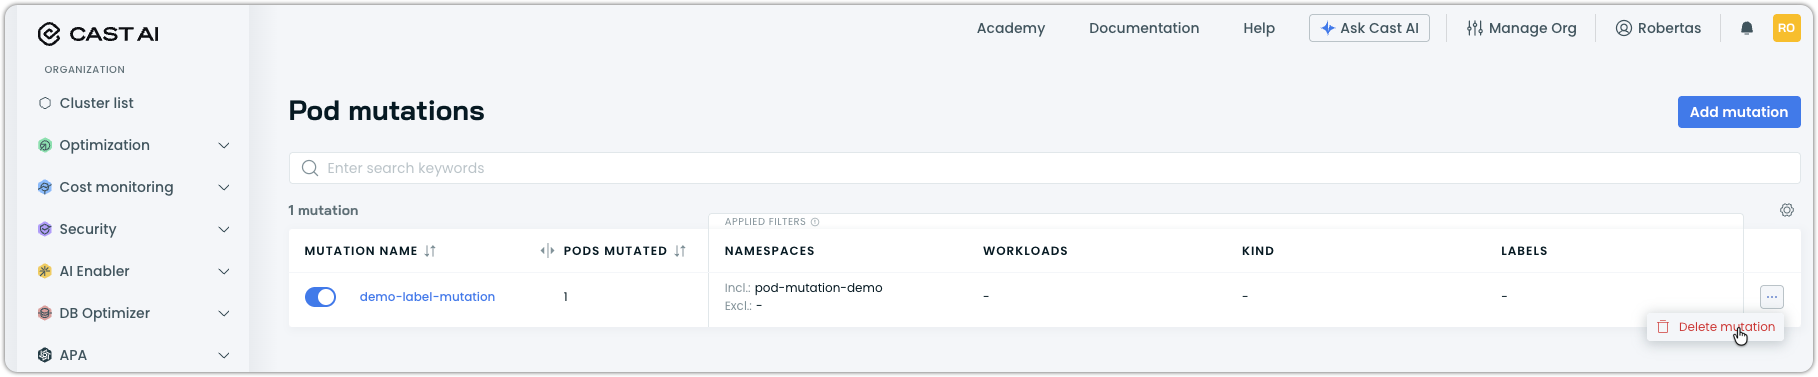
Troubleshooting
If the mutation isn't applied to your test pod, check the following:
Pod mutator not running:
kubectl get pods -n castai-agent -l app.kubernetes.io/name=castai-pod-mutatorIf no pods are listed or the status isn't Running, review the installation steps.
Check pod mutator logs:
kubectl logs -n castai-agent -l app.kubernetes.io/name=castai-pod-mutator --tail=50Look for errors related to your mutation or webhook configuration.
Mutation not synced to cluster:
Mutations created in the console are synced to your cluster as custom resources. Verify the mutation exists:
kubectl get podmutations.pod-mutations.cast.ai Namespace filter mismatch:
Ensure the namespace you're creating pods in matches the filter configured in the mutation.
Next steps
Now that you've created your first mutation, explore more advanced use cases:
- Pod mutations reference — Complete reference for all configuration options and CRD specification