
Vulnerabilities
See all you Kubernetes cluster images and their vulnerabilities in one place
WarningThe Cast AI Kubernetes Security feature set is undergoing significant changes. Some features shown in this documentation are being deprecated and others are moving to the cluster view in the console. Screenshots and navigation paths may not reflect the current product. Updated documentation is in progress.
The Vulnerabilities report allows you to easily identify the container images currently running in your cluster and the vulnerabilities they may expose. It provides a comprehensive view of any vulnerabilities that may have been introduced, regardless of how the image was added to your cluster. This report consolidates information from various sources, including individual image registries, third-party Helm charts, and other deployment methods, ensuring you have a complete picture of your image security and vulnerability posture.
NoteThis feature requires the enablement of the Cast AI Security. Refer to the Getting started section to enable the Vulnerability management feature.
Scanning frequency and behavior
Cast AI automatically scans container images for vulnerabilities with the following behavior:
- Trigger: Scans are initiated when new running images are detected in your cluster
- Detection interval: Cast AI checks for new images every 30 seconds by default
- Concurrent scans: One image is scanned at a time by default to minimize resource impact
- Configuration: These intervals can be adjusted using Kvisor configuration parameters:
--image-scan-interval=30s(detection frequency)--image-concurrent-scans=1(number of simultaneous scans)
For more information on configuring scan behavior, see the Kvisor configuration documentation.
What's inside
Once you have enabled the Cast AI Security feature, you can access the Vulnerabilities report by following these steps:
- Log in to the Cast AI console.
- Select Security > Vulnerabilities from the sidebar.
Upon opening the Vulnerability report, you will see a list of images used by your organization across all connected clusters. The report provides various statistics and insights related to the discovered images.
NoteIf all nodes are managed by the Cast AI Cluster Controller, there is no need for additional action to view a complete list of images running on your clusters. In other cases, you need to enable the Private image scanning functionality.
Filter images
To focus on specific images, you can use the filter located above the list. The filter allows you to narrow down the view based on criteria such as:
- Image location (cluster or namespace)
- Resource labels
- Image status
- Scan status
When applying a filter, the statistics view will update to reflect the selected scope.
Image repositories list
The image repositories list presents a grouped view of the images used by your organization across all clusters. Images are grouped into repositories based on their name, with each repository containing images that share the same name but may have different tags and/or digests.
The list provides details such as vulnerability information, the number of clusters and running resources where the image is found, and the tag of the latest scanned image.
Image details
To view detailed information about a specific image, click on the repository name and select the desired image digest from the drop-down menu. This allows you to navigate between different versions of the image.
Under the selected image digest, you can find all associated tags, details, and status. There is an Image hierarchy section and two tabs below the digest: Vulnerabilities and Affected resources.
Image hierarchy
The Image hierarchy section displays the base image used to create the selected image, along with the layers and commands used to build each layer. This information is valuable for identifying the layer that introduced vulnerabilities and determining the necessary steps to address them.
By default, all layers are selected. You can filter out vulnerabilities or problematic packages specific to a particular layer by selecting that layer.
NoteDepending on your image build process, the Image hierarchy section may not include commands used to build certain layers. To fully leverage this feature, it is recommended to preserve image metadata during the image build process.
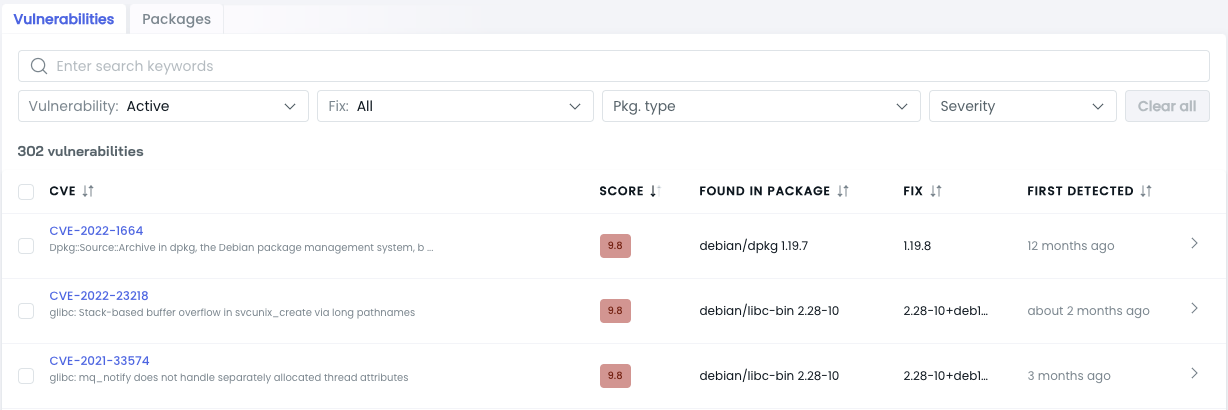
Vulnerabilities
The Vulnerabilities tab lists all detected vulnerabilities in the selected image, along with available fixes. The vulnerabilities are sorted by their CVSS (Common Vulnerability Scoring System) score, highlighting the most critical issues.
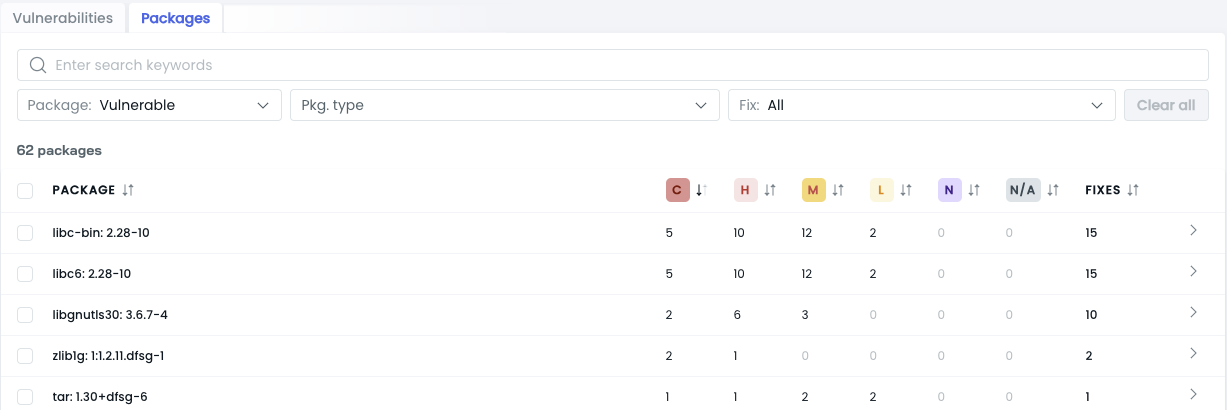
Packages
The Packages tab provides information about the operating system and application-specific packages present in the image. It identifies any vulnerabilities associated with these packages and suggests available fixes.
Affected resources
The Affected Resources tab shows where the selected image is being used within your clusters and indicates when the deployment using the image was first created. This information helps you understand the impact and scope of any vulnerabilities.

Manage exceptions
The vulnerability exceptions feature allows you to remove any vulnerabilities and image repositories from the report that you deem to be false positives.
Add image repository to exceptions
To exclude an image repository from the list view, follow these steps:
- Select the checkbox next to the image repository name. You can select multiple repositories at once.
- Click on the
Except repositorybutton that appears above the table of repositories. - Provide a reason for the exception in the newly opened drawer and click the
Except repositoriesbutton.
Alternatively, you can exclude a repository through the Image Details view:
- Click on the
Except repositorybutton in the upper right corner of the screen. - Enter the reason for the exception in the drawer and click the
Except repositoriesbutton.
Find an exception
When a repository is marked as an exception, it is moved to the Excepted view. The repository will no longer appear in the main image repository list, and the statistics section will be updated accordingly. The Excepted view contains a separate list of excepted repositories.
The main difference between the Active and Excepted image views is that the Excepted image details contain two additional fields: REASON and EXCEPTION SET ON.
Remove an exception
To remove exceptions, navigate to the Excepted repositories list, which can be found in the upper right corner of the screen, and follow these steps:
- Select the checkbox next to the image repository name. You can select multiple repositories at once.
- Click on the
Cancel exceptionbutton that appears right above the table of exceptions. - Provide a reason for canceling the exception in the drawer and click the exception button.
You can also cancel the repository exception from the Image details view.
- Select the
Cancel exceptionbutton in the upper right corner of the screen. - Review the list of selected images in the newly opened drawer and press the
Cancel exceptionbutton.