
Okta: Set up IdP user group sync
This guide walks you through setting up automated group synchronization between Okta and Cast AI. The process involves configuration steps in both Cast AI and Okta.
Before you begin
Ensure that:
- You have an existing SSO connection between Okta and Cast AI configured and working. If you haven't set this up yet, see Setting up SSO with Okta
- You have administrative access to your Okta organization
- You have the Owner role in your Cast AI organization
- You've identified which Okta groups should be synchronized to Cast AI
NoteThis setup requires coordination between Cast AI console configuration and Okta admin interface changes. Plan to complete both parts in the same session.
Part 1: Enable group sync in Cast AI
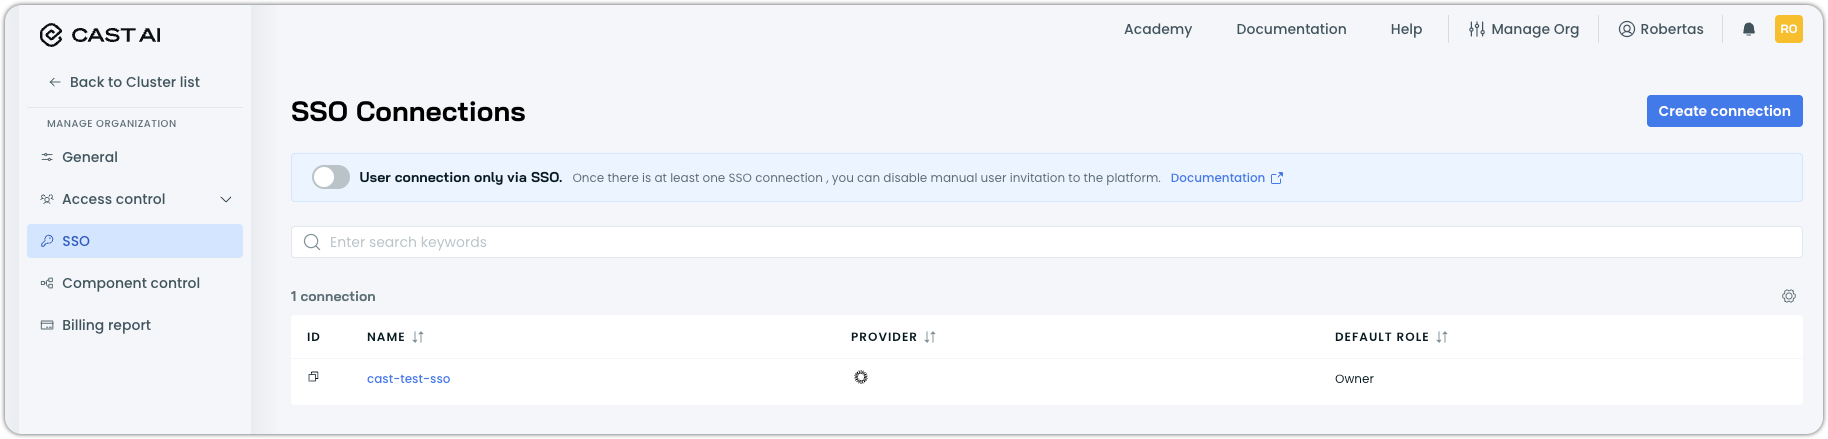
Step 1: Navigate to SSO settings
- In the Cast AI console, go to organization settings
- Navigate to Access control > SSO in the sidebar
- Locate your existing Okta connection
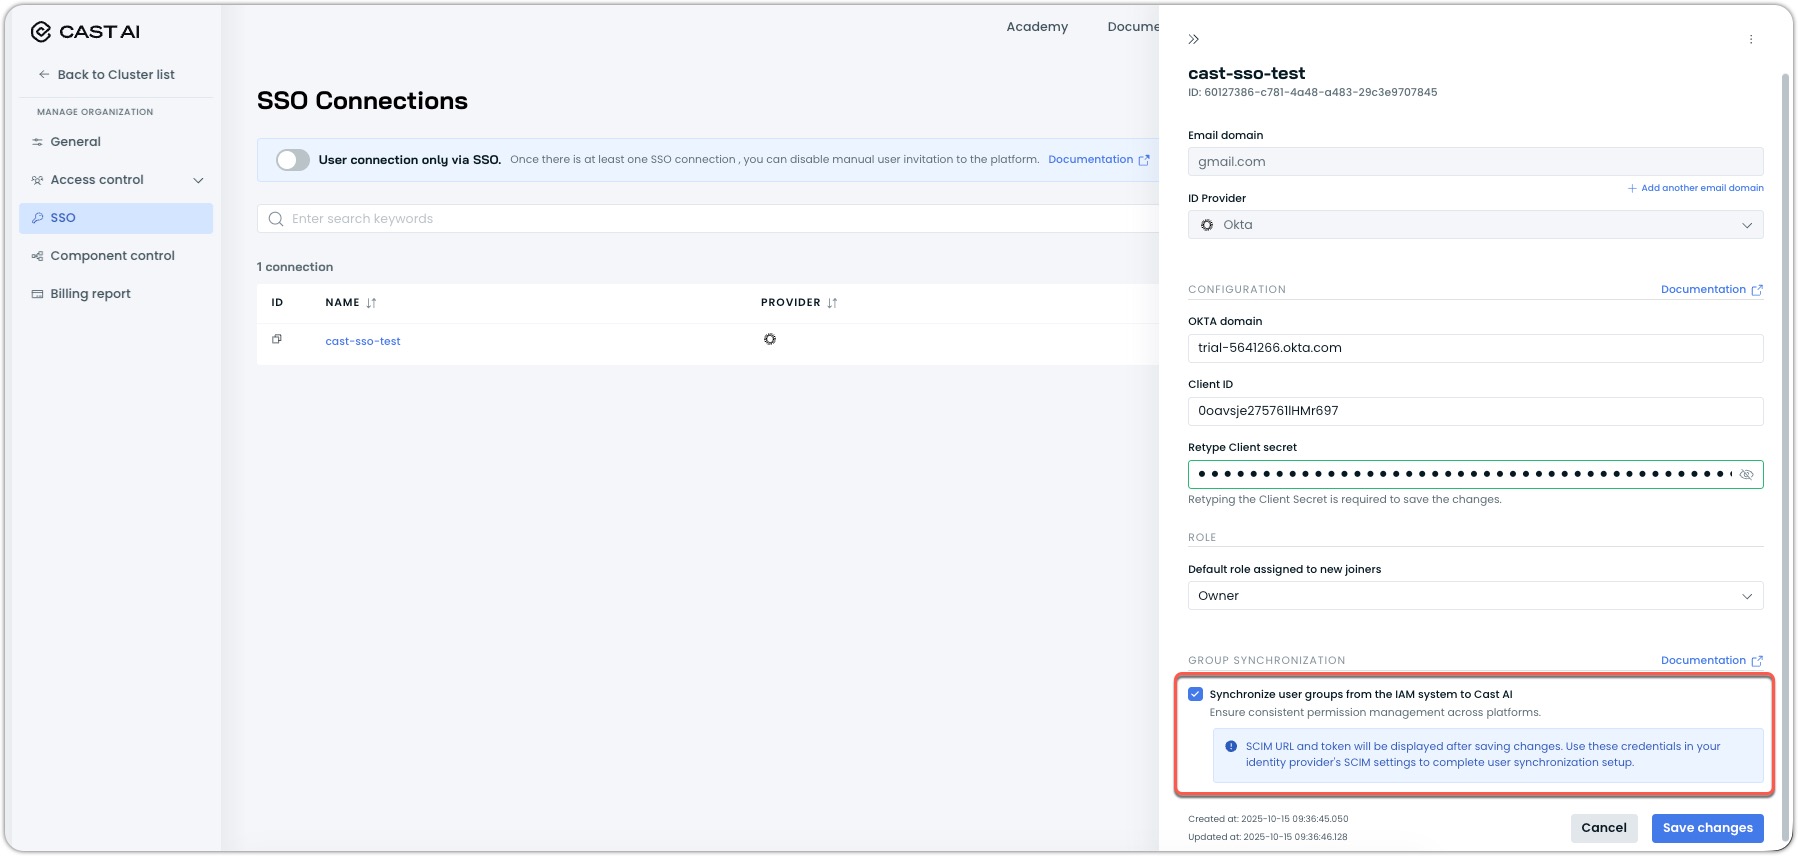
Step 2: Enable synchronization
-
Click on your Okta connection and check the Synchronize user groups from the IAM system to Cast AI box in the drawer that opens to enable sync
-
Cast AI will generate a SCIM endpoint URL and bearer token for your organization once you press the Save changes button
-
Copy and save both the URL and token – you'll need these for Okta configuration

ImportantKeep the SCIM URL and token secure. You'll use these in Okta to establish the connection.
NoteThis step can also be completed when setting up the SSO connection for the first time at Cast.
Part 2: Configure SCIM integration in Okta
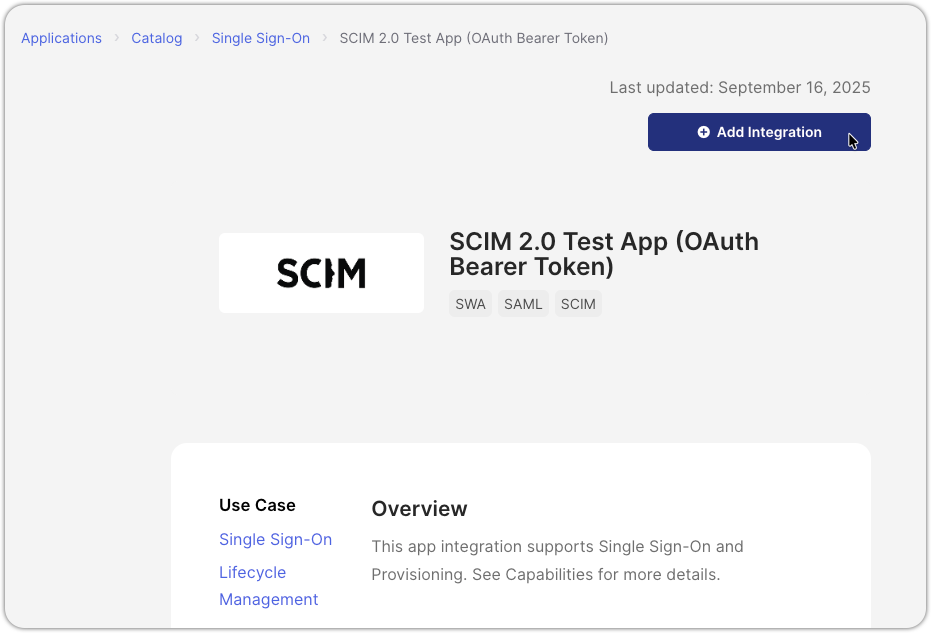
Step 1: Add SCIM 2.0 integration
- In your Okta Admin Console, go to Applications > Browse App Catalog
2. Search for "SCIM 2.0"
3. Select SCIM 2.0 Test App (OAuth Bearer Token) and click Add Integration
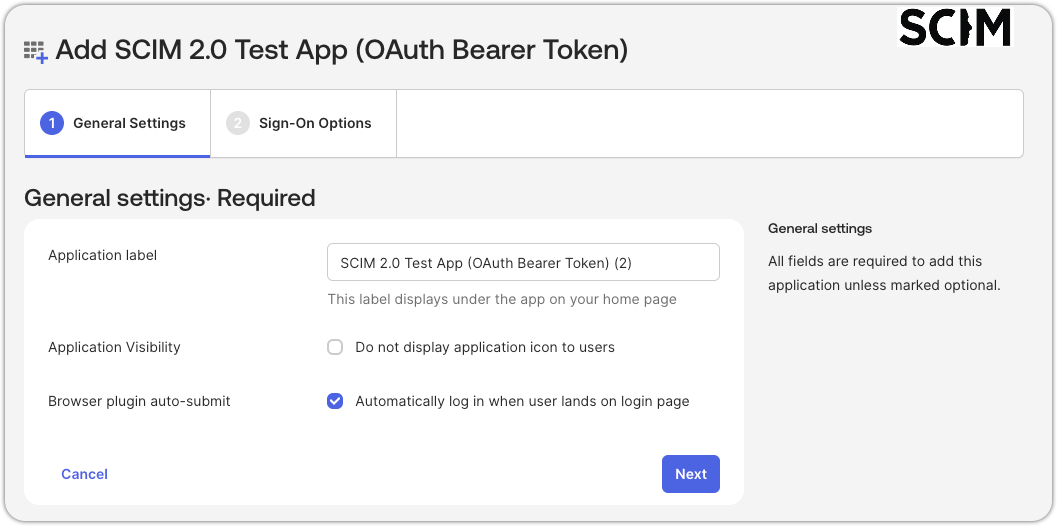
Step 2: Configure SCIM provisioning
-
In the newly added SCIM application, give it a descriptive name (e.g., "Cast AI SCIM Sync" or "Cast AI Group Provisioning") to help other administrators identify its purpose
NoteThe default name "SCIM 2.0 Test App (OAuth Bearer Token)" may not clearly indicate this application's purpose. Using a descriptive name prevents accidental deletion by other administrators.
-
Make any other preferred changes in General Settings and click Next
-
In the Single-Sign On tab, click Done
-
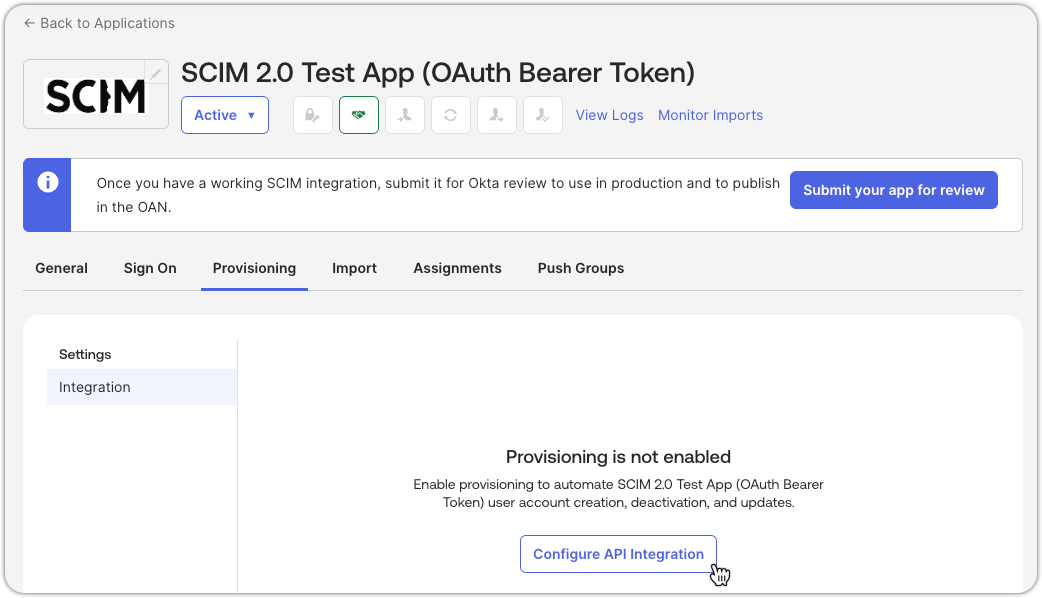
You will be taken to your app's Assignments tab; switch to the Provisioning tab instead
-
Click Configure API Integration
-
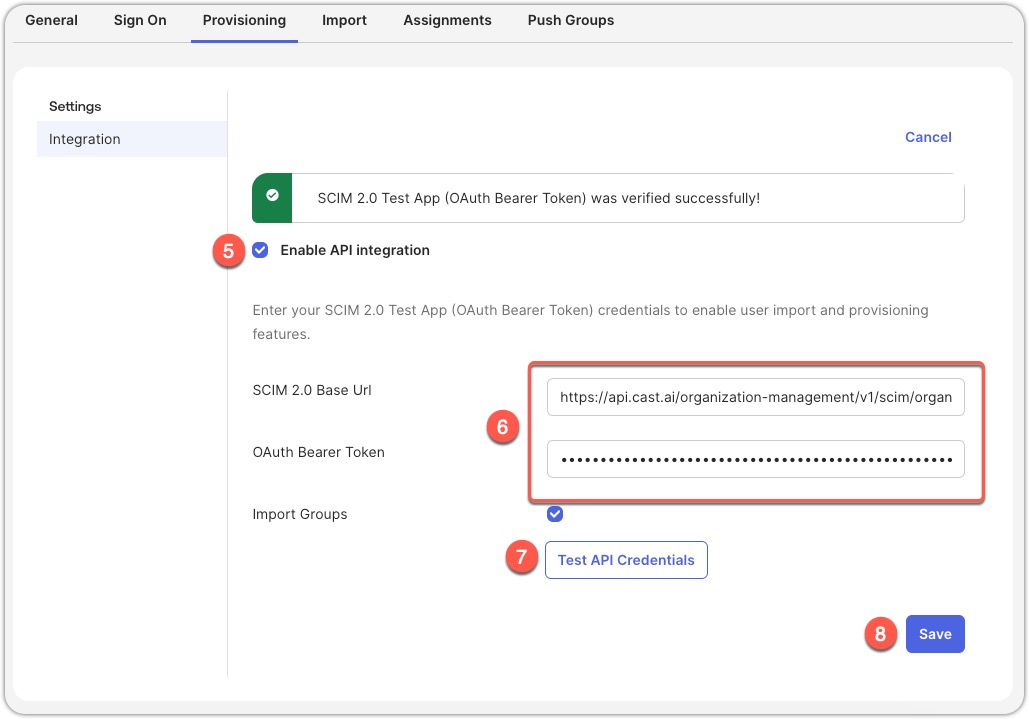
Check Enable API integration
-
Enter the following:
- Base URL: [Paste the SCIM URL from Cast AI]
- API Token: [Paste the bearer token from Cast AI]
-
Click Test API Credentials to verify the connection
-
Click Save
Step 3: Enable provisioning features
- Still in the Provisioning tab, under the Provisioning to App settings, click Edit
- Enable the following features:
- Create Users
- Update User Attributes
- Deactivate Users
- Click Save

Part 3: Configure group and user assignments
Step 1: Assign groups to the application
-
Go to the Assignments tab in your SCIM application
-
Click Assign > Assign to Groups
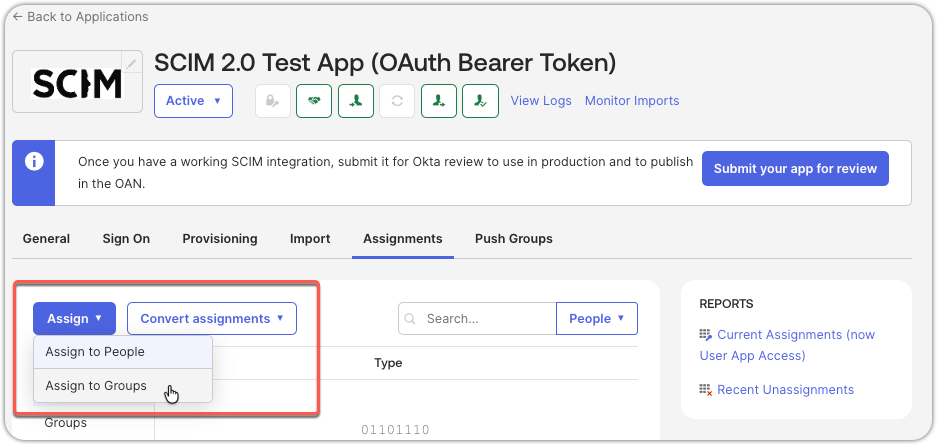
-
Select the Okta groups you want to synchronize with Cast AI
-
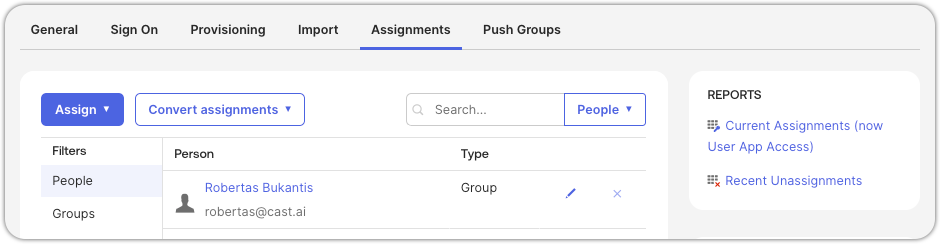
Click Assign for each group, then Done

After this step, if you go back to the Cast console, under Users, you will notice the users that match the ones under People in the assignments on Okta.
Okta:
Cast AI:

Step 2: Configure group pushing
Follow the steps outlined below to configure the mapping of user groups between Okta and Cast AI.
- In the SCIM application, go to the Push Groups tab
- Click Push Groups and select Find groups by name (or by rule, depending on how you have that configured on Okta)
- Search for and select the groups you assigned in Step 6
- For each group, select Create Group (this will create the group in Cast AI)
- Click Save

NoteYou may use the option to Link Group (rather than Create Group) on Okta if you have gone ahead and created user groups on Cast side that match your Okta groups already (by name). Although for a less error-prone experience, we recommend that you allow Okta to create groups on Cast from scratch.
Step 3: Initiate group sync
- After configuring push groups, if you hadn't checked the box to Push group memberships immediately in the step before, initiate the push action now to start the initial synchronization and mapping
- Wait for the sync to complete – this may take several minutes depending on group size
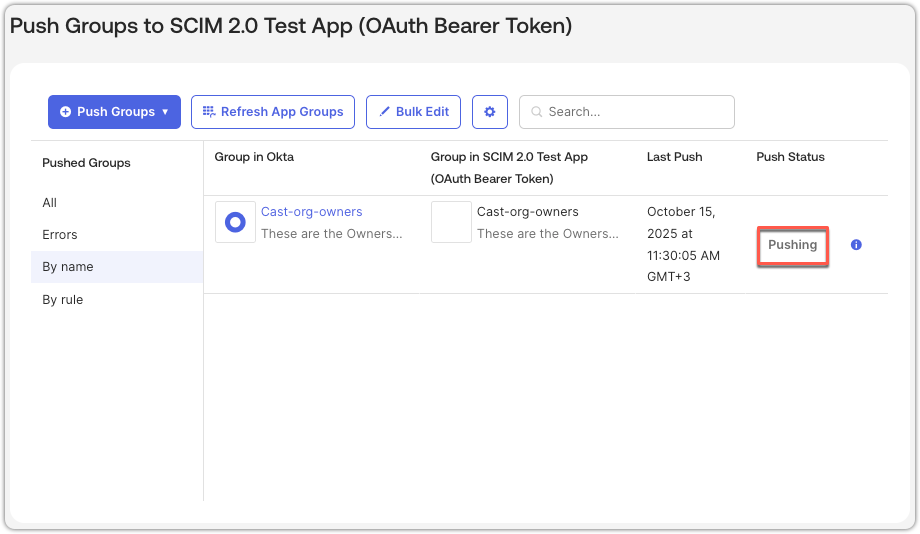
Monitoring sync progress:
- Check the Push Status column to track synchronization progress
- If any errors occur during sync, hover over the blue tooltip icon next to the status to view error details
- After sync completes, any errors will also be visible in the Errors tab under Pushed Groups
Part 4: Confirm groups in Cast AI
-
Return to the Cast AI console and navigate to Access control > User groups
-
You should see the new groups created from Okta
-
Click on the user group and go to the Users tab to see the users that match your Okta configuration:

Ongoing synchronization
From this point forward, any changes you make to the synchronized groups in Okta will automatically be reflected in Cast AI. This includes:
- Adding users: When you add users to synced groups in Okta, they will appear in Cast AI
- Removing users: When you remove users from synced groups or deactivate them in Okta, they will lose their Cast AI access
- Updating user information: Changes to user attributes like display names will sync to Cast AI
Keep in mind that synchronization is not instantaneous and may occur in apparent stages. You may notice that:
- A newly added user appears in the Cast AI Users list first
- The same user may take some additional time to appear in their assigned User groups
- Updates typically complete within several minutes, though timing can vary based on group size and the sope of changes applied and pushed from Okta
For additional help
Updated 2 months ago